Friday, September 30

Card Drive for Kids "Meet Rebekah"

Hello my friends!! Today, I am presenting to you to  Rebekah!! You have seen her here few times before,she is my neighbor and my daughter Becca's BFF.

You can read about her over here and here, from her mom's own words.

Today, I am writing something about her, why? because I asked her mom if I could do it and she says SURE!!

I met Bekah and her family a couple of weeks after we moved into our new house. I am a very reserved person, so making new friends was not in my plans, what I had in my head was to empty all my moving boxes and have everything clean.
One day, we stopped by Beka's house and I met her family (my husband already did when we where building the house), Nicole and I had a good conversation and the girls were playing. Then we talked about Bekah and her Spina Bifida condition, I was very surprised because she could walk, talk and be loud as any other girl :)

I have to confess I love Bekah very much, she is like the sister my daughter doesn't have, they play, argue, cry and have fun together, that is awesome!!! They became friends since they met and still great friends! I love having her for sleepovers, playing time or just when Nicole and I have get together just to talk. I have learned from her and I have witnessed some awesome things. Bekah had an accident once and burned her ankle and she didn't feel anything, when I found out I felt the pain and my Becca too.

They take the school bus together, talk on the phone everyday, just to know what they are having for dinner, LOL. They go to AWANA together, and although they are in different classes they just like to go together, thanks Nicole!!!

I don't want to get emotional, but I am.

I can tell so many things about her, but the most amazing thing she is a sweet girl, with a big heart, loves the Lord and is great child, friend and sister.

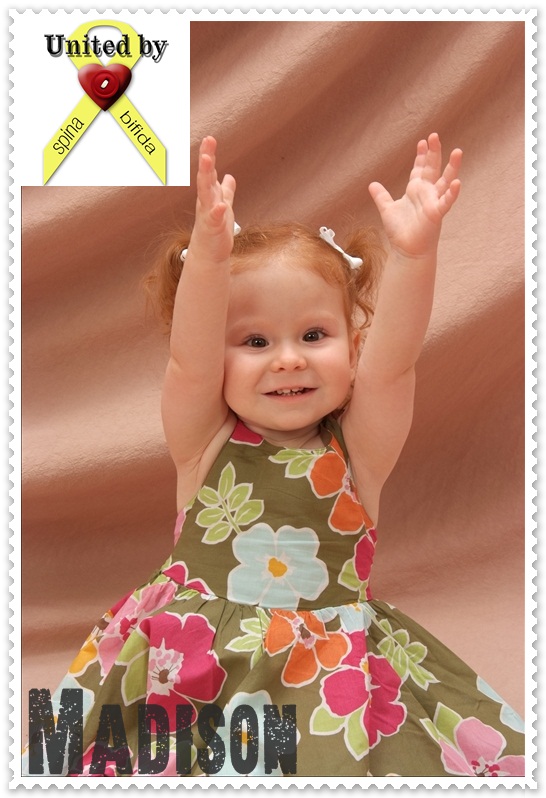
Here is Bekah and my Becca !! They are always smiling :)

Come back tomorrow to find out more about the Card Drive and also the chance to win awesome prizes!!!

Thanks so much!
God bless!!

Thursday, September 29

Gina K. Designs Blog Hop "Preserving Memories"

Hello my friends! join us for a Preserving Memories hop! Members of Gina K.'s Design Team have come together to host a hop where we will share with you scrapbook and 3D projects - we hope this will inspire you to dust off those photographs and get scrappin' and creative!

If you came from Lee's blog you're at the right place. If not make sure to head over to StampTV  where you will find a list of all those participating in today's hop.

I decorated a picture frame. I got this frame at Craft Warehouse for $2.00! It was plain, I planned to paint it, but then I decided it would look better if I cover it with some fabric tape :) This picture is of my daughter from last Winter, she made this beautiful snowman and the image from Theresa's new set worked out perfect for this project :) Here are the details.

Directions:
  • Trace your front and back of your frame on Fabric tape and Patterned Paper. Cover your front with fabric tape and the back with PP.
  • Stamp snowflakes in White Craft Ink (from Very Merry Christmas)and sentiment (from Celebrate the Season) in Black Soot Distress Ink.
  • Adhere lace around front window. Add a couple of rhinestones.
  • Mat White Cs and sticky paper, stamp snowflakes (from Blessed is the season) in Faded Jeans Distress Ink and snowman (from Celebrate the Season) in Memento Tuxedo Black. Die-cut snowflakes with Circle Nestabilities.
  • Color snowman and cut it out.
  • Adhere twine on the back of snowflakes and adhere it to frame. Add White pearls .
  • Adhere snowman to frame.
  • Add liquid pearl to center of every stamp snowflake.
  • Adhere Lace tape all around the frame.
Click picture for a bigger look.

Frame Recipe:
  • Cardstock: White (Gina K. Designs)
  • Stamps: Celebrate The Season, Blessed is the Season, Very Merry Christmas (Gina K. Designs)
  • Ink: Faded Jeans Distress, Black Soot Distress (Ranger Industries), White Craft (JoAnn's)
  • Embellishments: White Pearls (GKD), White Opal Liquid Pearls, Caribbean Twine (The Twinery), White Lace Tape (Love My Tapes), Clear Rhinestones.
  • Accessories: Circle Nestabilities, Pop dots, Bright Pink Leather Fabric Tape (Love My Tapes), Wood frame (Craft Warehouse), Copic markers.

All the items in bold can be found at Gina K. Designs Store.

Head on over to Carolina's blog  to see what she's sharing with you today!

Hope you like my creation!
Have fun hopping :)

Card Drive for Kids " Meet Tanner"

Hello my friends! Today we are meeting Tanner!!

Here it's what his mommy has to say about him:

“Our family consists of Ray-Dad-35 years old, (Myself) Star - 34 yrs old, Tanner - almost 3, and a new baby boy due 11/22/11!  We reside in Phoenix, Arizona.  I'm currently a stay at home mom to Tanner, but plan on going back to school after the new baby makes his debut.

Tanner is our first child, born on December 15th, 2008 in Phoenix, AZ.  He was born with Spina Bifida: Myelomeningocele, Chiari II Malformation, and Bi-lateral club feet.  He has a VP shunt.  He has endured 6 surgeries since birth. At 14 hours old he had his SB opening closed, at 9 days old he had his shunt put in. At nearly 3 months old he had a shunt revision, followed by another revision at almost 4 months old. He has also had 2 surgeries on his feet due to the club feet, and has had casts on many times (18 weeks total so far). We are currently working to see if he is potty trainable, only time will tell. :)
Even though it may seem that he has been through a lot, you would never know it unless told about it!  Tanner is all smiles, a big tease, and the all around jokester of the family!  Always saying the funniest things, and pulling the cutest expressions!  Tanner is by far the happiest almost 3 year old boy ever!  He has his moments like any little boy would have, but they are few and far between. Tanner never ceases to amaze me with his strength and courage. He will try everything at least once, and if he really wants to do it.... He will keep trying until he accomplishes it!  Stubborn to the core (just like his mom), he doesn't let anything stop him. He wears AFO's (ankle foot orthodics) on both feet for support in standing and walking.  He has been 4-point crawling since the age of 1 and is learning to take steps in his reverse walker.  He also recently started cruising along the furniture.  When it comes to Tanner, I always say "When there is a will, there is a way."  And he has a strong will!  Tanner is obsessed with Buzz Light year and  Lightning McQueen !  He also loves Woody & Rex from Toy Story, Mickey Mouse, Elmo, and Thomas the Train.
Tanner is our sunshine and miracle from God.  I wouldn't change the way he is for anything!  Things aren't always easy, but are always worth it in the end!


Thanks so much!!

Wednesday, September 28

Christmas Banner and a card.

Hello my friends! Today I have more project using the new stamps from the Cheer Christmas Collection from Heartfelt Creations. This time I created a banner and I really like it, LOL. I know, this is my first time making a banner and may not be super cool, but I really like it ;)

In other news, Heartfelt Creations has a Design Team Call!! If you would like to be part of the new DT, check this out HERE

Merry Christmas Banner


Directions:
  • Stamp Ornaments (x4) on White Cardstock in Versamark Ink. Add Gold Embossing powder and heat it up.
  • Color Poinsettias with Copic Markers.
  • Stamp Sentiment from HCPC 3419 Holiday Poinsettia Candle Pre-Cut Set on White CS in Vintage Photo Distress Ink. Die-cut, emboss and stencil it with Labels 14 Nestabilities.
  • Die-cut and emboss a piece of Good as Gold CS. Mat this piece with sentiment.
  • Punch a little hole in each ornament, tie twine and sentiment piece in center.
  • Make big bow and glue them on top of each ornament.

HC Stamps and Store Products:
  • HCPC 3417 Poinsettia Ornament 2 Pre-Cut Set.
  • HCPC 3419 Holiday Poinsettia Candle Pre-Cut Set.
  • Grand Calibur.
Other Products:
  • Cardstock: White, Good as Gold (GKD)
  • Ink: Vintage Photo Distress (Ranger), Versamark
  • Embellishments: Red/Gold Organza Ribbon, Maraschino Twine (The Twinery)
  • Accessories: Label Fourteen Nestabilities (Spellbinders), Gold embossing powder, Copic Markers: R27, R29, R35, Pop dots, Tacky Glue.

++++++++++++++++++++++++


Bells card


Directions:
  • Make card base from Ivory Cardstock. 5" square card.
  • Create a panel with Red Hot CS and Patterned Paper. Add stitches. Tie on ribbon. Adhere panel to card base.
  • Stamp bells from HCPC 3424 Poinsettia Bells & Bows Pre-Cut Set on White CS in Memento Tuxedo Black Ink. Color image with Copic Markers: C1, C3. C5, YG95, Y21, Y35, R35.
  • Die-cut, emboss and stencil image with Circle Nestabilities. Mat this piece with a Red Hot Scallop piece.
  • Adhere them to card.
  • Add Stickles to ribbon image and Crystal lacquer to bells. Add a little pearl to poinsettia.

HC Stamps and Products:
  • HCPC 3424 Poinsettia Bells & Bows Pre-Cut Set
  • Circle Nestabilities.
  • Scallop Circle Nestabilities.
  • Grand Calibur.
  • Pop dots.
  • Crystal Lacquer.

Other Products:
  • Cardstock: Ivory, Red Hot, White (GKD)
  • Patterned paper: Jovial (Basic Grey).
  • Ink: Memento Tuxedo Black (Tsukineko), Pink (for sponging)
  • Accessories: Scor-tape, Star Dust Stickles (Ranger), Red Seam Binding Ribbon, Pearl, Sewing machine.

Hope you like them!
For more inspiration, please visit the Heartfelt Creations Blog.


Have a great day!!

Card Drive for Kids "Meet Madison"

Today, we are meeting Madison, a beautiful little girl with the most awesome red hair.

This is what her mommy has to say about her:

Madison is a precious little girl, 2 years old. Her birthday is Feb. 24, 2009. She has spina bifida and uses a wheelchair and even at the age of 2 she can get around really well. She also crawls and climbs and plays and is very active and happy.
Madison is adopted. She is our 10th and last child. We were not really looking to adopt but it seems God sent her right to us. I believe it was all part of His plan. She brings us so much joy. She is such a sweet happy baby. She loves Mickey and Minnie Mouse and Barney. She loves to go to church. She loves her brothers and sisters. She has beautiful curly red hair and the sweetest smile .
 God Bless You, Fran

Tuesday, September 27

Card Drive for Kids "Meet Logan"

Hello my friends! Hope you are having a great day. This week I will start showing you some kids that are adorable, funny, inteligent and they have something in common "Spina Bifida".

October is Spina Bifida Awareness Month and this year I am expanding the Card Drive for Kids to 4 awesome kids. Every day I will introduce you to one kid, know a little bit more about him/her and family.

Today we meet Logan:

About Logan and our family- There's Adam- Dad -30 years old, Mom (Me) Tiffany -25 years old, Big Brother- Alex who is 5 years old and then we have Logan who is 2 years old, turning 3 years old on October 17th! Big brother is in Preschool and Logan is at home with mommy! I am Stay-at-Home Mom and love every minute of it! We live in Oklahoma. Logan was born October 17th, 2008 in Oklahoma City. He was born with Spina Bifida: Myelomeningocele, Congenital Hyrdrocephalus, Chiari II Malformation and Hydronephrosis of the left kidney. He has a VP shunt, Asthma and G.E.R.D. He's had 7 surgeries since birth and is enrolled for Physical Therapy twice a week. But, despite all of that, Logan is one of the happiest little boys you will ever meet and he is doing wonderfully!!! Always smiling and full of laughter. He's our ray of sunshine and true miracle from God! He Loves Ni Hao Kai-lan, Mickey Mouse Clubhouse and has recently developed a love for The Little Einsteins! Logan loves music, his favorite song is "Twinkle, twinkle little star" or anything that momma sings to him! The floor is his territory and he loves to roll where ever he pleases! Logan commando crawls, EVERYWHERE and he has finally reached that age of mischief! Logan loves to be involved in everything that his big brother does and often causes trouble with his big brother because he is so intrigued! ;-);-) He enjoys sitting up and he loves to get his hands on anything easily grasped, reading books and playing patty cake! Logan is a momma's boy all the way and he has become a master at giving hugs & kisses and cuddling! But most of all, Logan knows that he is loved by his family!! (He tends to eat that up a bit!) We thank God for him every singe day...

You can know more about him and his family visiting his mommy's blog HERE


Logan and his big brother :)


Logan and some of the cards he received last year :)
Thanks so much!
God bless.

Saturday, September 24

Wee Memories Challenge # 69 "Patterned Paper"

Hello my friends and welcome to Wee Memories Challenge # 69, which is all about "Patterned Paper", so take your patterned paper and create something beautiful for this challenge :)

Our challenge this week is sponsored by "Echo Park Paper"
Here is the card I created for this week's challenge.
Directions:
  • Make card from Ivory CS.
  • Create a panel with Chocolate Brown and Ivory CS. Emboss Ivory CS, ink all edges, mat and add stitches. Adhere it to card.
  • Die-cut Patterned Papers, ink all edges and mat with Chocolate Brown CS. Add stitches and adhere panels to card.
  • Die-cut a Rectangle and Oval piece. Stamp sentiment on Oval piece. Mat together and adhere them to card.
  • Stamp and color pumpkins, cut them out and adhere it to card with Pop Dots.
  • Create a double bow, add green brad and adhere it to card.
  • Add gold nailheads to corners.
  • Add Crystal Lacquer to pumpkins.

Card recipe:
  • Cardstock: Ivory, Chocolate Brown, White (GKD)
  • Patterned Paper: Yellow "Blissful Collection" (Authentique), Orange "Forever Fall collection" (Bo Bunny)
  • Stamps: Falling for You StampTV Kit (Gina K. Designs)
  • Ink: Memento Tuxedo Black, Vintage Photo Distress.
  • Embellishments: Gold Nailheads (GKD), Green Brad (American Crafts), Green Seam Binding Ribbon (etsy).
  • Accessories: Distressed Stripes embossing folder, Square, Rectangle and Oval Nestabilities (Spellbinders), Glue dots, Pop dots, Crystal Lacquer, Tape (Love my Tapes). 

I used the sketch from "Mojo Monday", the colors are from The Play Date Cafe "Orange, Yellow & Green", the theme comes from RRR "Autumn" and the Simon Says "Use of Dies"

The deadline for this challenge is 11.59pm PST on Friday, September 30,  2011. For more details, some fabulous design team inspiration and to link up your projects, click here

Hope you like it!
Have a great day!!

Wednesday, September 21

More Christmas Cheer Collection Projects!!

Hello my friends! It's Wednesday and I have more projects showcasing the new Christmas Cheer Collection from Heartfelt Creations.

Here are the projects I have for you today.

Merry Christmas Card:

Heartfelt Creations Products:
  • HCPC 3415 Petite Poinsettia PreCut Set
  • HCPC 3419 Holiday Poinsettia Candle PreCut Set
  • Zip Dry Paper Glue
Other Products:
  • Cardstock: White, Red (GKD)
  • Patterned Paper: Jovial (Basic Grey)
  • Ink: Memento Tuxedo Black (Tsukineko), Vintage Photo Distress (Ranger)  
  • Accessories: White Seam Binding Ribbon, Pearl, Mod Podge, Sewing machine, Scor-tape, Copic Markers: R29, R35, R46

Directions:
  • Stamp poinsettias on White Cardstock in Memento Tuxedo Black. Color them with Copic Markers. Cut them out and apply some Mod Podge and set to dry.
  • After poinsettias are dried, mount them to create a 3D flower, glue them and them add a pearl. Set aside.
  • Make card base from White Cardstock. A2 size.
  • Create a panel with White and Red Cardtsock. Add a strip of Patterned Paper and add stitches.
  • Stamp sentiment in Vintage Photo Distress Ink.
  • Create a bow a adhere it to card.
  • Add Poinsettia to card and adhere complete panel to card base.

+++++++++++++++++++++++++++


Christmas Bell Tags

Heartfelt Creations Store Products used:
  • HCPC 3423 Scenic Christmas Bells Pre Cut Set.
  • HCD 715 Christmas Cheer Die
  • Grand Calibur
  • Zip Dry Paper Glue
Other Products:
  • Cardstock: Kraft, White (GKD).
  • Ink: Memento Tuxedo Black (Tsukineko).
  • Embellishments: Maraschino, Green Twine (The Twinery), Star Dust Stickles (Ranger), Ruby Liquid Pearls (Ranger), Copic Markers: YR00, R46, YG63, YG65, 0
  • Accessories:  White Uni-ball Signo broad Pen,  Paper hole punch

Directions:
  • Die-cut big bell (x6) using Kraft CS. Using White Pen add lines. Add twine to each tag.
  • Stamp image on White CS in Tuxedo Black Ink. Color images with Copic Markers. Glue small bell on Big one.
  • Add Glitter to leaves and Liquid Pearl to dots.
  • Make a bow with green twine and glue it to tag.
Hope you like them!
Have a great day!

Tuesday, September 20

Pretty Princess!

Hello my friends! I have a card for you today and this one is just for fun!! Few weeks ago I won a blog candy over at Beate's blog, "lucky me", after I got my prize I stamped some images so didn't have the time to finish my coloring. Well, last week was a little bit stressful for me and decided to spend some time coloring, I checked on some of my favorite blog challenges and I found these :


Here is my card:

Directions:
  • Make card base from White cardstock. 5" square.
  • Create a panel with Lemon Drop CS and Strips of Patterned Paper. Ink all edges and add stitches. Adhere it to card.
  • Stamp image on White CS in Memento Tuxedo Black. Color image with Markers.
  • Die-cut, emboss and stencil image with Circle Nestabilities. Mat this piece with a scallop circle piece. Adhere it to card.
  • Tie on ribbon. Make a cow with bow-easy, add a brad and adhere it to card.
  • Add Stickles to wings, diamond and crown.
  • Add pearls.

Card recipe:
  • Cardstock: White, Lemon Drop, Vibrant Violet (Gina K. Designs)
  • Patterned paper: Blissful (Authentique)
  • Stamps: Marci (La La Land Crafts)
  • Ink: Memento Tuxedo Black (Tsukineko)
  • Embellishments: Pearl, Star Dust Stickles (Ranger), Yellow Brad (American Crafts), Lilac Seam Binding Ribbon (Hug Snug)
  • Accessories: Circle Nestabilites, Scallop Circle Nestabilities (Spellbinders), Scor-tape, Pop dots, Sewing machine, Sponges.

Hope you like it!
Have a great day!!

Operation Julie's Smile .

Hello my friends! If you are on Facebook you may know about Julie Ranae's dental situation, but if you are not, let me share what she is going through now.

Taken from Julie's blog

Many of you may have heard that I recently
had to have emergency oral surgery which resulted
in the removal of my front teeth.
As a child, I struggled with brittle teeth due to
some health concerns and my parents did all
they could to ensure that I went into adult-hood
with the best teeth possible.  Unfortunately with age,
the brittle teeth became a problem again and well,
long story short, the dentist recommended that
I bite the bullet and have them all replaced.


I made the appointment, had the consultation
and was handed a piece of paper that said to
bring $4,000 with me to have the rest of the teeth 
taken out.  I was in shock because the dentist made
reference to the idea that 'it could all be worked out' ; )

Well, here I am today, missing front teeth (and a few others)
and being frustrated because I believed that this was
a procedure that would be taken care of quickly.
The unfortunate thing, is that THAT amount was JUST for the
removal of the rest of my teeth...it does not account
for the 'permanent teeth' that would need to be put in place.

When my teammate Nicole Rixon of
heard what had happened, she contacted not only
our design team, but a variety of other friends
and teammates of mine and the following was born...


There will be a benefit blog hop called 
'Operation Julie's Smile' 
that will take place Oct 7-9.  
There are a variety of
companies and design teams who will be participating 
in this hop to help raise funds for this benefit. 
So far, nearly $1000 in prizes have been made available and will be awarded for both participants 
and those who donate. 


Every little bit helps and each donation that
comes in makes it possible for me to regain
a true smile...whatever your part in our
event, I thank you from the
bottom of my heart.....

If you would like to donate, please click on the Donate button, every little bit helps.
Thanks so much!
God bless.

Monday, September 19

Fun Canvas Picture "My monkey doodle"

Check out these awesome canvas pictures!

Few weeks ago I got an e-mail from Easy Canvas Print to do a product review on their custom canvas prints. It was so cool to know that I could choose my favorite picture and they were use it to make it into canvas to do the review. I chose a picture of my Becca, it was taken last year at our church Baptism Day. She was climbing trees like a monkey and I got this picture that day.

The process to get  your picture into canvas is really easy!! You just have to upload your picture and choose the size you want. I decided to choose a 8" x 10". Once I uploaded the photo and chose the thickness, it was done.  Seriously, it was super duper easy.

I received the Canvas Print last Friday. My daughter was so intrigued to know what it was. I was napping, so she had to wait until I got up, LOL. After that, I told her it was her Christmas present and she couldn't see it yet (laugh inserted), she ran to daddy to let him know she had a Christmas present already. After too much laugh I opened the box and showed it to her. Her first reaction was a big hug and kiss to mama!! then she couldn't stop looking at it, she still says it is beautiful.

I think that's what you're going to think if you see your photo printed on a canvas.
I put the picture on my Peruvian spot in my living room. Love the colorful blanket I bought so many years ago when I worked at a Hospital in the Peruvian Mountains and the beautiful Inca Vase.

 Well, let me show the pretty canvas!


I highly recommend that you check the Easy Canvas Prints website and see for yourself .  I don't think you will be disappointed.

Hugs!!

What's brewin'

Hello my friends! Hope you are having a great Monday. Here really feels like a Monday, LOL, I just wish I could've slept for a little longer, anyways, I will make it a "coffee day" and I will survive until bed time. Talking about coffee, I have a nice card using the new "Cool Beans" set from Gina K. Stamps (this set is free with the purchase of 3 sets!) and a beautiful Dark Pink Lace and Leather Fabric Sheet tapes from "Love my Tapes"

For my card I used the sketch #158 from Clean & Simple Stamping, although my sentiment was position in a different spot :)


Directions:
  1. Make a card base form Ivory Cardstock. 5.5" x 4.25"
  2. Emboss bottom part of your front card.
  3. Adhere Dark Pink Lace Tape Ribbon.
  4. Stamp sentiment in Vintage Photo Distress Ink.
  5. Die-cut a piece of Leather Fabric Sheet using Square Nestabilities. Adhere it to card.
  6. Stamp image onto White CS, color it with Markers. Die-cut, emboss and stencil piece with Square Nestabilities. Add Glitter to small parts of image.
  7. Add Pink Rhinestones.

Card Recipe:
  • Cardstock: White, Ivory (GKD)
  • Stamps: Cool beans (GKD)
  • Ink: Memento Tuxedo Black (Tsukineko), Vintage Photo Distress (Ranger)
  • Embellishments: Dark Pink Lace Tape, Brown Leather Fabric Sheet Tape (Love my Tapes), Pink Rhinestones (Kaisercraft), Star Dust Stickles (Ranger)
  • Accessories: Square Nestabilities (Spellbinders), Swiss Dots (Provo craft), Pop dots.
Hope you like it!
Have a great day!

Saturday, September 17

Wee Memories Challenge #68: No patterned paper

Hello my friends and welcome to another Wee Memories Challenge. This week our challenge is "No Patterned paper", you can create your own with stamps if you think your project need it :)

Our challenge this week is sponsored by "Jen Ippity Chick"

Here is the card I created for this week's challenge.

Directions:
  • Make card base from Ivory Cardstock.
  • Dry emboss a piece of Good as Gold CS with Textile folder. Add to card and add pearls.
  • Tie on ribbon and make a bow.
  • Stamp image on Ivory Cardstock in Versamark Ink. Apply Gold embossing powder and heat it up. Die-cut, emboss and stencil image with Oval Nestabilities.
  • Stamp sentiment.


Card recipe:
  • Cardstock: Ivory, Good as Gold (GKD)
  • Stamps: Bella Rose Wedding, Bella Rosebud (Heartfelt Creations)
  • Ink: Versamark, Vintage Photo (Ranger)
  • Embellishments: Pearls, Ivory Satin Ribbon.
  • Accessories: Textile embossing folder, Oval Nestabilities, Scor-tape, Pop dots, Sponges,
The deadline for this challenge is 11.59pm PST on Friday, September 23,  2011. For more details, some fabulous design team inspiration and to link up your projects, click here

Hope you like it!
Have a great day!!

Friday, September 16

Gina K. Designs September Inspiration Blog Hop Day 3: My True Love Gave to Me & Cool Beans

Hello my friends and welcome to Day 3 and last day of Gina K. Designs September Inspiration Blog Hop. Today we are showcasing "My True Love Gave to Me" and "Cool Beans" by Gina K. Designs.

Here are my projects.

Have a Joyous Holiday: Love this set!! It has a lot of possibilities, the images can be mix/match with other sets and sentiments :) To be honest the first time I heard this song "12 Days of Christmas" was 2 or 3 years ago, I don't think I've ever heard it in Spanish, weird I know.

Directions:
  • Make card from White Cardstock. A2 size.
  • Mat Red Hot CS and Patterned Paper, add a strip punch border and add stitches. Adhere panel to card.
  • Stamp image to White CS, color birds with Copic Markers. Die-cut, emboss and stencil it with Circle Nestabilities. Mat this piece with a Red Scallop Circle.
  • Stamp sentiment on White CS. Die-cut, emboss and stencil piece with Grommet Tag Dies. Add black brads.
  • Adhere panels to card.
  • Add pearls and stitckles to bird's wings and musical notes.

Card Recipe:
  • Cardstock: White, Red Hot (GKD)
  • Patterned Paper: Jovial (BasicGrey)
  • Stamps: My True Love Gave to Me (GKD)
  • Ink: Memento Tuxedo Black (Tsukineko), Vintage Photo Distress (Ranger Industries) 
  • Embellishments: Pearls, Black Brads (GKD), Star Dust Stickles (Ranger)
  • Accessories: Circle Nestabilities, Scallop Circle Nestabilities, Grommet Tag Shapeabilities (Spellbinders), Pop dots, Scor-tape, Border Punch (Fiskars), Sewing machine, Sponges.

 ++++++++++++++++++++++


YOU MOCHA my day: If you love coffe, you will love the new Free With Three set: Cool beans" I love coffee and eventhough I have tried to quit it, I can't. Sometimes you just a cup of coffee to start your day :)

Directions:
  • Make card base from Kraft CS. A2 size card.
  • Mat a piece of Ivory and Chocolate Brown CS. Ink all edges and add stitches. Stamp sentiment. Adhere panel to card.
  • Stamp beans on White CS, color them with Markers and cut them out. Adhere it to stitched panel.
  • Stamp image on White CS, color it with Copic Markers. Die-cut, emboss and stencil it with Circle Nestabilities. Add pop dots to the back and adhere it to a scallop kraft piece. Adhere it to card.
  • Add stitckles to coffee.

Card recipe:
  • Cardstock: White, Ivory, Chocolate Brown, Kraft (GKD)
  • Stamps: Cool Beans (GKD)
  • Ink: Memento Tuxedo Black (Tsukineko), Vintage Photo Distress (Ranger)
  • Embellishment: Star Dust Stickles (Ranger)
  • Accessories: Circle and Scallop Circle Nestabilities (Spellbinders), Pop dots, Scor-tape, Copic Markers, Sponges, Sewing machine. 
All the items in bold can be found at Gina K. Designs Store.

Now, are you ready for more inspiration?! Visit the DT blogs listed below and leave a comment for your chance to win a set of your choice!!
 Have fun hopping!!

Thursday, September 15

Gina K. Designs September Inspiration Blog Hop Day 2: Celebrate the Season & Home is

Hello my friends and welcome to Day 2 of Gina K. Designs September Inspiration Blog Hop. Today we are showcasing 2 wonderful sets "Celebrate " illustrated by Theresa Momber and "Home is" illustrated by Tami Mayberry.

Here are my projects:

Celebrate the Season: "Celebrate" set has images for different occasions like Fall, Halloween, Christmas, etc. I decided to make a Christmas card and I love the results.

Directions:
  • Make card from Ivory CS. A2 size.
  • Using the oval tag from Fancy Tags Two, die-cut, emboss a couple of them in Red Hot CS. Create a frame.
  • Stamp sentiment in Barn Door Distress Ink.
  • Die-cut a piece of Scor-Tape Sheet and Ivory CS using Oval Nestabilities. Peel one side of your Scor-tape paper and adhere it to carsdtock. Apply Microfine Transparent Glitter. Stamp the snowman on it. Color it with Copic Markers. (Yes, you are reading this right! This microfine glitter is awesome, tutorial to come)
  • Adhere image to card with Pop Dots.
  • Make a bow and adhere it to card.

Card Recipe:
  • Cardstock: Ivory, Red Hot (Gina K. Designs)
  • Stamps: Celebrate (GKD)
  • Ink: Barn Boor Distress, Black Soot Distress (Ranger)
  • Embellishments: Christmas Ribbon (GKD)
  • Accessories: Oval Nestabilities, Fancy Tags Two (Spellbinders), Scor-tape Sheet paper, Glue dots, Pop Dots, Microfine Transparent Glitter (Art Glitter)

 ++++++++++++++++++


Home is where the heart is: I love Tami's new set. So whimsical and fun to color and do paper piecing as well.

Directions:
  • Make card base from Ocean Mist CS. 5" square.
  • Mat Lemon Drop, White and Patterned Paper, add stitches.
  • Die-cut and emboss a piece of White CS using Fleur de Lis Square Nestabilities.
  • Die-cut a piece of PP using Square Nestabilities. Ink all edges and adhere it to Fleur de Lis piece, add stitches.
  • Tie on ribbon, create a bow and add a button.
  • Stamp images on White CS, color them with Copic Markers. Die-cut, emboss and stencil it with Circle Nestabilities. Stamp sentiment.
  • Add Glitter to sun and Crystal Lacquer to heart, windows and door. Set to dry.
  • Add it to card with Pop Dots.

Card recipe:
  • Cardstock: Ocean Mist, White, Lemon Drop (GKD)
  • Stamps: Home is (GKD)
  • Patterned paper: Blissful (Authentique), Honey Cake (My Mind's Eye)
  • Ink: Faded Jeans Distress, Vintage Photo Distress (Rangers), Memento Tuxedo Black (Tsukineko).
  • Embellishments: Yellow Seam Binding Ribbon, Blue Button (GKD), Star Dust Stickles (Ranger), Lemon Drop Twine (The Twinery),
  • Accessories: Fleur de Lis Squares, Squares and Circle Nestabilities (Spellbinders), Pop dots, glue dots, Crystal Lacquer, Scor-tape, Sponges, Sewing machine.

 All the items in bold can be found at Gina K. Designs Store.

Now, are you ready for more inspiration?! Visit the DT blogs listed below and leave a comment for your chance to win a set of your choice!!


  • Gina K
  • Tami Mayberry – illustrator Home Is
  • Theresa Momber – illustrator Celebrate
  • Carolina Buchting
  • Cathy Tidwell
  • Deb Felts
  • Donna Baker
  • Emily Giovanni
  • Giovana Smith
  • Jennie Harper
  • Lee Murphy
  • Melanie Muenchinger
  • Michelle Woerner
  • Sharon Harnist
  • Tina Gilliland
  • Vicki Dutcher

  • Have fun hopping!

    Wednesday, September 14

    Gina K. Designs September Inspiration Blog Hop Day 1: Holiday Basket & Under the weather.


    Hello my friends and welcome to Day 1 of Gina K. Designs September Inspiration Blog Hop. Hope you enjoyed the Release Party last night, it was sure a lot of fun!!
    Today we are showcasing 2 of the new sets just released "Holiday Basket" illustrated by Melanie Muenchinger and "Under the Weather" illustrated by Rupa Shevde.

    Here are the projects I created:

    May your day be filled with love: I created this card with "Holiday Basket" Set. The images are super cool to color, if you don't like to color, just do heat embossing in gold or bold colors and you will get nice effects.

    Directions:
    • Make card base from White cardstock. 5" square card.
    • Create a frame using Fleur De Lis and Rectangle Nestabilities from Red Hot Cardstock. Adhere it to card.
    • Stamp baskets and poinsettias, color them with Copic Markers and cut them out. Add brads to basket to connect the handles. Add poinsettias and cover them with Crystal Lacquer.
    • Stamp sentiment.
    • Create a double bow with bow-easy. Adhere it to card with glue dots.

    Card Recipe:
    • Cardstock: White, Red Hot (Gina K. Designs)
    • Stamps: Holiday Basket.
    • Ink: Memento Tuxedo Black (Tsukineko), Vintage Photo Distress (Ranger)
    • Embellishments: Gold nailheads (Gina K. Designs), Brads (SU), Green Ribbon (JoAnn's).
    • Accessories: Fleur de Lis Rectangle Nestabilities, Rectangle Nestabilities, Pop Dots, Scor-tape, Glue dots.

    ++++++++++++++++++

    Get Well Soon: This card was created with "Under the Weather" set. This set has really cute images, fun to color or paper pieced.

    Directions:
    • Make card base from White cardstock. A2 size.
    • Ink all edges. Cut a panel from Sweet Corn CS, mat this with Patterned Paper and add stitches.Adhere it to card.
    • Stamp image on White CS, color it with Copic Markers. Die-cut, emboss and stencil it with Rectangle Nestabilities. Mat it wit a piece of Sweet Corn CS. Add zig-zag stitches. Adhere it to card with Pop Dots. Add glitter.
    • Stamp sentiment.
    • Add button and twine. Adhere them to card with glue dots.

    Card Recipe:
    • Cardtsock: White, Chocolate Brown, Sweet Corn (Gina K. Designs)
    • Stamps: Under the Weather.
    • Patterned Paper: Blossom Soup (Jillibean Soup), For the Record (Echo Park Paper)
    • Ink: Memento Tuxedo Black (Tsukineko), Vintage Photo Distress (Ranger)
    • Embellishments: Blue Buttons (Gina K. Designs), Star Dust Stickles (Ranger), Lemon Drop twine (The twinery)
    • Accessories: Rectangle Nestabilities (Spellbinders), Glue dots, Pop dots, Scor-tape, Lace border punch (Martha Stewart), Sewing machine,

    All the items in bold can be found at Gina K. Designs Store.

    Now, are you ready for more inspiration?! Visit the DT blogs listed below and leave a comment for your chance to win a set of your choice!!
    Have fun hopping!!

    Tuesday, September 13

    It's Release Time!! Christmas Cheer Collection is here!!

    Hello my friends!! It's Heartfelt Creations Release time. The Christmas Cheer Collection is here and it's fabulous!
    The Christmas Cheer Collection features 14 new pre-cut stamp sets and one exclusive Heartfelt Creations die manufactured by Spellbinders. The possibilities with the classic images in this collection are absolutely endless. You will achieve handmade projects that will "wow" your friends and family this Christmas season.

    Here are the projects I created with some of the stamps sets from this collection.

    Merry Christmas Candle

    Directions:Would you like to win this awesome collection? Leave a comment on the Heartfelt Creations blog by September 20 for a chance to win the entire release valued at $240.00
    • Stamp image on White Tissue paper in Memento Tuxedo Black and sentiment in Barn Door Distress Ink. Color candle with Copic Markers.
    • Cut out Tissue paper close to image and sentiment borders. Adhere to candle. Cover image with Wax paper and heat it up until Tissue paper melts on candle.
    • Let cool.
    • Add Gold tinsel and make a bow

    Heartfelt Creations Products used:
    • HCPC 3419 Holiday Poinsettia Candle PreCut Set.
    Other Products:
    • White candle (Walmart), Gold tinsel, Copic Markers:R35, R49, Y11, Y15, YG65, White Tissue paper, Barn Door Distres Ink (Ranger), Memento Tuxedo Black (Tsukineko)
    ===================================

    Triple Poinsettia Card


    Directions:
    • Make card base from White Cardstock. A2 size.
    • Die-cut and emboss biggest die from Fleur de Lis Rectangle Nestabilities in Red Cardstock. Adhere it to card.
    • Stamp image on White Cardstock, color it with Copic Markers and die-cut, emboss and stencil it with Rectangle Nestabilities.
    • Stamp medium and small poinsettias from Pettite Poinsettia Set, color them with Copic Markers, cut them out and adhere them to big image. Add Gold Gala Glitz in each center flower and Glitter to each edge.
    • Add Liquid Pearls to purple flowers.
    • Adhere panel to card.
    • Create a bow from Seam Binding ribbon and adhere it to card.

    Heartfelt Creations Products used:
    • HCPC 3415 Petite Poinsettia PreCut Set.
    • HCPC 3418 Poinsettia Spray PreCut Set.
    • Rectangle Nestabilities.
    • Grand Calibur.
    • Gold Gala Glitz.
    Other products:
    • Cardstock: White, Red (GKD)
    • Ink: Memento Tuxedo Black (Tsukineko)
    • Accessories: Fleur de Lis Rectangles Nestabilities (Spellbinders), Copic Markers : R35, R29, R46, V1, YG95, Y35; Foam tape, Seam Binding ribbon (etsy), Liquid Pearls (Ranger)


    Hope you like my projects and I would love to read your comments.
    Have a great day!!