Welcome to the Impression Obsession April 2024 Release Team Favorites Hop!
The Impression Obsession Design Team are sharing their favorite projects from this month's release today.
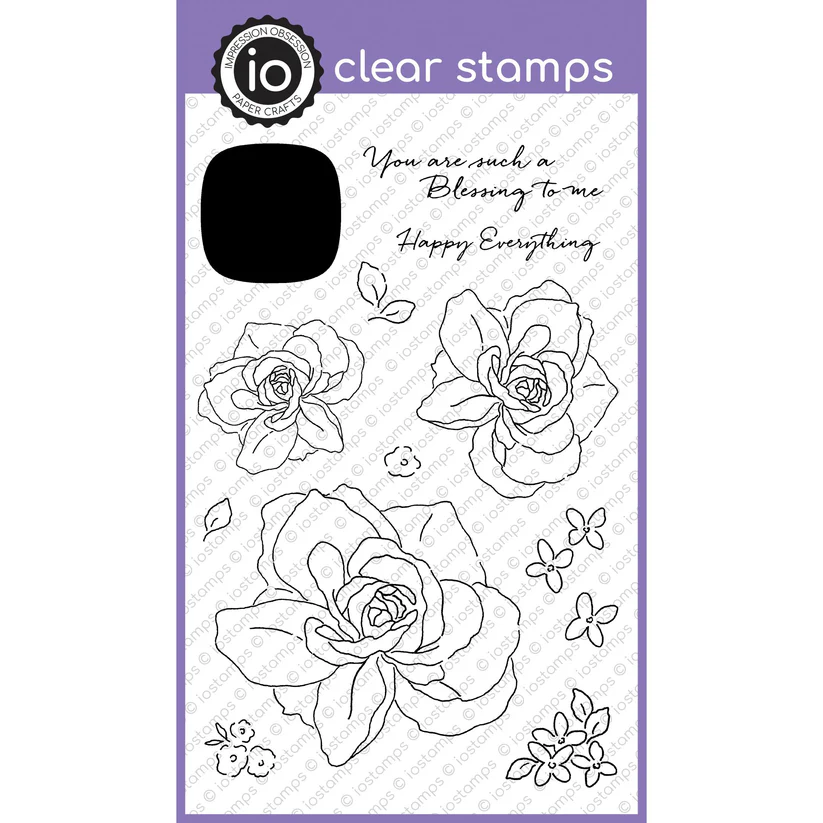
I have three cards for you today using the beautiful Everything Roses set.
Tiniest flowers
I love to create my backgrounds using the small stamps from my sets and these
small flowers and leaves are perfect!!
Stamp flowers and leaves from Everything Roses on white cardstock in Sienna Ink.
Color them with alcohol markers, trim panel.
Adhere a slightly bigger black panel behind stamped panel and adhere to a pink card base.
Add glitter to some of the flowers.
Stamp sentiment from Butterfly Garden Sayings on white cardstock in Peony Ink,
die-cut with Rounded Rectangle Layers.
Die-cut another piece in pink to add more contrast.
Adhere it to panel with foam adhesive.

Products used
Affiliated links used at no extra cost to you.


You are such a blessing to me
Die-cut a panel from Basics 13-Grays Paper with Crazy Stitched Set.
Adhere it to a pink card base.
Stamp little flowers on pink cardstock, color with markers and adhere to panel.
Stamp big flower from Everything Roses in Cocoa Ink, color with markers and fussy cut it out.
Add clear Sparkle to flower.
Stamp sentiment on a white Petite Scalloped Circles.
Adhere them to card.
Embellish with pink rhinestones.

Products used
Affiliated links used at no extra cost to you.


Happy Everything
Simplest card using Everything Roses set.
Stamp squares in Bubblegum, Rose, Cherry and Peony Ink.
Stamp flowers in Black Ink.
Stamp Sentiment in Peony Ink.
Embellish card with pink rhinestones.

Products used
Affiliated links used at no extra cost to you.

Check out what the DT has created for you
Impression Obsession Blog
Vicki Garrett
Angela Bode
Anna Wight
Dina Kowal
Giovana Smith
Jeanne Streiff
Laura Fulcher
Laura Williams
Robin Clendenning
Vicki Garrett
Angela Bode
Anna Wight
Dina Kowal
Giovana Smith
Jeanne Streiff
Laura Fulcher
Laura Williams
Robin Clendenning
Hope you like my cards.
Have a fantastic day!


WM.JPG)