Friday, December 31

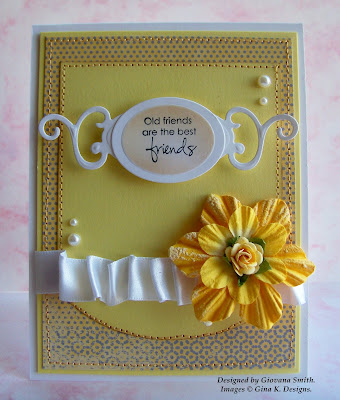
Bye bye 2010, Thanks for a great crafty year

Hello my friends!! Today is the last day of 2010, so fast, so amazing!! This year has been an awesome crafty year for me, I've met great people, conquered my fear to submit for publications and got published!! started new Design Teams and again met more new and great people.
I want to thank you for all your sweet comments, visits, support and for being with me in my good and bad times.

Now, I want to show you my favorite cards in this 2010. Hope you enjoy them and be ready for an awesome 2011, starting this Monday with some new stuff, you are going to love :)
Shall we start?

January


February


March


April : With this card I made it into the Gallery Idol Top 20!!


May


June : Another Gallery Idol 2010 card!


July


August


September : This is the first card I made as a DT member for Heartfelt Creations!!


October


November : A great month!! I made it into Gina K. Designs DT!!


December


Thanks a lot!!!
Happy New Year!!

Tuesday, December 28

StampTV Top 10 and a special sale!

Hello my friends! I hope you all have a great Christmas time. I enjoyed spending time with my in-laws, my daughter had a lot of fun with her cousins and also with her new Christmas presents. She got tons of paints, paper, crayons and more paper, LOL.
Now, I am working on projects for the next release that starts next Monday, so stay tune

StampTV is having the Top 10 Favorite episodes, you can play as many times as you want, and the prizes are awesome!!! All entries must be posted by January 2nd, 8:00pm Central Time.


Gina K. Designs is having a special sale!!!


I have some cards made with Friends are Forever here, here and here, and with Inside & Out here, here and here.

Have a great night!!

Saturday, December 25

Merry Christmas!!

I want to wish all of you a Very Merry Christmas!!

Thursday, December 23

Snow and the snowman

Hello my friends!! Sorry for being MIA this long! I've been enjoying time with my family, baking cookies with my daughter (and eating them too!!), playing with dolls and going outside and play in the snow.
I have lots of projects to do for a couple of releases next month from my favorite companies and I've been coloring like crazy as well.
I just needed a little break blogging to refresh my creativity and the most important thing to spend time with the people I love the most!

I have a snowman card I made with Snowmen melt your heart set from Heartfelt Creations.


Also, I want to show you a couple of pictures of my daughter playing in the snow. It's snowing almost every day here, we have lots of accumulated snow in our yard and also the perfect time for DD to play outside!


Have a great day!

Friday, December 17

Many thanks!

Hello my friends! For today I have a card for STV Color SPotlight 6.
The color combo for this week is:


This is a big card 5" square. I wish I could have done it a little bit smaller, but I think I like it after so many hesitations to post it here.

Directions:
  • Make card from Black Cardstock. 5" square.
  • Cut a piece of Bubblegum Pink (4 5/8 square), ink all edges with Worn Lipstick Distress Ink.
  • Cut stripes of White cardstock (1" x 4 5/8"), emboss all pieces with Swiss Dots folder and ink all edges. Adhere to Bubblegum Pink piece and add stitches.
  • Tie ribbon around with embroidery thread and add a button.
  • Stamp floral image on White cardstock in Memento Tuxedo Black. Color it with Marker sand cut it out. Adhere to card with foam tape. Add extra flower for some dimension and Diamond Stickles.
  • Add Rhinestones.
 Card Recipe:
  • Cardstock: Black Onyx, Bubblegum Pink, White (Gina K. Designs)
  • Stamps: Floral Wreath (Gina K. Designs)
  • Ink: Memento Tuxedo Black,  Worn Lipstick Distress (Ranger), SU Markers, Copic Markers.
  • Embellishments: Dark Pink Rhinestones (Kaisercraft), Dark Pink Satin Ribbon (Offray), Pink Button (Gina K. Designs), Diamond Stickles (Ranger)
  • Accessories: Swiss Dots Embossing folder, Foam tape, Clear glue, Sewing machine, Yellow thread, Cream Embroidery thread.
Hope you like it!!
Have a great and blessed day!

Wednesday, December 15

Missing you

Hello my friends and Welcome Wednesday!! Hope your day is great and crafty. Today I have a Missing You card showcasing some pretty stamps from Heartfelt Creations!
This is pretty simple but elegant at the same time!

Directions:
  • Make card from Ivory cardstock. Ink all edges.
  • Stamp image and sentiment onto card in Faded Jeans Distress Ink. Add Star Dust Stickles on tress, mailbox and ground.
  • Die-cut Window shape , ink all edges and add it to card with Foam tape.
  • Add light blue rhinestones.

Card Recipe:
Hope you like it!! Don't forget to visit the Heartfelt Creations Blog for more projects!! Lots of eye candy for you.

Have a great day!!

Tuesday, December 14

Have a wonderful Birthday!

Hello my friends!! Hope you are having a great day! Today is sunny and cold here, not the best combination, but I like it better than gray days.

Today's card comes from this picture from Pal Paper Arts


and this my take.I got inspired from the colors and the gold in the picture.  I used one of the new stamp sets from Gina K. Designs and illustrated by Theresa Momber, this set is called "The Giving Tree"

Directions:
  • Make card from Ivory Cardstock (4.5" square)
  • Mat and stitch a piece of Ivory (3.75" square)) and Good as Gold. Adhere to card.
  • Mat and stitch a piece of Ivory (3" square) and Good as Gold. Tie ribbon around and add a bow. Adhere to card.
  • Die-cut and emboss a piece of Good as Gold cardstock using Circle Nestabilities. Add to card.
  • Stamp images onto Ivory Cardstock in VersaMark Ink, add Gold embossing powder and heat it up. Die-cut it with Circle Nestabilities. Adhere to card with Foam tape.

Card Recipe:
  • Cardstock: Ivory, Good as Gold (Gina K. Designs)
  • Stamps: The Giving Tree (Gina K. Designs)
  • Ink: Versamark (Tsukineko)
  • Embellishments: White Organdy Ribbon (Gina K. Designs), Mini pearls.
  • Accessories: Circle Nestabilities, Gold embossing powder, Embossing heat gun, Sewing machine, Adhesive.
I am submitting this card also to Caardvarks Challenge : Monochromatic

Hope you like it!
Have a great day!

Monday, December 13

Sketch Spotlight

Hello my friends! I hope you are having a great day! Mine is C-R-A-Z-Y!!! really I just want to scream, sometimes don't you feel that anything is right?
Anyway, last night I made a card for today's Sketch Spotlight at StampTV and guess what, I messed it up. My printer is a mess and quit working, so I drew this sketch with only 2 panels on the BG instead of 4. But I decided to show it to you and I hope you like it.

Directions:
  • Make card base from White Cardstock.
  • Dry emboss a White piece of cardstock using Snowflakes Folder. Cut this piece (4" x 2.5"), ink all edges in Vintage Photo Distress and add stitches.
  • Stamp background in Tea Dye Distress, stamp pine trees in VersaMark Ink, add Clear embossing powder and heat it up. Sponge image with Vintage Photo Distress Ink. Die-cut, emboss and stencil using the largest Oval Large Nestabilities.
  • Trace the outlines from the largest oval, cut it out. Place White piece on top with Foam tape.
  • Add ribbon.
  • Add Diamond Stickles on embossed snowflakes.
  • Add Star Dust Stickles on Pine trees


Card Recipe:
Just before clicking to make this post go live, I check outside and I found this!! Thank you God for showing me your love.


Hope you like it!
Have a great day!!

Friday, December 10

Paper Secrets Holiday Blog Hop


Hello my crafty friends!! I am so happy to be participating in another Paper Secrets Blog Hop. If you have come from Christy's blog you are in the right place, if not I will recommend you to start from Kristi's blog
This time is all about the Holidays and I hope you have a lot of fun hopping around the wonderful 25 blogs, after visiting all the blogs, please go HERE and leave a comment letting us know you have finished the hop, this way your name will be entered in the Prize Drawing!! Paper Secrets is giving away 3 really awesome gifts to 3 randomly chosen winners.
What will you win? It's a Christmas surprise so I can't tell you.
HINT: Have you seen the December challenge prize kit?

For this hop, I made a couple of projects for you.

Stamping in candles! I have to say this is my favorite project. Believe it or not, this is the first time I've tried this technique and I love it! Not many materials required and the result is just wonderful!!
If you would like to try this technique, check it out HERE

 Close-up

Materials:


Cardinal card: I couldn't resist and I made a card too :) I love the Cardinal images very much!


Edited to add: The frame used in my card is Decorative Window Scene Die by Heartfelt Creations.

Hope you enjoyed my projects! Now head over to Silvia's blog and enjoy her creations!!

Have fun hopping and don't forget to leave me a comment.
Have a great day!!

Wednesday, December 8

More Christmas cards

Hello my friends!! I will invite you to visit the Heartfelt Creations Blog and enjoy some wonderful creations from the Design Team!
This time, I've made some more "Clean & Simple" Christmas cards!! Perfect to mass produce.

Rejoice in the Season

Directions:
  • Make card from Ivory Carstock A2 Size.
  • Stamp snowflakes from HCPC 3338 Petite Medallion Background Pre-Cut Seton a piece of 2" x 5.5" Ivory Cardstock in Red Ink. Add Red Ribbon and adhere to card.
  • Stamp sentiment from HCPC 3352 Cardinal With Holly Berries Pre-Cut Set on White Cardstock in Vintage Photo Distress ink. Die-cut piece with label 8 Nestabilities.
  • Adhere this piece to card with Foam tape. Add a Silver Rhinestone.


Card Recipe:


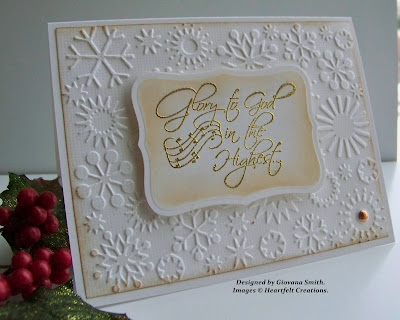
Glory to God

Directions:
  • Make card from White cardstock. A2 size.
  • Emboss a piece of White vellum cardstock using Snowflakes Embossing folder + Cuttlebug. Ink all edges with Vintage Photo Distress Ink.
  • Stamp sentiment from HCPC 3346 Joyous Noel Pre-Cut Set on White cardstock in Versamark Ink. Add gold embossing powder and heat it up.
  • Die-cut, emboss and stencil this piece.
  • Adhere it to card with Foam Tape.
  • Add a little Copper Rhinestone on the bottom


Card recipe:
  • Cardstock: White, White Vellum.
  • Stamps: HCPC 3346 Joyous Noel PreCut Set
  • Ink: VersaMark (Tsukineko), Vintage Photo Distress (Ranger)
  • Embellishments: Copper Rhinestone.
  • Accessories: Cuttlebug, Snowflake Embossing folder, Label 8 Nestabilities (Spellbinders), Gold Embossing Powder, Embossing heat gun, Foam tape, Sponges.
I am submitting this card to:

Tuesday, December 7

Tag set

Hello my friends and Happy Tuesday! Hope you all are having a great day so far.
Today I have a set of tags for you. I used one of the latest sets from Gina K. Designs (This set designed by Tami Mayberry)
These tags match perfectly with Off the Wall Craftiness Color Challenge


Directions:
  • Stamp Block images onto Kraft cardstocl in Tea Dye Distress Ink. Then, stamp sentiments in Walnut Stain Distress ink.
  • Using Label 3 Nestabilities (starting from the smallest, use #3) die-cut images.
  • Using Label 3 Nestabilities (starting from the smallest, use #4) die-cut a piece of Kraft Cardstock, emboss and ink all edges.
  • Add small piece onto big piece with foam tape.
  • Add  Star Dust Stickles to Paper flowers and adhere to card.
  • Tie Jute twine.


Tag recipe:
Thanks so much for stopping by!
Have a great day!

Monday, December 6

Holiday Greetings

Hello my friends and Happy Monday!! I am trying to be back posting everyday (wish me luck), happily I am feeling much better, but my voice is not completely back and I still sound congested, taking antibiotics and trying to do as much as possible and also rest, a mix of everything, LOL.
Anyway, I have a Clean & Simple card for you today, super easy to mass produce and super cute too :)
I used "Heartfelt Creations" Stamps.

Directions:
  • Make card from White Cardstock.
  • Stamp Pines and Pine cones from HCPC 3326 Holly Berry Filler Pre-Cut Set onto White Cardstock in Tea Dye and Crushed Olive Distress Ink.
  • Stamp Cardinal on Red cardstock in Memento Tuxedo Black. Die-cut image using Cardinal Die-cuts. Adhere to card with Foam tape. Add Crystal Lacquer on image.
  • Stamp sentiment from HCPC 3349 Cardinal Holiday Mailbox Pre-Cut Set in Vintage Photo Distress Ink.
  • Finally add Red Rhinestones on right top corner and Jute twine.


Card recipe:
I am submitting this card to:
Hope you like it!
I love reading all your comments.
Have a great day!!

Friday, December 3

Christmas cards

Hello, my friends! Can you believe it's Friday already! Are you ready to start sending your Christmas cards? Have you started making them? Maybe no. Well, Today I have for you some "Clean & Simple" Christmas cards I made in no time.
For these cards I used "Heartfelt Creations" stamps, we can also visit the Heartfelt Creation Blog for more ideas and lot of eye candy :)

Rejoice in the Season

Directions:
  • Make card from Kraft cardstock. A2 size.
  • Stamp image from HCPC 3339 Elegant Holly Swirls PreCut Set in Versamark Ink, add Gold embossing powder and heat it up.
  • Stamp sentiment from HCPC 3352 Cardinal With Holly Berries PreCut Set in Memento Tuxedo Black.
  • Add pearl to image.
  •  Adhere piece of Patterned paper and tie Red Satin Ribbon around.


Card recipe:
Merry Christmas

Directions
  • Make card from Kraft cardstock A2 size (4.25" x 5.5")
  • Cut a piece of Pink Cardstock: 4.75" x 3.5". Stamp image from HCPC 3352 Snowy Cardinal Pre-Cut Set onto cardstock in Versamark Ink. Add White embossing powder and heat it up. Sponge over the image using Pink Ink. Color pines with Copic Marker YG95. Color the snow with Star Dust Stickles.
    Stamp sentiment from HCPC 3349 Cardinal Holiday Mailbox Pre-Cut Set in Walnut Stain Ink.
  • Create frame using White Uni-Ball Pen. Add Red Rhinestones and adhere to card base.
  • Stamp Cardinal image from HCPC 3353 Cardinal Family Pre-Cut Set on Red cardstock in Memento Tuxedo Black. Die-cut image with HCD 706 Cardinal Family Die-cut set.
  • Adhere Cardinal to card using foam tape in the middle and glue in both ends. Add Crystal Lacquer on image.


Card Recipe:
Hope you like them!
Have a great day!

Wednesday, December 1

Gina K. Previews Day 3

Hello and welcome to Day 3 of Gina K. December Previews! First, I want to say Thanks so much for all your awesome comments on my projects, I love reading them all. I wish I could answer all of them, but I am just recovering from a nasty infection and my computer time is limited.
Anyway, tonight we are previewing  Floral Wreath , this set is free with 3!!

Here is the card I have for you tonight.

Many thanks

Directions:
  • Make card from White Cardstock. 5" square.
  • Mat a piece of Lipstick Red (4.5" square) and Patterned Paper (4 3/8" square). Add stitches. Adhere to card.
  • Die-cut a piece of Lipstick Red using Fleur de Lis Dies. Adhere to card with foam tape.
  • Die-cut, emboss and stencil a piece of White Cardstock using Square Nestabilities. Adhere to card with tape.
  • Stamp Floral Wreath on White Cardstock in Memento Tuxedo Black. Color it with Copic Markers. Stamp sentiment in Walnut Stain Distress Ink. Adhere to card. Add Crystal Lacquer and set to dry.
  • Make a bow and adhere to card.


Card recipe:
* All products in bold can be found at Gina K. Store.

For more inspiration using The Floral Wreath, be sure to check out what the rest of the design team has come up with


Don't forget to leave a comment on each of the DT participating blogs for your chance to win this awesome set!! "Gina is giving away 4 of these sets!!
Also, tomorrow night is the Release party over at StampTV at 7 pm Central time.

Tuesday, November 30

Gina K Previews Day 2

Hello and welcome to Gina K. December Previews Day 2! Tonight, we are showcasing 2  great sets: The Giving Tree by Theresa Momber and Nesting by Asela Hopkins.

Here are the cards I made.

The Giving Tree

Directions:
  • Make card from Kraft cardstock (A2 size)
  • On a piece of Kraft cardstock, stamp tree and snowflakes in Versamark Ink, add White embossing powder and heat it up.
  • On a piece of White cardstock, stamp sentiment in Versamark Ink, add Gold Embossing powder and heat it up. Cut this piece, ink edges and adhere it to Kraft piece.
  • Mat Kraft piece with a White piece of cardstock. Adhere to card.
  • Add some Star Dust Stickles on snowflakes, tree branches and borders.

Card recipe:

Nesting

Directions
  • Make ard from Innocent Pink Cardstock. A2 size.
  • Cut a piece of White cardstock (5" x 3.75") Dry embossed bottom part with Swiss Dots folder. Ink all edges. Tie ribbon around and adhere to card.
  • Die-cut a rectangle piece on an Innocent Piece and White color cardstock. Adhere them to card.
  • Stamp butterflies onto White cardstock in Light Pink Ink, add some Worn Lipstick Distress Ink on the borders and stamp. Cut them out and adhere to white rectangle piece. Add Mini pink Rhinestones.
  • Stamp sentiment on Innocent Pink .
  • Add rhinestones in every corner.

 Card recipe:

For more inspiration using The Giving Tree and Nesting, be sure to check out what the rest of the design team has come up with.

Don't forget to leave a comment in each of the DT blogs for your chance to win one of these 2 new sets!!!
Don't forget that Release Party is this Friday Dec. 2nd over at StampTV!!