Friday, March 30

You make me believe

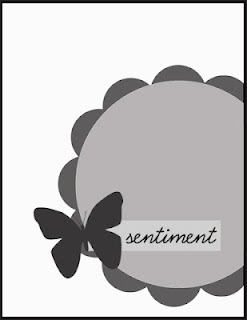
Hello my friends! I have a card for you today. I used the color combo from The Play Date Cafe and lots of products from Love My Tapes.
I am submitting this card to Simon Says Stamp Challenge : Anything Goes.


Details:
  • Die-cut and emboss and couple of pieces of cardstock using Label 1 Nestabilities. Create a card.
  • Die-cut a smaller piece using same dies and white cardstock. Dry emboss it and ink all edges.
  • Add White and Black Lace Tape to card panel.
  • Die-cut 2 butterflies using Brown Leather Fabric Tape. Adhere them to card and add pearls.
  • Stamp sentiment, die-cut and emboss piece with Circle Nestabilities.


Card Recipe:
  • Cardstock: White (GKD)
  • Stamps: Sentiment from Petals &Wings StampTV kit (GKD)
  • Ink: Black Soot, Weathered Wood (Ranger)
  • Embellishments: Brown Leather Fabric Tape, White Lace tape, Black Lace Tape (Love My Tapes), Pearls.
  • Accessories:Double Sided Tape (Love My Tapes), Label 1 Nestabilities, Circle Nestabilities (Spellbinders), Butterfly die (Heartfelt Creations)
Hope you like it!
Have a great day!

Tuesday, March 27

Thank you for loving me

Hello my friends! I want to show a card that I enjoyed coloring very much!! This image is a little sneak peek from a set called "Treasured" that will be released next week by Sweet 'n Sassy Stamps.
I really like how it turned out :) The sketch is from Splitcoaststampers.

Submitting this card to:


Directions:
  • Make card base from White Cardstock.
  • Cut Patterned Paper panels, ink all edges, mat them with a piece of coordinated cardstock and add stitches. For the pink piece I die-cut a mini scallop border, then I adhere it with tape and add stitches.
  • Add panels to card base.
  • Add mini pink rhinestones.
  • Stamp image and sentiment in Memento Tuxedo Black Ink.
  • Die-cut, emboss and stencil image using Wonky Rectangle Dies and sentiment using Oval Nestabilities.
  • Color image with Copic Markers.
  • Add Glitter to butterfly and Crystal Lacquer to petals.
  • Add image and sentiment to card.


Hope you like it!
Have a great day and thanks for visiting.

Monday, March 26

He is Risen!

Good Monday Morning everyone! Hope your weekend was great and you got enough sleep and energy to start a new week.
Today, I have another CAS Easter card for you. I just got this set from Sweet 'n Sassy Stamps, it is called "Elegant Blessings", perfect for your Easter cards and other ocassions as well.

I used the sketch from Clean & Simple Stamping #183. I changed it a little bit, hope it's ok :)


He is Risen!

Directions:
  • Make card base from White Cardstock.
  • Score each side at 0.25".
  • Stamp cross in Walnut Stain Distress Ink and die-cut and emboss it with Circle Nestabilities.
  • Die-cut and emboss and piece of Patterned Paper using Scallop Circle Nestabilities.
  • Mat these two pieces with a White Doily piece.
  • Adhere piece to card base and cut excess from right side.
  • Stamp sentiment in Vintage Photo Distress Ink.
  • Add 3 clear rhinestones.

Hope you like it.
Thanks for stopping by.

Saturday, March 24

Best Wishes

Hello my friends! Hope you are having a great day! I have a very CAS card for you today with a little feeling of Spring :) I love Spring very much, love gardening, mowing the lawn and enjoying my flowers, BUT the only thing I don't like is the allergies, oh goodness, I get so sick sometimes and my little one gets really sick, we are praying this year we can just enjoy the season without any kind of allergies.

Submitting this card to:

Best Wishes

Directions:
  • Make card base from White Cardstock.
  • Stamp background image in Crushed Olive Distress Ink.
  • Stamp flower image in Worn Lipstick Distress Ink.
  • Stamp sentiment in Black Soot Distress Ink.
  • Adhere a couple of strips of Patterned Paper from Petals & Wings Collection, add stitches.
  • Tie on twine and add a green button. Make a bow.
  • Add Ruby Red Liquid Pearls in each flower and under sentiment.

Card recipe:
  • Cardstock: White (GKD)
  • Patterned Paper: Petals & Wings (GKD)
  • Stamps: Petals & Wings StampTV Kit. (GKD)
  • Ink: Crushed Olive, Worn Lipstick, Black Soot (Ranger)
  • Embellishments: Green button (GKD), Ruby Red Liquid Pearls (Ranger), Red twine (The Twinery)
  • Accessories: Mini glue dots, Sewing machine
All the items in bold can be found at Gina K. Designs Store

Hope you like it.
Have a great day!

Thursday, March 22

Pretty Tulips

Hello my friends! Hope you are having a great day! I have a very pretty card for you today. I don't use digital images very often, but this tulip image from Sweet 'n Sassy Stamps is soooo pretty I had to use it and so much fun to color too!!
The sketch is from yesterday's Sketch Challenge over at SCS and the colors are from SNSS Color Challenge "Aqua + Red"

Submitting this card to:
Directions:
  • Make card base from White Cardstock. A2 size.
  • Mat panels of Real Red and PP, add stitches and adhere them to card base.
  • Tie on Aqua Ribbon around card base a couple of times.
  • Die-cut a panel of Bashful Blue CS using Rectangle Nestabilities. Adhere it to card with Pop dots.
  • Print tulips. Color it with Markers. Die-cut, emboss and stencil it with Oval Nestabilities. Adhere it to card with Pop dots.
  • Create a bow with Caribbean Twine and adhere it to image.
  • Add a little bit of Star Dust Stickles to tulips.
  • Add Aqua Rhinestones to opposite corners.


Hope you like it!
Have a great day!

Wednesday, March 21

"Spring Has Sprung" Gina K. Designs DT Blog Hop


The Design Team for Gina K. Designs welcomes you to a fun Spring Has Sprung blog hop. For this hop we will showcase Spring cards or projects with you!!! The DT Members have all used a wide variety of Gina K. Designs stamp sets to inspire you to get inky too! Come play along with the Current Challenges at Stamp TV!!!


If you came from Emily's blog, then you're right where you should be. If not, please go to Stamp TV  where you will find a list of all those participating


This is what I've created for today's hop:

Many thanks

Directions:
  • Using the biggest die from Beaded Squares, die-cut and emboss a couple in White Cardstock. Create a card.
  • Using a Square Nestabilities Die, die-cut a piece of Patterned paper from Petals & Wings Collection. Ink all edges. Add a strip of Pink Patterned paper and add zig-zag stitches.
  • Add Patterned Paper panel to card front.
  • Stamp image on White Cardstock in Memento Tuxedo Black. Color it with Markers. Stamp sentiment in Black Soot Distress Ink.
  • Die-cut, emboss and stencil piece with Square Nestabilities.
  • Add panel to card with large pop dots.
  • Add Star Dust Stickles to center of each flower and Ruby Red Liquid Pearls to left side.

Card Recipe:
  • Cardstock: White (GKD)
  • Patterned Paper: Petals and Wings Collection (GKD)
  • Stamps: Petals & Wings Stamp TV Kit. (GKD)
  • Ink: Memento Tuxedo Black (Tsukineko), Black Soot Distress (Ranger)
  • Embellishments: Star Dust Stickles (Ranger), Ruby Red Liquid Pearls (Ranger)
  • Accessories: Square Nestabilities, Beaded Square Nestabilities (Spellbinders), Pop dots, Scor-tape, Sewing machine.

All the items in bold can be found at Gina K. Designs Store
Now hop on over to Jimmi's blog for more Gina K. goodness!!!

Thanks so much for stopping by.
Happy hopping.

Tuesday, March 20

Heartfelt Creations Semi-finalist and I need your vote :)

Hello my friends! I have some exciting news to share with you. Few weeks ago Heartfelt Creations had a DT Call and I applied and I got chosen as a Semi-Finalist! I was part of the DT before, but I stepped down due to some health issues and family situations, but now, everything is OK and I decided to try again! I love Heartfelt Creations products very much!!

Now, Heartfelt Creations want YOU to vote and help to choose the new Design Team, and I would love if you could give me your vote, you can check all the info HERE, also just for voting you will be included to win a $50.00 Gift certificate :)

Now, let me show the projects I submitted for this call:

Clean And Simple Christmas Card. Poinsettia Stamp by Heartfelt Creations.

All stamps and dies by Heartfelt Creations.

All stamps and dies from Heartfelt Creations.

Close Up of bottom corner
Hope you like these projects and give me your vote.
Thanks so much and have a great day!!

Thursday, March 15

First Class Friend

Hello my friends! Hope you are having a great day, here I am very busy planning everything for my daughter's birthday party, she is going to be 8!! Oh my, I can't believe it, time flies for sure, at the same time I feel so blessed to have the girl I have, she is our only and most amazing gift from above.

Now craft talking, I have a Vintage card for you today. I used one of my favorites sets from Sweet 'n Sassy Stamps "Vintage Postcard"  set and also the mail stamp die, that coordinates with this set.

I am submitting this card to Tuesday Trigger : Simple Elegance


Directions:
  • Make card base from Kraft Cardstock.
  • Cut a panel from Ivory Cardstock, die-cut and emboss bottom edge with Classic Bracket (Spellbinders)
  • Cut a panel from Patterned Paper (Butterfly Garden by Pink Paislee), ink all edges and add it to Ivory piece, add stitches.
  • Stamp Postcard lines in Vintage Photo Distress Ink.
  • Stamp First Class Friend in Walnut Stain Distress Ink as well as the Mail Stamp image. Die-cut it using coordinate die.
  • Create a bow with Twill ribbon, add a crocheted flower and a pink paper flower.

Hope you like it!
Have a great day.

Wednesday, March 14

Gina K. Designs March Inspiration Blog Hop Day 4


The Design Team for Gina K. Designs welcomes you to another fabulous Inspiration Blog Hop!!! Gina and the Design Team will inspire you with many beautiful ideas! And as you hop through their blogs, make sure to leave a comment on each of them because we will choose a few random comments and those stampers will each win a grab bag of deeply etched, pre-cut Gina K. Designs stamps! To see the full list of winners check the Big News forum at Stamp TV a couple of days after the hops!!

These are the projects I created for today's hop. My cards are very Clean and Simple this time, but if you have any question, please don't hesitate to ask.

Believe In Yourself: The combo I used for this card is White/ Ivory. I stamped the butterflies in Vellum Paper in Versamark Ink and added  Bridal Embossing Tinsel. I created a window with the White piece of CS, dry embossed and added to card with Pop dots. The sentiment was stamped in Tea Dye Distress Ink.


Great Sayings: I called this card Pretty In Red :) The card base is White CS, I stamped the image and sentiment in Barn Door Distress Ink. I added Red Ribbon and liquid pearls. Super easy and very elegant. The picture is not the best, Sorry about that, I will try to change it later.


Now, check out all the amazing designs and inspiration:

Tuesday, March 13

Gina K. Designs March Inspiration Blog Hop Day 3


The Design Team for Gina K. Designs welcomes you to another fabulous Inspiration Blog Hop!!! Gina and the Design Team will inspire you with many beautiful ideas! And as you hop through their blogs, make sure to leave a comment on each of them because we will choose a few random comments and those stampers will each win a grab bag of deeply etched, pre-cut Gina K. Designs stamps! To see the full list of winners check the Big News forum at Stamp TV a couple of days after the hops!!

Petals and Wings StampTV Kit:  This new StampTV Kit is fantastic!! I love it very much, the images are so cute and a lot of fun to color as well.

Directions:
  • Make card base from White CS. A2 size.
  • Die-cut a piece of Patterned Paper from Petals & Wings Collection using Wonky Rectangles Dies. Using the same die, trace it on your Red CS and cut it out. Mat together and add zig-zag stitches. Adhere piece to card base.
  • Stamp image on Watercolor Paper in Stazon Black Ink. Color with Watercolor Ink Pencils.
  • Stamp saying in Barn Door Ink.
  • Die-cut, emboss and stencil image with Wonky Rectangles Dies.
  • Add ribbon and thread a green button with twine and add it to image.
  • TIP: I used a little scrap piece of ribbon, it works perfect!!
  • Add panel to card base with Pop dots.
  • Add Liquid Pearls to center of each flower.

Card recipe:
  • Cardstock: White, Red Hot (GKD), Watercolor Paper (LSS)
  • Patterned Paper: Petals & Wings Collection (GKD)
  • Ink: Stazon Black, Inktense Watercolor Ink pencils (Derwent)
  • Embellishments: Red Organdy Ribbon, Green Button (GKD), White Liquid Pearls, Green twine.
  • Accessories: Wonky Rectangle Dies (Spellbinders), Pop dots, Scor-tape.

All the items in bold can be found at Gina K. Designs Store

Now, check out all the amazing designs and inspiration:

Monday, March 12

Gina K. Designs March Inspiration Blog Hop Day 2


The Design Team for Gina K. Designs welcomes you to another fabulous Inspiration Blog Hop!!! Gina and the Design Team will inspire you with many beautiful ideas! And as you hop through their blogs, make sure to leave a comment on each of them because we will choose a few random comments and those stampers will each win a grab bag of deeply etched, pre-cut Gina K. Designs stamps! To see the full list of winners check the Big News forum at Stamp TV a couple of days after the hops!!

Wild About You: Beautiful set illustrated by Theresa Momber. I decided to make a CAS cards :)

Directions:
  • Cut cardstock 3.75" x 11", fold in half and get a a card base 3.75" x 5.5"
  • Cut Patterned Paper 3.5" x 5. 25". Cut White CS piece 3" x 4.75"
  • Stamp giraffes and sentiments.
  • Tie on twine and add Lace Tape.
  • Mat White CS piece with PP and add zig-zag stitches.
  • Add panel to card base.
  • TIP: To make your sewing easy, hold your twine with a piece of sticky note, then add the button or tie your know or your bow :)
  • Add rhinestones (pink card)

Card Recipe:
  • White, Innocent Pink, Lemon Drop (GKD)
  • Patterned Paper: Pool Side (pink), Pool Side (Blue) (GKD)
  • Ink: Vintage Photo Distress, Tea Dye Distress, Faded Jeans Distress, Black Soot Distress (Ranger)
  • Embellishments: Mini clear Rhinestones (GKD), Pink button (GKD)Lemon Drop & Pink Sorber twine (The twinery), Light & Dark Pink Lace Tapes (Love My Tapes)
  • Accessories: Sewing machine, Scor-tape.
------------------------------------

Blooming with Blessings: Love all the cute images and sayings in this set. Perfect if you love coloring :)

Directions:
  • Make card base from White Cardstock. A2 size.
  • Mat Lemon Drop CS and Patterned Paper (Petals & Wings), add zig zag stitches. Add ribbon around and create a double bow with bow-easy, adhere it to card.
  • Adhere panel to card base.
  • Stamp duck image on white CS in Memento Tuxedo Black Ink. Color image with Copic Markers. Die-cut, emboss and stencil image with Wonky Rectangles Dies.
  • Stamp sentiment on White CS in Memento Tuxedo Black Ink. Die-cut, emboss and stencil it with Labels 8 Nestabilities. Add saying to right side of image.
  • Add image/saying piece to card base.
  • Add Crystal Lacquer to water spot and Star Dust Stickles to drops.
  • Add Mini rhinestones.

Card recipe:
  • Cardstock: White, Lemon Drop (GKD)
  • Patterned Paper: Petals & Wings Collection (GKD)
  • Ink: Memento Tuxedo Black (Tsukineko)
  • Embellishments: Mini Clear Rhinestones, Light Pink Gingham (GKD), Star Dust Stickles (Ranger).
  • Accessories: Crystal Lacquer, Pop dots, Labels Eight Nestabilities, Wonky Rectangles (Spellbinders), Scor-tape, Mini glue dots, Copic Markers, Sewing machine.
All the items in bold can be found at Gina K. Designs Store

Now, check out all the amazing designs and inspiration:

Friday, March 9

Gina K. Designs March Inspiration Blog Hop Day 1


The Design Team for Gina K. Designs welcomes you to another fabulous Inspiration Blog Hop!!! Gina and the Design Team will inspire you with many beautiful ideas! And as you hop through their blogs, make sure to leave a comment on each of them because we will choose a few random comments and those stampers will each win a grab bag of deeply etched, pre-cut Gina K. Designs stamps! To see the full list of winners check the Big News forum at Stamp TV a couple of days after the hops!!

Let me show you the projects I created for today's hop:

Wild Flowers Set: Love this new set of Melanie. I decided to use the butterflies from this set and the beautiful Bible verse, this verse has been my favorite since I was little.

Directions:
  • Make card base from White CS. 4.75" x 4.75" square
  • Score each side at 0.5" and 3/8".
  • Die-cut Sweet Mango CS using Scallop Circles Dies and Patterned Paper from Sundance Collection using Circle Dies, mat and add zig zag stitckes. Adhere piece to card.
  • Die-cut a white piece of CS using Scallop Circle Dies, mat this with a Circle piece in Sweet Mango CS, add zig-zag stitches. Stamp Bible verse in Versamark Ink, add White embossing powder and heat it up.
  • Stamp butterflies in Vellum Paper in Versamark Ink, emboss them with White embossing powder, ink all edges and cut them out.
  • Add Circle piece to card using Pop Dots.
  • Bend butterflies, add glue dots and adhere them to card.
  • Add a Clear button,Tangerine Twine and a couple of Gold Nailheads.
  •  

Card Recipe:
  • Cardstock: White, Sweet Mango (GKD), Vellum Paper (LSS)
  • Patterned Paper: Sundance Collection (GKD)
  • Ink: Versamark Ink
  • Embellishments: Clear button, Tangerine Twine, Gold Nailheads (GKD)
  • Accessories: Scor-buddy, Scallop Circle Nestabilities, Circle Nestabilities (Spellbinders), Pop dots, Mini glue dots, White Embossing powder, Embossing heat gun.

---------------------------------------------------------

Masculine tags:  Love this set, very masculine and a must have in your collection :) I used the sketch from CPS for my card.

Directions:
  • Make card base from Ivory CS. A2 size.
  • Stamp image onto Ivory CS in Faded Jeans Distress Ink (twice), cut it out (I don't have this die yet), then cut out the card from your second stamped image.
  • Die-cut and emboss a piece of Kraft CS using Labels Three Die. Add to card base.
  • Stamp saying  in Vintage Photo Distress Ink.
  • Mat a piece of In the Navy CS and Pool Side Patterned Paper. Add zig  zag stitches, add brads and jute twine and adhere piece to card.
  • Add tag piece to card with pop dots.

Card Recipe:
  • Cardstock: Ivory, Kraft, In the Navy (GKD)
  • Patterned Paper: Pool Side (GKD)
  • Ink: Faded Jeans, Vintage Photo (Ranger)
  • Embellishments: Brads, Jute twine (GKD)
  • Accessories: Labels 3 Nestabilities (Spellbinders), Pop dots, Sewing machine.

All the items in bold can be found at Gina K. Designs StoreNow, check out all the amazing designs and inspiration:

Thursday, March 8

Gina K. Designs March Release Party Invitation Blog Hop


The Gina K. Design Team is excited to invite you to another fabulous Release Party tonight!!! The party starts at 7:00 pm Central Time in the Stamp TV Release Party Forum. Join us for Challenges, Contest Questions, Design Team Samples, Full Stamp Set Reveals and, of course, party chit chat!!! Everything will go "live" at 7:00 pm Central in Gina's Store so there won't be any long wait to start shopping! Hope to see you there!


If you came from Emily's blog, then you're right where you should be. If not, please go to Stamp TV where you will find a list of all those participating.

Here's a sneak peek of one of the cards I will be sharing with you at the party tonight:


My card is showcasing images and papers from the new StampTV Kit!! You are going to love it, this kit has beautiful images and the new papers are gorgeous!!


Go to Jimmi's blog, to continue the hop and see you tonight at the party!

Friday, March 2

Vintage Post Card

Hello my friends! Hope you are having a fantastic day! I have another card using Vintage Postcard set from Sweet 'n Sassy Stamps! I really love this set. I used the sketch from Card Patterns and also playing the Love My Tapes Challenge (you are all invited to play along!) "Lace"


Directions:
  • Make card base from Ivory Cardstock.
  • Ink all edges of Patterned paper and Cardstock.
  • Mat Green CS and PP, add zig-zag stitches.
  • Adhere Pink CS panel, add stitches.
  • Stamp images onto PP, add embossed border and Lace Tape and add stitches.
  • Adhere panel to card base. Add a pin.
  • Die-cut and stamp postal image and adhere it over pin.

Card Recipe:
  • Cardstock:, Ivory, Textured Green and Pink (Core'dinations)
  • Patterned Paper: Pink Paislee.
  • Stamps: Vintage Postcard (Sweet 'n Sassy Stamps)
  • Ink: Vintage Photo, Tea Dye, Barn Door (Ranger), Tuxedo Black (Tsukineko)
  • Embellishments: Beige and Dark Pink Lace Tape (Love My tapes), Yellow Pin (Little Yellow Bicycle)
  • Accessories: Postal die (Sweet 'n Sassy Stamps), Border Die (Spellbinders), Sewing machine
Hope you like it!
Have a great day!

Thursday, March 1

Sweet 'n Sassy March Release


Welcome to the Sweet 'n Sassy Stamps March New Release Celebration!  The Design Divas are so excited to be kicking off this month's amazing stamp release with a blog hop today.  You are probably joining me from Kim Schofield's blog; if not, be sure to head back to the Sweet 'n Sassy Stamps blog so you don't miss a thing!

Here are my projects:

Congrats card: Using the new "Pennant Party" Set.

Directions:
  • Die-cut and emboss a couple of pieces of White Cardstock using Beaded Squares Dies. Create a card.
  • Die-cut a square piece of Patterned Paper and Light Blue Cardstock. Mat together and add zig-zag stitches. Adhere it to card base.
  • Stamp sentiment in Vintage Photo Distress Ink.
  • Die-cut pennants, stamp image onto pennants and add Star Dust Stickles. Set aside to dry.
  • After pennants are dried, adhere them to card.
  • Thread a yellow button with Twine and add twine bows.
  • Add clear rhinestones.

Card Recipe:
  • Cardstock: White, Light Blue.
  • Patterned Paper: Honey Cake Collection (My Mind's Eye)
  • Stamps: Pennant Party (Sweet 'n Sassy Stamps)
  • Ink: Vintage Photo & Mustrad Seed Distress (Ranger)
  • Embellishments: Yellow button, Twine, Clear Rhinestones, Star Dust Stickles.
  • Accessories: Pennants Dies (Sweet 'n Sassy Stamps), Beaded Squares & Squares Nestabilities (Spellbinders), Scor-tape, Sewing machine

-----------------------------------------------------------------------------------------

Vintage PostCard: Using the new "PostCard" Set


Directions:
  • Make card base from Ivory Cardstock.
  • Create a background with the long stamp image.
  • Stamp Post Card saying in Vintage Photo Ink.
  • Stamp postal image in Tea Dye Ink.
  • Distress all edges and mount this piece on Chocolate Cardstock. Add stitches.
  • Stamp "stamp image" , die-cut it and then add it to card with foam tape.
  • Tie on ribbon and copper tinsel.
  • Sponge cover of your card.
  • Adhere panel to card base.


Card recipe:
  • Cardstock: Ivory, Chocolate.
  • Stamps: PostCard (Sweet 'n Sassy Stamps)
  • Ink: Vintage Photo Distress, Tea Dye Distress (Ranger)
  • Embellishments: Seam Binding Ribbon, Copper tinsel.
  • Accessories: Post Stamp Die (Sweet 'n Sassy Stamps), Distresser (CTMH), Sewing machine, Pop dots, Sponges, Scor-tape. 
Hope you like my creations!

We hope you enjoy checking out the projects as much as we've enjoyed making them!  Ready to get started?  Your next stop is Holly McMillen's blog.
And just in case,  here is the whole list of team members hopping along with us today:

Giovana Smith---You are HERE


After the hop, make plans to join us for our New Release Party over in our Member Company Forums on Splitcoaststampers.  We'll have full reveals of all the stamp and dies sets being released this month, challenges to inspire you, and of course fun chatter with great friends!  See you there!

Pin It