Thursday, October 23

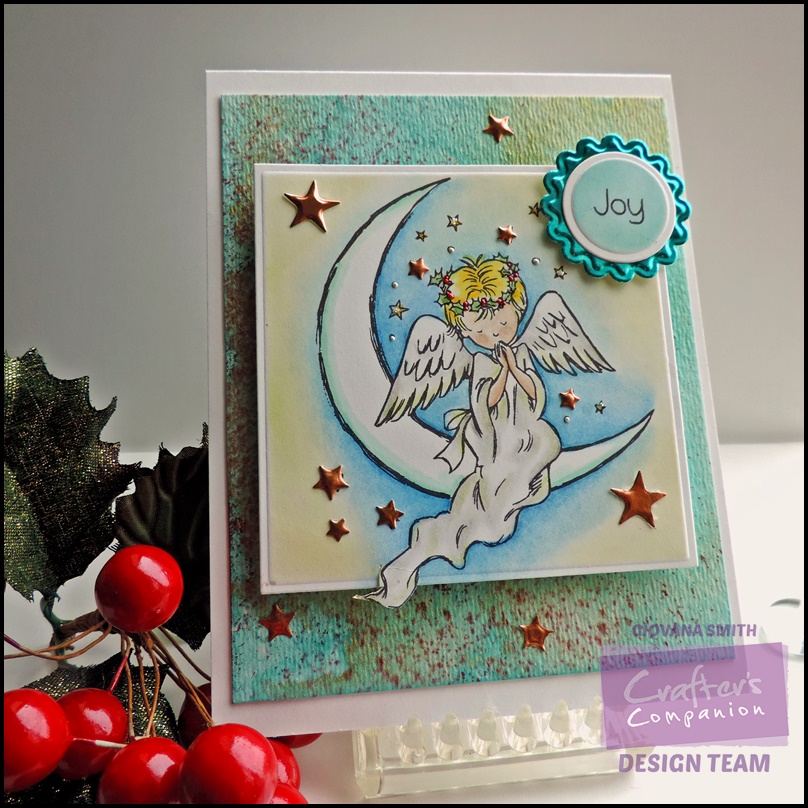
Joy

Hello friends! Hope your day is a good one. Christmas is going to be here before you know it and if you enjoy making and sending your own cards, I think this set would be a perfect one.
This set is called "Peace Angel" by Crafter's Companion.

Here are the details:


Submitting this project to:

Don't forget to enter my giveaway HERE!!


Hope you like it.
Have a fantastic day!

Tuesday, October 21

Crafter's Companion UK Birthday and a Giveaway!!

*** Giveaway is now closed ***

Hello friends! Hope your Tuesday is great! Crafter's Companion UK is celebrating its birthday and the CC USA sister is joining the celebrations as well!! This week Crafter's Companion USA has a week of sales! Who doesn't love sales {wink, wink}

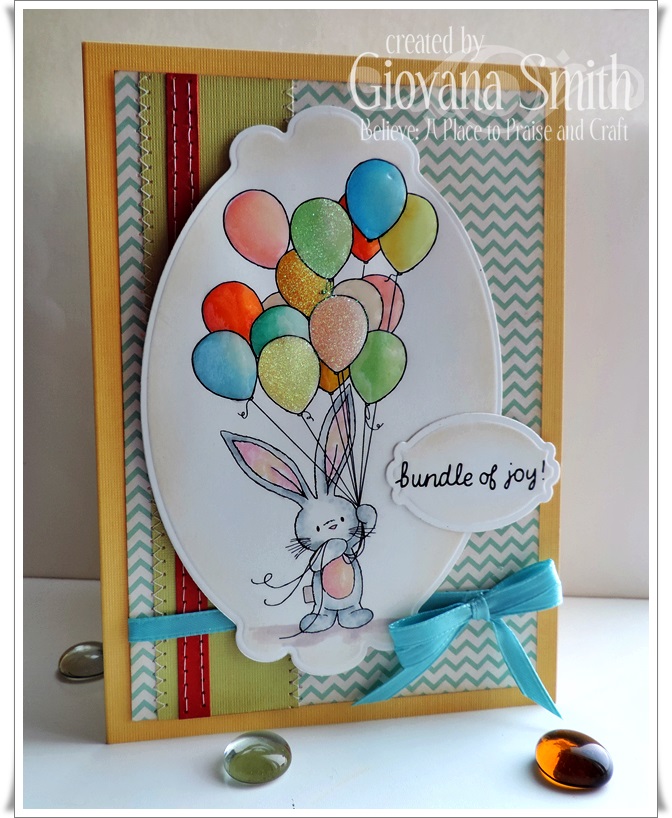
Today, I want to show you a card I made using a sweet Bebunni image, and you can get it for FREE if you place a qualified order over a CCUSA!!


This cute image was colored with Spectrum Noir Markers and Pencils:


Then I cut out part of the ear and die-cut the image with Circle dies and added a scallop red piece. Added a twine little bow and added stickles to the flower.

But wait!! That's not it, I have a beautiful set to giveaway! This Bebunni Celebration can be yours! What do you need to do? Just leave a comment and your name will be enter. 


I made this card some time ago with this set, you can find the info about the colors used HERE

That's it for today!!
Don't forget to leave a comment for your chance to win this set! You have until Sunday, October 26th (9pm Pacific Time) to enter!!

*** Giveaway is now closed ***

Saturday, October 18

A couple of "Clean and Simple" Christmas cards

Hello friends!! It's Saturday (night!) and I am here, blogging and relaxing on my couch after a day in the garden. My daughter and I cleaned  up 2 small boxes and 75% of the biggest garden box, we left tomatoes only on the ground, hopefully we will get more tomatoes before the real cold weather starts.
We harvested 22 pumpkins, 4 spaghetti squash, tomatoes, potatoes and beets!!

Anyway, after that I was so tired I only wanted to rest, I didn't even cook, ordered pizza and the family was happy. {wink, wink}

Ok, let me show you a couple of projects I made few days ago with a soon-to-be released stamps by Latina Crafter. I was in the Christmas and watercolor mood! They are super simple with lots of clean spaces (if you know my style, I love layers and layers)

Feliz Navidad: For this card, I stamped the trees on a piece of watercolor paper in versamark ink, added white embossing powder and heat set. Then I used my Inktense pencils and applied red, green, blue colors mixing them with a pencil until I got the background I wanted. Added a piece of dark green cardstock and zig-zag stitches. Then, addedthe panel to an A2 white card base. The sentiment was stamped on a piece of vellum in Versamark ink and gold embossing powder. Finally tied twine. My card was inspired the Fusion Sketch
Submitting this card also to: Virginia's View Challenge: Clean and Simple and Addicted to CAS: Vellum


Disfrutando esta Navidad: Means "Enjoying Christmas". Pretty much the same as the first card, for this one the same tree, I sprayed the image with sunflower and chocolate mists and blue intense pencil.Added straight stitches and die-cut the left side with a scallop line die. The sentiment was stamped tho the side, added red ribbon to create a nice contrast. I got inspired by the CAS(E) this Skech #96 


Hope you like them.
Have a great night!

Thursday, October 16

For You Tutorial

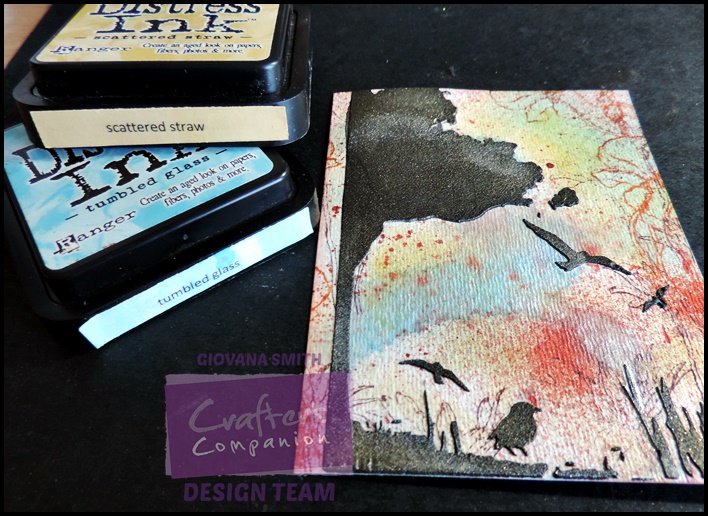
Hi friends! Today  I have a very simple and fun tutorial using brand new Sheena Douglas Stencils, this time I am using "Summer Meadow Stencil" and also new to the store Dreamweaver Embossing Pastes, in this project I am using Matte Black Embossing Pate.

Lets get started:

  •  Looks like this after all the pretty shimmering spray.

  •  Then, take your Claret StazOn Ink and stamp the daisies from Poppies and Daisies set. 


  •  While the paste still wet, sprinkle Dreamweaver Gold Metallic F/X. Set aside to dry. After it is completely dry, get a little bit of the gold fix and rub it on the embossed areas. It will give the black a really nice shimmer. 

  • This is the result. I added the embossed piece to an A2 card base, I added a strip of Candy Red Shimmering cardstock and few white stars I had leftover from the Christmas Wreath Die.

Hope you like it.
Have a great day.

Wednesday, October 15

Give Thanks

Hello friends! Today , I have for you a super easy card, yes, it's very easy. I used a couple of the new dies just released by Top Dog Dies.

Here are the details:

  • Make card base from Ivory cardstock. A2 size.
  • Mat a piece of red shimmering cardstock and an embossed dot background piece. Add stitches.
  • Leaves: Start with a piece of watercolor paper, (I chose watercolor paper because it can hold all the sprays and mists without changing its shape) mist the piece with Gold, Yellow, Green, Chocolate mists. I used different brands, but these are colors I used. Let it dry, then die-cut the leaves and acorn from Top Dog Dies Fall Foliage Die Set a couple of times. Shape the leaves to give them more dimension.
  • Add leaves and acorn to the card, add a gold bow and pearls.
  • Die-cut Top Dog Dies Give Thanks Die Set in Gold and Red Shimmering cardstock. Add them to card.


These are the dies used for this project:
Give Thanks Die Set

Fall Foliage Die Set

Hope you like it!
Have  fantastic day.

Tuesday, October 14

Christmas Bell Decoration.

Hello friends! How are you doing today? Hope you are starting a great week. I wanted to blog all weekend, but the nasty bug really hit us, cold, cough, headaches, more sleepy time and no energy at all. I disinfected my house yesterday, hopefully the bug is dead and I can come back into my normal and regular routine.

For now, I have a super cool Christmas project for you. I used my Ultimate, seriously the best tool on earth!! and the Angel Wings & Fancy Things Embossing Board to trace the bell and the Snowman Delight & Candlelight Embossing board for the holly leaves. I scored the bell on gold cardstock, then I dried embossed the 3 bells using Splendour embossing folder and for the leaves I used Green Envy Shimmering cardstock.
I created the beautiful bow using the Ultimate as well, the bows are amazingly easy t make and look a lot prettier than the other tool I used to use.
After I had all my pieces scored and cut out, I scored the bell in the middle and adhered strong red tape and put them together. Then, added the leaves, decorated them with red pearls and finally added the big bow.


I think this is perfect to decorate your Christmas tree or maybe your table. What do you think?

Hope you like it.
Have a fantastic day!

Thursday, October 9

Time for Tea


Hello friends!! Today, I have a super cute card for you, I wanted a monochromatic look and I loved the results.

This image is from the new collection form Moonbeam Meadow Time for Tea set. I colored the image with Spectrum Noir Markers TN1, TN2, GB1, GB2 and Spectrum Noir Pencils 088, 090, 094. I started with markers and added the shadows with the pencils. I colored the banners from an extra image and cut them out, mountain them with foam adhesive and added Star Dust Stickles. Then the panel were added to a white cardstock base card.
It was very easy and fun to create.


Submitting this project to:


Hope you like it!
Have a fantastic day!

Wednesday, October 8

Happy Birthday Top Dog Dies

Hello friends! Hope you all are having a fantastic Wednesday. Today, I want to show you a Fall Birthday card, I really, really (yes, I wrote really twice) like how it turned out! Fall is in the air and I think this card can make anybody's day! Also, a good way to celebrate Top Dog Dies 1st Birthday!! and what a better way to celebrate that with some saving!! You can purchase the new dies or any other dies with this coupon codes!


Here are the details:

  • Start making a card base from White cardstock. 5" square card.
  • Cut a panel from Patterned Paper 4.5" square and White wood grain cardstock (Gmund Savanna).
  • Add panels to card base with foam adhesive.
  • Die-cut Top Dog Dies Scallop Frame and Mat Die Set in White cardstcok. Cut bottom part of the Mat die to 4". This way you are creating a 4"x4" frame. Adhere it to card panel.
  • Add scallop frame to card panel with dimensionals.
  •  Die-cut Top Dog Dies Fall Foliage Die Set in the same wood grain cardstock. Sponge leaves to Distress Inks.
  • Adhere the leaves and acorn to card.
  • Die-cut a banner from Top Dog Dies Banners #1 in White cardstock, stamp sentiment.
  • Finally apply a light mist of yellow and add pearls.


Hope you like it!
Have a fantastic day!

Tuesday, October 7

Christmas Angel and a HSN show


Hello friends! How are you doing today? Hope the germs are away from your household, sadly some have come here and my poor head has been in pain, hopefully I will start feeling better soon.

Anyway, I have some exciting news to share with you! I have been working on some very special projects for a Crafter's Companion HSN show!! YAY! You can check out the TV show schedule in the picture above.

See this cute Christmas angel? I made it especially for the show! Super easy to make. I scored the angel using Angel wings & Fancy things embossing board (3x) and Gold Dust Shimmering cardstock, then I embossed them using Petite dot embossing folder, score them in half and used red tape (super strong), when you have the last angel, insert copper tinsel.
After that, take white tulle and add a couple of pieces on each side, then finish your project with coordinate ribbon (I have this antique ribbon I got from a state sale)


High view of the angel.

Hope you like it and can be able to watch the show!
Let me know if you watch the show.

Giovana

Saturday, October 4

It's World Card Making Day!!


Hello friends! Hope you all joined the celebrations for World Card Making Day! Today, I played with a couple of challenges from Latina Crafter. I really tried to play and joined more challenges, but sadly a bad headache sent me to take a nap and relax for awhile.

Now, I want to show you the cards I created with 2 of the 3 challenges posted HERE, each sketch has a theme.

My first card follows the sketch + Christmas theme. I used a piece of gold crafting metal sheet heat embossed the image in black.  The image is from the  "Nativity" set and the sentiment is from "Adorad al Salvador".  For the blackground I used the dot stencil and distress ink to create a soft area.


The second sketch + "Pink" theme. I wanted to create a CAS card and I really love how it turned out. This card was done in no time, I stamped the ribbon in pink ink, then I used a fine black marker to outline the image. I used the dot stencil again to create a bottom border, I used distress inks for this. Then, I stamped the sentiment in red ink, it means "Hope, love, faith" Finally, I added a swirl die-cut panel in pink cardstock, stitches and ribbon and the card was done. The image and sentiment are from "Dando la pelea" set.


I am submitting this card to:

**You can join the celebrations from WCMD over at Latina Crafter. The challenges are open to everybody until October 10th, you can use any products you own** 

Hope you like them!
Have a fantastic day

Friday, October 3

Sweet 16 Invite

Hello friends! It's Friday!! And today I have a fun and sweet card for you using some fun and soon-to-be-released dies from Top Dog Dies!!

For my card I sued the sketch from Sketch Saturday. I wanted my card simple and elegant and I think I scored it :)


I made my card in Spanish "Estás invitado" means "You are invited" and I thought a cute sweet 16 in pink would be perfect.

Here are the details:
  • Make card base from White cardstock.
  • Mat a piece of Pink cardstock and Patterned Paper, add stitches.
  • Die-cut a couple of frames in pink cardstock and one in white.
  • Stamp sentiment on White frame
  • Add ribbon and twine to lower label.
  • Add labels to card panel.
  • Die-cut vintage number in gold metal sheet. Adhere them to white frame with hot glue.
  • Add pearls.


These are the dies I used:

Submitting this project to:
Hope you like it!!
Have a fantastic day!

Falling leaves

Hello friends! Hope you are starting a great day! Fall is here for sure, weather is getting cooler and leaves are falling and changing colors, ahhhh, my favorite season for sure. Do you like Fall? or do you prefer warmer weather? Just curious.

Today, I want to show you a card I made using this beautiful image "Falling Leaves" stamp set by Sweet 'n Sassy Stamps.

Here are the details:
  • Make a card base from white cardstock. A2 size.
  • Cut a card panel from white cardstock, stamp image in orange and red ink.
  • Outline some of the leaves with a fine black markers, then add a little shadow with a white gel pen. Using Distress ink, color the background.
  • Mat piece with a slightly bigger piece of orange cardstock and add stitches.
  • Die-cut a leave from Leaf Silhouettes Die set, stamp coordinated image and sentiment. Ink all edges with Vintage Photo Distress Ink. 
  • Add panel to card base, add leave with foam adhesive.


Hope you like it!
Have a great day!!

Thursday, October 2

Crafter's Companion October Challenge.


Hello friends! Hope  you all are having a great day! I've been  a little bit sickie, just need more hours on the day to "sleep more" and "do less". Oh well, we always can dream about it.

Today, I am bringing you the brand new Crafter's Companion Challenge "Buttons & Bows"

And more fun news, you can use ANY product you have to participate, read all the rules and details HERE.

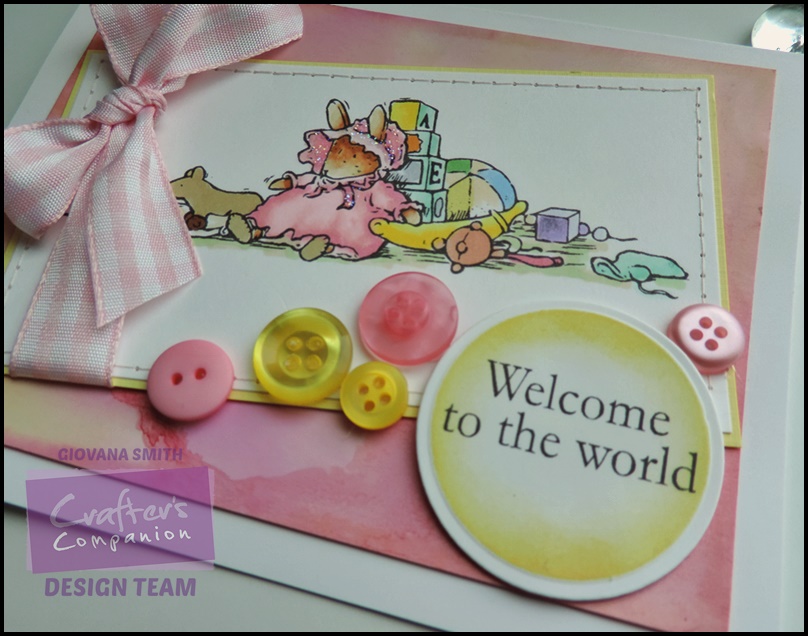
This is the card I created for this challenge, I used a brand new stamp Poppy's Babies from the Brambly Hedge Collection.

Here are the details:

  • Create a card base from Ultra Smooth Premium White Cardstock. A2 size.
  • Cut a panel from Glossy White cardstock (3.75" x 5"), scribble Spectrum Noir Markers CR6, DR5, SB4, PP2 on a plastic bag, spray alcohol on it and then rub your glossy piece to get the colors, set aside to dry.
  • Stamp image on Ultra Smooth Premium Cardstock, color image with Spectrum Noir Markers
    • Mouse: TN1, TN2, TN3, TN4
    • Dress: PP1, PP2, PP3
    • Ball: LY1, TB1, LG3, TN1
    • Cubes: BT1, BT2, CT1, CT2, OR1, IG2
    • Little cube: LV1, HB1
    • Other toys: CT1, CT3, BT1, BT2, EB2, EB3, 
    • Floor: LG2, EB1
  • Stamp sentiment on White cardstock. Die-cut, emboss and stencil it with Circle Dies.
  • Add glossy piece to card base, then add image (I matted it with a yellow piece and added stitches), tie ribbon on image.
  • Add yellow and pink buttons.
  • Add sentiment with foam adhesive.


Submitting this project to:


Hope you like it!!
Have a fantastic day!