Friday, May 13

CSS Alumni "Sketch Blog Hop"

Hello my friends! Welcome to another CSS Alumni Blog Hop. This time, we have a beautiful sketch by our very talented Melissa Cash.


Now, if you are here from Joy's blog you are in the right place, if not please start from StampTV so you don't miss any of the wonderful creations :)

Here is my take on the sketch.

Directions:
  • Make card base from Kraft Cardstock using Circle Eyelet Nestabilities.
  • Die-cut a piece of patterned paper using Circle Nestabilities, emboss and stencil it as well.
  • Die-cut, emboss and stencil a piece of White Cardstock using Oval Nestabilities, Adhere it to card with tape.
  • Stamp image on White Cardstock in Memento Tuxedo Black, color it with Prismacolor Pencils. Cut out image and add Stickles.
  • Stamp sentimento on White CS in Vintage Photo Distress Ink. Die-cut, emboss and stencil it using Fancy Tags Nestabilities. Cut out right side of tagd and adhere it to card with Foam tape.
  • Adhere cut out image to card.
  • Add 3 Medium Nailheads and bow.

Card recipe:
Now, hop over to Deb"s blog and see what she has done for us today.

Make sure to leave a comment as you hop along because on Tuesday morning (May 17th), we will randomly choose one of the comments from all the blogs who will get a stamp set of their choice valued up to $24.95!

Have fun hopping!
Thanks so much for stopping by.

Thursday, May 12

Sew Fun GKDT Blog Hop

Hello my friends! Hope you all are having a great day. The members of Gina K.'s Design Team have come together to host a hop with sewing as the center theme. Along the hop you will find a variety of sewing techniques from hand sewing to faux sewing!

If you came from Emily's blog,you're at the right place. If not make sure to head over to StampTV where you will find a list of all those participating in today's hop.

Here is the card I made. I used straight and zig zag stitches on my card :)

Directions:
  • Make card base from Kraft Cardstock. A2 size.
  • Cut a piece of Patterned paper (Butterfly Garden Collection), ink all edges, mat this with a piece of Ocean Mist cardtsock. Add zig zag stitches.
  • Tie on ribbon.
  • Ruffle with lace and adhere it to card.
  • Stamp sentiment onto foam label frame in Vintage Photo Distress Ink.
  • Stamp bird on Ivory Cardstock in Vintage Photo Ink, cut it out and adhere it to card with foam tape. Add Stickles.
  • Add Gold Nailheads.


Card Recipe:
Head on over to Janice; to see what she's sharing with you today!

Have fun hopping!
Hope you like my creation :)

Tuesday, May 10

It's Release time! Bella Rose Collection is Here!!

Hello my friends! Hope you all are having an awesome day! Today is the day!! The beautiful Bella Rose Collection is finally here. The Bella Rose Collection features 8 new PreCut Stamp Sets that coordinate with a new exclusive Heartfelt Creations die, manufactured by Spellbinders.

So, for today I am featuring 2 new set from this collection.

It's your Birthday

Products used:
Directions:
  • Make card base from White cardstock, size 4.25" x 5.5". Die-cut a beaded oval, emboss and stencil it as well, adhere it to card.
  • Die-cut a piece of Patterned Paper from Butterfly Garden Collection (Pink Paislee), emboss and stencil it with Oval Nestabilities. Adhere it to card with foam tape.
  • Stamp Rose from HCPC3394 Classic Bella Rose Pre-Cut Set on White Cardstock in Versamark ink, add Gold embossing powder and heat it up. After it cools off, die-cut image using Bella Rose Die. Adhere image to card with foam tape.
  • Stamp image on White Cardstock in Vintage Photo Ink, die-cut, emboss and stencil it with Oval Nestabilities.
  • Die-cut a piece of Pink cardstock using Border die, adhere it to card.
  • Tie on ribbon.

Special-Tea Card

Products Used:
  • HCPC 3393 Tea with Bella Pre-cut Set
  • Other: Cardstock: Coredinations (Katydid, Rose embroidery); White (GKD); Ink: Memento Tuxedo Black, Prismacolor Pencils: 911, 912, 922, 926, 937, 941, 946, 904); Star Dust Stickles; Pearls, Yellow, Satin Ribbon, Butterfly Garden Patterned Paper (Pink Paislee), Zip Dry Paper Glue.
Directions:
  • Make card base from Katydid Cardstock, 5.25" square.
  • Mat a piece of Rose Embroidery Cardstock (5" square) and Patterned Paper, ink alle dges on Patterned Paper and add stitches.
  • Stamp image on White Cardstock in Memento Tuxedo Black, color it with Prismacolor Pencils (911, 912, 922, 926, 937, 941, 946, 904). Add stickles to rose and leaves.
  • Mat image piece with Rose Embroidery Cardstock, ink all edges on image piece, add stitches. Distress all edges.
  • Punch out side right side of image piece, add Yellow Ribbon and adhere it to card.
  • Add Pearls.
  • Inside: Cut a piece of 4.75" square white Cardstock, add a strip of patterned paper, ink all edges. Stamp sentiment and adhere it to card

Would you like to win this wonderful collection? Leave a comment here on this post and also on the Heartfelt Creations blog, you can visit also all the DT blogs for more chance to win, on May 17 one lucky person will win the entire release valued at $149.99. The winner will be announced on the HC blog on May 18.

Have fun hoping!
Have a great day!!

Monday, May 9

Pretty Bethany

Hello my friends! Hope you are having a great day! I have been really busy and I am looking forward to some relaxing summer time! LOL. DD is only 1o lesson away to finish her school year and we are so excited! I get my summer break too :) I have lots of plans for this Summer that I can't wait to start.
Anyway, today I have another card using Picking Flowers Bethany! Isn't she adorable :) My daughter loves her too, she told me we should name one of the wild bunnies we have around "Bethany", I think it is a good idea :)

This card is very simple and I hope you like it.

 Directions:
  • Make card base from White Cardstock.
  • Punch out flower border onto Patterned Paper and adhere it to front card. Tie on ribbon.
  •  Die-cut yellow cardstock using Eyelet Circle Nestabilities. Adhere it to card.
  • Stamp image on White Cardstock in Memento Tuxedo Black. Color image with Copic Markers.
  • Die-cut and emboss image using Circle Nestabilities. Adhere it to card with foam tape.
  • Add Stickles to flowers.
  • Stamp sentiment in White CS in Vintage Photo Distress Ink. Die-cut, emboss and stencil it using Label 8 Nestabilities. Adhere it to card. Add yellow paper flower.

I am submitting this card to:
Hope you like it!
Have a fantastic Day!

Sunday, May 8

Happy Mother's Day!

Hello my friends! I wish you all are having a great Mother's Day! full with blessings.

I lost my mom almost 25 years ago and I miss her every single day. I know she lives in a precious and wonderful place, but I have my days when it hits more and today it is one of those days.

So, for you my wonderful friends I made this card, enjoy your day :)


The saying is for the new collection from Heartfelt Creations, this set is called Sentiments for Mom


Hope you have a great day!
God bless you all
Giovana

Saturday, May 7

Scrappy Saturday Challenge #53: The Greeting Farm

Hello my friends! Welcome to another Wee Memories Scrappy Saturday Challenge and also our monthly Blog Hop. So, if you are from Anita's blog, you are in the right place, if not, please start from Jenny's blog. Also, this month we have 2 very especial Guest Designers!!

This week our sponsored is The Greeting Farm and our challenge is C.R.A.F.T.S (Color, Ribbon, Acrylic, Floral, Twine, Stamps) any or all.


For my card I used Chibi Guitar Digi Image, she is super cute and so much to color.

Directions:
  • Make card base from Kraft Cardstock.
  • Mat Sweet Mango CS and PP. Add stitches.
  • Die-cut a piece of PP using Label 8 Nestabilities. Mat this with a piece of Sweet Mango CS. Adhere it to card.
  • Stamp swirls and add Liquid Pearls.
  • Print digital image, color it with Copic Markers. Die-cut and emboss image using Oval Nestabilities. Adhere it to card with foam tape.
  • Add Crystal Lacquer to hair and glitter to dress.
  • Draw grass with Copic Markers.
  • Add button with twine.

Card Recipe:
  • Cardstock: White, Kraft, Sweet Mango (GKD)
  • Digital Image: Chibi Guitar (The Greeting Farm.
  • Stamps: Bring the Bling (GKD)
  • Paper: Togetherness (Cosmo Cricket)
  • Embellishments: Blue button (GKD), Lemon Drop Twine (The Twinery).
  • Accessories: Oval Nestabilities, Label 8 Nestabilities (Spellbinders), Sewing machine, Liquid pearls, Foam tape, Glue dot, Crystal Lacquer.
Now, it is time to hop over to Iwona's blog.

The deadline for this challenge is 11.59pm PST on Friday, May 13,  2011. For more details, some fabulous design team inspiration and to link up your projects, click here
Have a great day!!

Friday, May 6

Have a happy day!


Hello my friends! Hope you are having a good day! I have a happy card for you today. StampTV has started new challenges and today is "Free for All Friday". Theresa has created a beautiful sketch and this is my take on it. I really missed sewing on my cards, so I decided to take a Tylenol and start sewing, LOL.

Have a happy day!

Directions:
  • Make card base from Lemon Drop CS.
  • Mat a piece of Grass Green CS with PP (Butterfly Garden Collection), ink all edges on PP. Add stitches and adhere it to card.
  • Stamp image on White CS in Memento Tuxedo Black. Color image with Prismacolor Pencils.
  • Die-cut, emboss and stencil image with Rectangle Nestabilities. Mat this piece with a Fleur de Lis Frame. Cut middle are to fit on image. Adhere it to card with foam tape.
  • Stamp sentiment on White CS in Memento Tuxedo Black. Die-cut, emboss and stencil it with Oval Nestabilities. Adhere it to card.
  • Add Nailhead on right bottom.
  • Add Crystal lacquer to mushrooms and leave. Set aside to let it dry.

Card Recipe:
  • Cardstock: White, Lemon Drop, Grass Green (Gina K. Designs)
  • Paper: Butterfly Garden (Pink Paislee)
  • Stamp: Little Critters (Gina K. Designs)
  • Ink: Memento Tuxedo Black (Tsukienko), Vintage Photo Distress (Ranger Industries), Daffodil Delight (SU), Prismacolor Pencils.
  • Embellishments: Gold Nailheads
  • Accessories: Rectangle Nestabilities, Oval Nestabilities, Fleur de Lis Frame Dies (Spellbinders),  Scor-tape, Sewing machine.
All products in bold can be found at Gina K. Designs Store.

Hope you like it!
Have a great day!

Thursday, May 5

If I had a flower

Hello my friends! Hope you are having a great day! Sorry for my lack of posting this week, tons of things to do and so little time, in addition of some back problems, my stamping time is very limited now.

Anyway, I have some exciting news for you, I am guest designing for Sweet'n Sassy Stamps this month!! I created a cute card with the new Picking Flowers Bethany, love this set very much, you can check out the post here and also all the details :)


Thanks so much!
Giovana

Wednesday, May 4

To cheer you

Hello my friends! Hope you are having a great day. Today I have a "cheerful" card for you. I used one of the new sets from Heartfelt Creations "Luscious Cherry Swirl Set". A simple card to cheer your day up :)

Products I used in this card:

Directions:
  • Make card base from White Cardstock. A2 size.
  • Mat Red cardstock (4.75" x 3.5") and Patterned Paper. Add stitches and adhere it to card.
  • Cut a strip of Green cardstock (1.5" x 5.5") and emboss it using Seeing Spots folder. Adhere it to card.
  •  Stamp image from HCPC 3387 Luscious Cherry Swirl Pre-Cut Set on White Cardstock in Memento Tuxedo Black. Color image with Copic Markers: R27, YG95, 0.
  • Die-cut, emboss and stencil image using Large Oval Nestabilities and Grand Calibur.
  • Stamp an extra image, color it and cut out leaves are, adhere it to main image.
  • Mat Oval image with a piece of Cranberry Cardstock. Adhere it to card with Foam tape. 
  • Add Crystal Lacquer to image and set to dry.
For more inspiration and eye candy, visit the Heartfelt Creations Blog. The DT has always awesome creations :)

Hope you like my card.
Have a great day!

Saturday, April 30

Wee Memories Scrappy Saturday Challenge # 54: Paper Piecing

Hello my friends!! Welcome to another Wee Memories Scrappy Saturday Challenge #54. This week our challenge is "Paper Piecing", this is one of the techniques I used to do a lot when I started making cards, so glad to do something I hardly do nowadays.


This week we are sponsored by Tiffany Doodles, great company with awesome Digital Images. One lucky winner will get a $15.00 Gift Certificate Prize!!
  
For you

Directions:
  • Make card from Textured Bluff Cardstock. (Size 5" square)
  • Emboss front of card .
  • Print image on White Cardstock, green and pink patterned paper.
  • Cut out leaves from green PP and glue them on White CS, do the same with flowers from pink PP.
  • Mat White CS with Burgundy CS and add stitches. Add punch border piece. Adhere to card.
  • Stamp sentiment, die-cut, emboss and stencil it with Circle Nestabilities. Add to card with foam tape.
  • Add Gold gala Glitz to flowers, then add Crystal Glitter to all flowers and leaves. Set to dry.

Card Recipe:
  • Cardstock: Bluff (Bazzill), White, Cranberry Tart (GKD)
  • Digital Image: Dogwood Branch (Tiffany Doodles)
  • Stamp: Sent. from Garden Silhouettes (GKD)
  • Ink: Walnut Stain Distress (Ranger Industries)
  • Embellishments: Gold Gala Glitz, Gold Rhinestones
  • Accessories: Border Punch (Fiskars), Sewing machine, Embossing folder, White Clear Glue.
The deadline for this challenge is 11.59pm PST on Friday, May 6,  2011. For more details, some fabulous design team inspiration and to link up your projects, click here
Have a great day!!

Friday, April 29

CSS Alumni Blog Hop: "Stamp TV Kit"

Hello my friends! Welcome to another CSS Alumni Blog Hop. This time we are showcasing any of the StampTV kits, and I decided to play with "Springtime Silhouettes" (brand new one).
If you are here from Jennie's blog you are in the right place, if not, please go to StampTV and start from there, so you don't miss any wonderful creation.

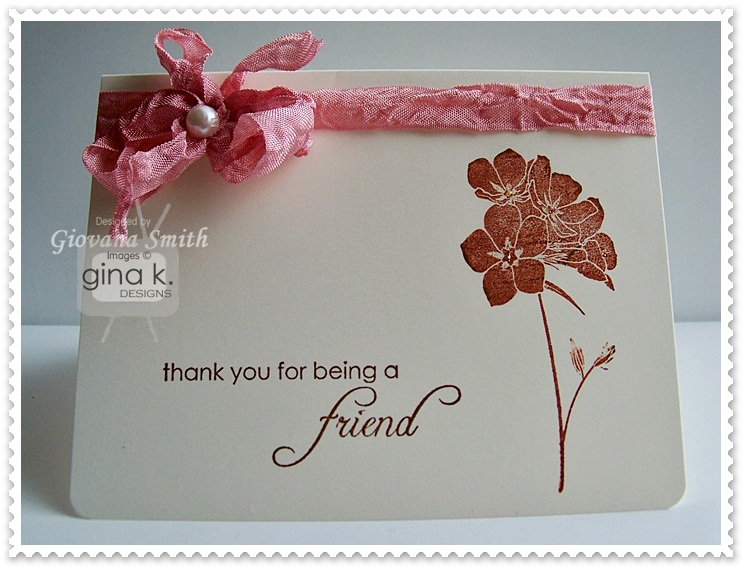
My card is a CAS creation, super easy!!

Directions:
  • Make your card base from Ivory CS. Punch bottom corners
  • Stamp image in Tea Dye Distress Ink, add Walnut Stain on all borders.
  • Stamp sentiment in Walnut Stain Distress Ink.
  • Tie on Seam Binding Ribbon, make a bow and add pearl.
Card Recipe:
Now, hop over to Cheri's blog and enjoy her beautiful creation.

Thanks so much for stopping by!
Have fun hopping.

I am submitting this card to "Less is More Challenge"

ETA: Gina will randomly choose a winner who will get to choose ANY past StampTV kit of their choice. She will announce the winner on Tuesday morning!! Don't forget to leave a comment for your chance to win :)

Wednesday, April 27

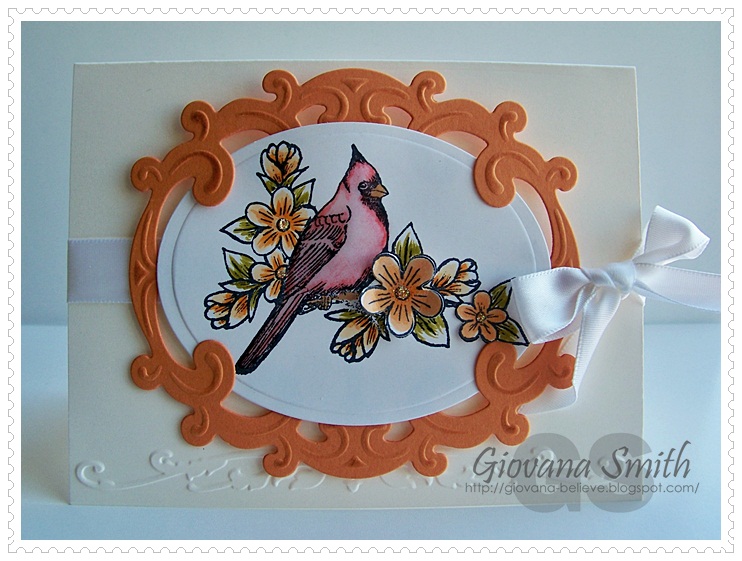
Cardinal Springtime Collection Cards

Hello my friends! Hope you are having a great day! I have 3 cards I made using new stamps from the new Springtime Cardinal Collection from Heartfelt Creations. Have you seen the entire collection? Not yet? Well, check it out HERE.

Cardinal Card #1:

Products used:
  • HCPC 3388 Spring Cardinals PreCut Set.
  • HCD 701 Posy Patch Die
  • HCD 708 Decorative Window Scene Die
  • Teal Gala Glitz
  • Crystal Lacquer
  • Grand Calibur

Directions:
  • Make card base from Bazzil  Handsome Cardstock. 5" square card.
  • Cut a piece of White Heart Embossed Cardstock (Making Memories) 4.75" square. Add to card base.
  • Cut a strip of Handsome CS (2" x 5"), tie White Lace around and adhere it to card.
  • Die-cut, emboss and stencil Window Frame. Adhere it to card.
  • Stamp image from HCPC 3388 Spring Cardinals PreCut Set, color it with Copic Markers: R48, B000, B21, YG95. Die-cut and emboss and adhere it to card.
  • Add extra flowers and Teal Gala Glitz.
  • Add Crystal Lacquer to Cardinal and set to dry
Cardinal Card #2:

Products used:

  • HCPC 3388 Spring Cardinals PreCut Set
  • HCD 710 Decorative Oval Window Die.
  • HCD 701 Posy Patch Die
  • Oval Nestabilities.
  • Antique Rose Glitter.
  • Crystal Lacquer
  • Directions:
  • Makce card base from Ivory Cardstock. A2 size.
  • Dry emboss bottom border with Organic Flourush folder. Tie on ribbon.
  • Die-cut, emboss and distress Orange Cardstock using HCD 710 Decorative Oval Window Die.
  • Stamp image from HCPC 3388 Spring Cardinals PreCut Set  on White Cardstock in Memento Tuxedo Black. Color Cardinal with Prismacolor Pencils and  flowers and leaves with Copic Markers: YG95, YR14, YR16. Die-cut and emboss image with Oval Nestabilities. Adhere it to card.
  • Add extra flower to image and glitter to center of flowers.
  • Add Crystal LAcquer to Cardinal and set to dry.

Cardinal Card #3:

Products used:
  • HCPC 3386 Cheery Cardinal PreCut Set
  • HCPC 3387 Luscious Cherry Swirls Pre Cut Set.
  • HCD 704 Perfect Petals Diecut
  • HCD 706 Cardial Family Diecut
  • Label 8 Nestabilities
  • Grand Callibur
  • Directions:

  • Make card base from Pearl Cardstock (Bazzill), card size 5.5" square.
  • Punch bottom front. Add a strip of Red Cardstock. Tie on ribbon and make a bow.
  • Die-cut and emboss (2) Corner Die from HCD 704 Perfect Petals Diecut in Pink Cardstock.  Adhere them to card.
  • Stamp image from HCPC 3386 Cheery Cardinal PreCut Set On White Cardstock in Memento Tuxedo Black twice, color Cardinal image with Prismacolor Pencils, flowers, leaves and cherries with Copic Markers: YG95, Y13, Y15, Y17, R29, 0.
  • Die-cut Cardinal image and adhere it to card with foam tape. Cut out extra cherries and flower and adhere it to card with foam tape as well.
  • Adhere it to card with Foam tape. Cover image with Crystal Lacquer and set to dry.
  • Inside: Cut a strip of Red Cardstock and adhere it to bottom part. Stamp cherries  in Tea Dye Distress ink.
  • Stamp Sentiment on Ivory CS in Memento Tuxedo Black. Die-cut, emboss and stencil it with Label * Nestabilities.
  • Adhere sentiment to card.
Visit the Heartfelt Creation Blog for more Inspiration.

Have a great day!

Tuesday, April 26

Gina K. Designs April Inspiration Blog Hop Day 3: What's the dirt?

Hello my friends! Welcome to day 3 and last day of our Inspiration Blog Hops. Today, we are showcasing What's the dirt? set. I love this set. I love gardening, so when I first this set I was in love instantly :) My garden is doing more or less, just hope the weather make its mind so I can transplant more veggies :)

Friends are flower in the garden of life: This card is super simple with lots of dimension. I started my card with White CS, added some pink grosgrain adhesive tape, then added some lace ribbon. Die-cut and emboss Innocent pink CS using Rectangle Nestabilities. Embossed the smalles piece with Swiss Dots folder and  added to card using the deboss part. I stamped the image on White CS, colored it with Copic Markers and die-cut and embossed it with Oval Nestabilities. The sentiment was stamped in Vintage Photo Distress Ink. I added some Crystal Lacquer on the image.


Ready for more inspiration? Visit each of the DT blogs listed below and don't forget to leave a comment for your chance to win too!!
Thanks so much for stopping by!
Have fun hopping.

Monday, April 25

Gina K. Designs April Inspiration Blog Hop Day 2: Branching Out, Follow your Dreams

Hello my friends and welcome to Day 2 of Gina K. Designs April Inspiration Blog Hop. Today, we are showcasing 2 wonderful sets: Branching Out & Follow your Dreams.

Branching Out Set: I created this 4.5" square card. I cut a piece of 4" Ivory CS, ink all edges and embossed it with Swiss Dots folder, tied on ribbon. Die-cut, emboss and stencil a piece of Ivory CS using Fleur de Lis big die. Adhered it to card with pop dots. Stamped image in Vintage Photo Distress Ink, the sentiment was stamped in Tea Dye Distress Ink (tis is from the new StampTV Kit). Added to card with pop dots and added 3 small nailheads.


Follow your dreams Set: This set is fantastic! I made a Masculine card and I paper pieced the boat with 2 different PP. The paper is from Wanted Collection (Cosmo Cricket).

Now, for more inspiration visit the DT blogs posted below and also don't forget to leave a comment for your chance to win!
Have fun hopping.
Thanks for stopping by!

Saturday, April 23

Scrappy Saturday Challenge #53: Magnolialicious

Hello my friends and welcome to another fun Scrappy Saturday Challenge. This week our challenge is Sponsored by Magnolia and the theme is "Girls Just Wanna Have Fun!" How fun is that?!


One lucky winner will get 3 Mini Magnolia Stamps!!


And this is what I came up with.

Directions:
  • Die-cut a couple of pieces of White CS using the Biggest die from Label 8 Nestabilities.
  • Die-cut a piece of PP using the second biggest die from Label 8. Ink all edges. Add White lace around.
  • Trace the second biggest die onto your Yellow CS and cut it out, mat this with PP piece. Tie on ribbon.
  • Stamp image, color it with Copic Markers. Die-cut, emboss and stencil image with Oval Nestabilities. Adhere it to card.
  • Make paper flowers from Tissue paper (see direction HERE) and adhere them to card.
  • Add Star Dust Stickle to image.

The deadline for this challenge is 11.59pm PST on Friday, April 29, 2011. For more details, some fabulous design team inspiration and to link up your projects, click here

The flowers were inspired by the Tuesday Trigger Challenge over at the Moxie Fab World


Hope you like it.
Thanks so much for stopping by!