Friday, April 22

Gina K. Designs. April Inspiration Blog Hop: Garden Silhouettes (One free with 3), Timeless Textures

Hello my friends! Welcome to Day 1 of Gina K. Designs April Inspiration Blog Hop! Today we are showcasing 2 beautiful sets: Garden Silhouettes (this set is free with the purchase of 3 sets!) and Timeless Textures (love this set very much!!)

Garden Silhouettes: This set is fantastic for CAS and quick cards. I made a little experiment using Memento Sweet Plum Ink and here are the results:

With Sympathy: I added enough ink to the image, then sprayed the image using Mini Mister (water mixed with Perfect Pearls) and stamped the image onto White CS. I didn't like it much, so I added Pink Copic marker around the image, this way the borders get a little darker and also creates a little shadow. Then die-cut, emboss and stencil it.


Many Thanks: I did the same as before, but here I sprayed the image from about 15 inches distance and stamped it.
I paper pierced the top corners and added pearls.


Birthday Wishes: This image was stamped the regular way. No spray used.
The patterned paper is from the new StampTV Kit. I added some Gold Nailhead in opposite corners.


Timeless Textures: I made a couple of cards using this set :)

Happy Birthday: For this card I stamped the smallest images onto White Cardstock, using Tea Dye Distress, Memento Sweet Plum and Memento Tangelo. I matted them with Sweet Mango, Kraf and Lilac CS! I stamped the largest image at the bottom and  the sentiment on top. The sentiment is from Theresa's new set: Follow your dreams.


With Love: For this card I used the polka dot image, using the stamp-a-majig I created the whole BG. The sentiment is from Garden Silhouettes set.


Are you ready for more inspiration? Visit all the blogs listed below and also don't forget to leave a comment for your chance to win :)


Have fun hopping!
Thanks for stopping by.

Thursday, April 21

Release Party Invitation Blog Hop

Hello my friends! Are you all excited about Gina K. Release tonight? I hope you are because the new sets are awesome!!
The GKDT has prepared a nice Blog Hop so you can see little sneak peeks of what you are going to see at the Party tonight, so if you are here from Emily's blog you are in the right place :)

Here is my sneak peek, any guesses?

Now, it's time to hop over Janice's blog and see what she has prepared for us tonight.

Don't forget the Party starts at 7:00 -9:00 pm (Central Time) at StampTV, see you there :)

Wednesday, April 20

Miss you

Hello my friends! Hope you are doing well. Here, I've been working on projects like crazy, in addition that I've been having back problems, agggghhhh, but today I am feeling much better and after finishing school with DD I decided to make a card just for fun! I was having so much fun that I even made my own paper flowers, so easy and so pretty!!

So, this card was inspired by several challenges I found on the web:
  

Directions:
  • Make your card base from White Glitter CS. 5" square.
  • Stamp image on White Cs in Black Ink. Color it with Copic Markers: Hair: E31, E33, E35, E37. Outfit: V01, V12, V15. Face: YR000, YR00. Wings and hands: R20. Die-cut, emboss and stencil it with Rectangle Nestabilities.
  • Die-cut PP with Rectangle Nestabilities as well.
  • Cut a piece of Lavender CS and adhere to card.
  • Die-cut scallop border and adhere to card.
  • Adhere Rectangle pieces to card. Glue butterfly.
  • Add flowers and sentiment.
How to create my flowers:
  • Yellow flower: Start with a piece of White Tissue paper, add ink direct onto paper using ink pad (Here I used Daffodil Delight). Fold tissue paper in 4 and die-cut it.
  • Purple flower: Start with a strip of White Crepe Paper. Add ink from ink pad (Memento Sweet Plum), fold in 4 and die-cut paper.
  • Die-cut I used: Daisy Patch Dies and Posy Patch Dies from Heartfelt Creations
  • TIP: Don't apply too much ink for a nice, smooth look :)

Card recipe:
  • Cardstock: Glitter White (DCWV), White (GP)Lovely Lavender (GKD)
  • Paper: Little Yellow Bicycle, White Crepe Paper, White Tissue Paper.
  • Stamps: Tilda (Magnolia), sentiment from Botanicals (GKD)
  • Ink: Memento Sweet Plum (Tsukineko), Daffodil Delight (SU).
  • Embellishments:Gold Gala Glitz
  • Accessories: Rectangle Nestabilities (Spellbinders), Daisy Patch Dies, Posy Patch Dies, Scallop Border Die (Heartfelt Creations), Scor-tape, Foam tape.
Does anybody know the name of this Tilda? I got this image long time ago and I don't have the name of her. Thanks!!

Hope you like it!
Have a great day!

Heartfelt Creations

Hello my friends! Hope you are having a great. For today I have a couple of cards I made with some of the newest stamps from Heartfelt Creations.

Dove Love:

Products used:
  • HCPC 3385 Spring Birdies and Roses Pre-Cut Set.
  • HCD 710 Decorative Oval Window Die
  • Oval Nestabilities
  • Grand Calibur.

Directions:
  • Make card base from White Cardstock . 5" Square.
  • Cut a piece of White Cardstock (4.25" square), emboss it using Swiss Dots Folder. Mat this piece
     with a slighty bigger piece of Red Glitter Cardstock. Add stitches and adhere it card.
  • Stamp image from HCPC 3385 Spring Birdies and Roses Pre-Cut Set on White Cardstock in Memento Tuxedo Black. Color them with Copic Markers: YG63, YG95, C0, C1, C3, R35, R46, E35. Cut out bottom part of second image.
  • Die-cut and emboss image using Oval Nestabilities. Adhere image to frame and adhere to card.
  • Create a bow and add to card. Add a pearl.
  • Add xut out roses and leaves onto image with Foam tape.
  • Die-cut Oval frame using HCD 710 Decorative Oval Window Die using Red Glitter Cardtsock.

Thinking about you

Products used:
  • HCPC 3383 Cardinal Posy Branch Pre-Cut Set.
  • HCD 701 Posy Patch Die
  • HCD 702 Decorative Butterfly-Border Die-cut.
  • Square Nestabilities.
  • Grand Calibur.

Directions:
  • Make card base from Purple Cardstock. 5" square card. Dry emboss front of card using Seeing Spots Embosing folder.
  • Die-cut border using HCD 702 Decorative Butterfly-Border Die-cut. Adhere to card and tie ribbon around.
  • Stamp image on White cardstock in Memento Tuxedo Black Ink. Color image with Prismacolor Pencils and cut it out.
  • Stamp some of the Posy flowers, color them and die-cut them with HCD 701 Posy Patch Die.
  • Die-cut, emboss and stencil a piece of White Cardstock using Square Nestabilities. Adhere it to card.
  • Adhere image on Square piece. Add extra posy flowers. Add Mini Nail Gold Head onto flowers.
Hope you like them!
Have a great day!

Monday, April 18

Happily ever after

Hello my friends! I have a quick and fun "Wedding card" for you today. I made this card last February for an awesome couple from my old church.
This card is very simple as you can see, the label image was heat embossed and the sentiment stamped in Vintage Photo Distress Ink.


The label image is from Smile set and the sentiment is from Fanciful Tags (Gina K. Designs)

I am submitting this card to TSG: Monochromatic.

Hope you like it!
Have a great day :)

Saturday, April 16

Wee Memories Scrappy Saturday Challenge #52: Your next Stamp

Hello my friends and welcome to another Wee Memories Scrappy Saturday Challenge. This week our challenge is sponsored by Your Next Stamp and the theme is "All things adorable" Well, I have to say all the images from Your Next Stamp  are adorable!!


For my card I used the sweet and adorable Party Fhiona


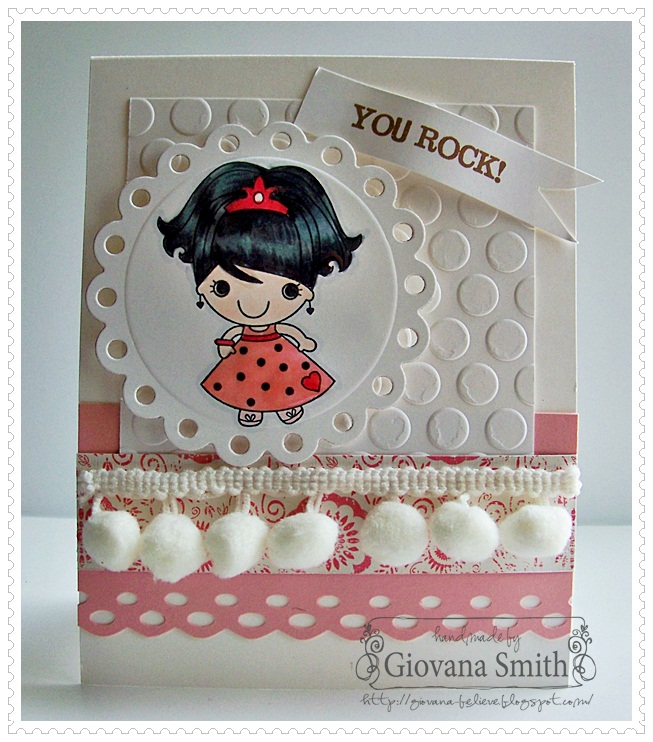
Your Rock!

Directions:
  • Make card base from White Cardstock.
  • Cut a piece of Pink Cardstock, punch bottom border and adhere it to card.
  • Cut a piece of White cardstock and dry emboss it using Seeing Spots folder and adhere it to card.
  • Cut a piece of Patterned Paper and adhere it to card.
  • Stamp image on White cardstock in Memento Tuxedo Black and color ir with Copic Markers. Die-cut and emboss image using Eyelet Circle Nestabilities. Adhere image to card with Foam tape.
  • Add pom-pom  to card.
  • Stamp sentiment, create a banner and adhere it to card.
  • Add Crystal Lacquer to hair and dress and set to dry.

Card Recipe:
  • Cardstock: White, Innocent Pink (GKD)
  • Paper: Little Yellow Bicycle.
  • Stamps: Party Fhiona (Your Next Stamp)
  • Ink: Memento Tuxedo Black (Tsukineko), Vintage Photo Distress (Ranger)
  • Embellishment: Pom-pom ribbon (Offray)
  • Accessories: Border Punch (Recollections), Eyelet Circle Nestabilities (Spellbinders), Seeing Spots emb. folder (Provocraft), Scor-tape, Foam tape, Crystal Lacquer, Copic Markers.

The deadline for this challenge is 11.59pm PST on Friday, April 22, 2011. For more details, some fabulous design team inspiration and to link up your projects, click here

Hope you like it.
Thanks so much for stopping by!

Thursday, April 14

Gina K. Designs Technique Highlight Blog Hop

Welcome to a fun Gina K. Designs Design Team hop! Today we are showing techniques of all kinds as featured on Stamp TV. We hope you enjoy hopping through the variety of techniques and are inspired to try something new!

If you are coming from Janice's blog, you are in the right place, if not, please start from StampTV so you don't miss anything.

For this hop I used the following techniques on my card:
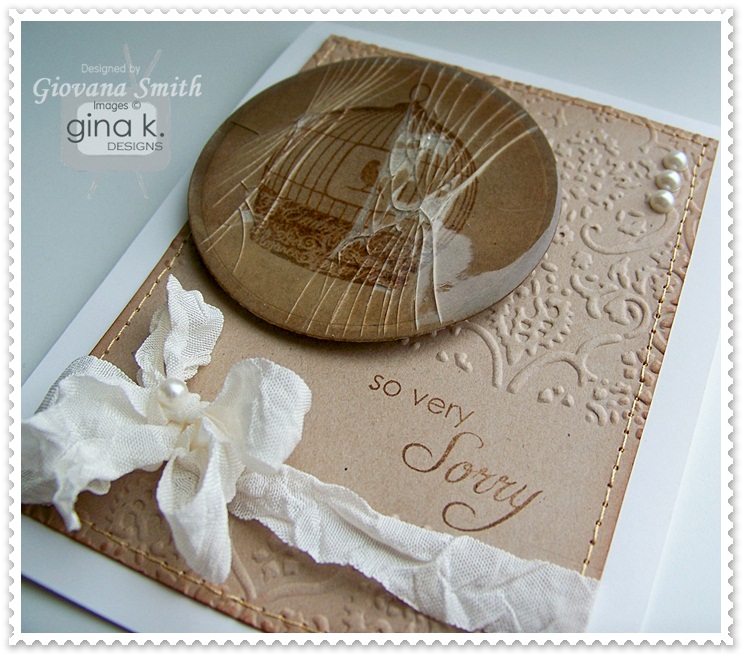
So very Sorry

Directions:
  • Make card base from White Cardstock. A2 size.
  • Cut a piece of Kraft CS ( 3 5/8" x 4 7/8"), ink all edges and partial embossed it.
  • Stamp sentiment in Vintage Photo Distress ink in non-embossed area. Add stitches and tie on ribbon and adhere to card.
  • Stamp image onto Kraft CCS, die-cut, emboss and highlight it with Circle Nestabilities. Follow directions to create Cracked Glass.
  • Adhere image to card.
  • Add pearls.

Card Recipe:
Hope you like my card.

Now it's yout turn to hop over to Emily's blog, and I hope you don't feel afraid to try new techniques, it's always fun to learn something new :)

Have fun hopping.

Wednesday, April 13

It's your birthday

Hello my friends! Hope you are aving a great day, I am feeling much better now and that means more stamping time for me. Have you checked the new Springtime Cardinal Collection from Heartfelt Creations? Isn't so pretty?! Don't forget to leave a comment HERE for your chance to win the entire collection!!!
Well, I have a new card to share with you using a couple of images from the new collection :)

First, I got inspired by the sketch from Waltzingmouse Stamps and the Joann's Garden Challenge # 13


It's your Birthday.

Directions:
  • Make card from White cardstock. A2 size.
  • Emboss a piece of White cardstock (4" x 5.25") using Textile Embossing folder. Ink all edges and adhere it to card.
  • Stamp Image from HCPC 3385 Spring Birdies and Roses PreCut Set on White Cardstock in Memento Tuxedo Black. Color Cardinal and roses with Copic Markers and leaves with Prismacolor Pencils.
  • Die-cut and emboss image with Circle Nestabilities. Adhere it to card.
  • Die -cut emboss and stencil Large Swirl from HCD 711 Decorative Dutch Iris Die. Adhere it to card.
  • Stamp sentiment from HCPC 3388 Spring Cardinals PreCut Set on White CS in Vintage Photo Distress Ink. Die-cut, emboss and stencil it using Fancy Tags, cut out right size and adhere to card with foam tape.
  • Add Crystal Lacquer on image and set to dry.


Card Recipe:
  • Cardstock: White (GKD)
  • Stamps: HCPC 3385 Spring Birdies and Roses PreCut Set,  HCPC 3388 Spring Cardinals PreCut Set (Heartfelt Creations)
  • Ink: Memento Tuxedo Black (Tsukineko), Vintage Photo Distress (Ranger Industries), Copic Markers, Prismacolor Pencils.
  • Accessories: HCD 711 Decorative Dutch Iris Die (Heartfelt Creations), Fancy Tags, Circle Nestabilities (Spellbinders), Textile Embossing folder (Provocraft), Foam tape, Sponges.
Hope you like it!
Thanks for stopping by!

Tuesday, April 12

It's Release time at Heartfelt Creations and your chance to win!

Hello my friends!! Hope you are having a great day!! Today is a super day, it's Release time over at Heartfelt Creations.

The Springtime Cardinal Collection features 8 new PreCut Sets. These new sets coordinate with existing exclusive Heartfelt Creations dies manufactured by Spellbinders.The images in this collection are very classic and elegant, perfect for your copic markers, and you will love the fact that they coordinate with some of the existing Heartfelt Creation dies, so this is an added value for some of the dies you might already own.

Here are the cards I created with some of the new stamps.

Together

Products used:
  • HCPC 3384 Cardinal Posy Wreath Pre-Cut Set.
  • HCD 702 Decorative Butterfly-Border Die-cut.
  • Gold Gala Glitz

Directions:
  • Make card from White cardstock. A2 Size.
  • Stamp image on Vellum Paper in Versamark Ink, apply Gold embossing powder and heat it up.
  • Cut out image. Color back part of Cardinal images using Red Chalk Ink. Stamp sentiment in Vintage Photo Distress Ink.
  • Die-cut border in White Cardstock using HCD 702 Decorative Butterfly-Border Die-cut. Adhere border in opposite corners. Adhere image using Glue dots.
  • Apply Gold Gala Gliz on flowers.
  • Add a couple of pearls.

  • You mean so much to me

    Products used:

    HCPC 3382 Magnificent Cardinal Rose Pre-Cut set
  • HCD 706 Cardinal Family Die-cuts.
  • Fancy Tags Dies
  • Circle Nestabilities
  • Grand Calibur
  • Directions:
  • Make card base from White cardstock. A2 size.
  • Stamp image from HCPC 3382 Magnificent Cardinal Rose Pre-Cut set on White Cardstock (twice) in Memento Tuxedo Black. Color roses and leaves with Copic markers:Y13, Y15, Y17, YG95,0; the Cardinal was colored with Prismacolor Pencils. Cut out main image, from second image die-cut Cardinal with HCD 706 Cardinal Family Die-cuts, then cut out big rose and leaves.
  • Die-cut the biggest Eyelet Circle Die using Sweet Corn cardstock, mat it with a Die-cut, emboss and stencil White piece of Cardstock. Adhere it to card.
  • Create a 3D image with die-cut Cardinal and cut out rose and leaves. Adhere to card.
  • Stamp sentiment on White Cardstock in Walnut Stain Distress ink. Die-cut, emboss and stencil it with Fancy Tag dies. Adhere it to card. Add rhinestones.
  • Make a bow and adhere it to card.
Would you like to win the entire collection?? Leave a comment HERE on my blog and  the Heartfelt Creations Blog and one lucky person will win the entire release valued at $119.92


Hope you like my creations
Have a great day!

Thinking of you is like Spring

Hello my friends! Hope your is day is great. Few days ago I found out that JustRite Stamps has a couple of challenges every month! How in the world I missed that? Anyway, I decided to play along and I created this cute card. I used Mother's Natures Gift Set and Circle Nestabilities. I colored the image with Prismacolor Pencils ( I need more Copics)

Inspiration Picture:


My card:


Hope you like it.
I will post directions later, still not feeling good.
Thanks so much.

Monday, April 11

Iris card

Hello my friends and Happy Monday! Hope your day is great. Mine is not so good, I woke up early today with a horrible throat pain and still there, I just don't want to get sick, agghhh.

Anyway. I have a card for you using the new sketch from StampTV and the colors from Stampin' Sisters in Christ.

Here is the sketch:


Directions:
  • Make card from White cardtsock.
  • Mat Wild Lilac Cardstock and Patterned Paper (from StampTV kit), ink all edges of PP and Wild Dandelion CS. Add stitches.
  • Stamp Iris from Warm With Love Set on White CS in Memento Tuxedo Black, Color image with Copic Markers. Die-cut and emboss image with Oval Nestabilities
  • Adhere image to card.
  • Add smallest nailhead and ribbon to card.

Card recipe:
  • Cardstock: White, Wild Dandelion, Wild Lilac (Gina K. Designs)
  • Paper: StampTV Kit.
  • Stamps: Warm with Love (Gina K. Designs)
  • Ink: Memento Tuxedo Black (Tsukineko), Copic Markers.
  • Embellishments: White Organdy Ribbon, Nailheads (Gina K. Designs)
  • Accessories: Border Die, Oval Nestabilities (Spellbinders), Pop Dots, Glue Dots, Sewing machine, Scor-tape.
All the highlighted products can be found at Gina K. Designs Store.


Hope you like it!
Have a great day!

Saturday, April 9

Wee Memories Scrappy Saturday Challenge #51: Tangled Up In Twine

Hello my friends! Welcome to another Wee Memories Scrappy Saturday Challenge #51, this week it's sponsored by The Twinery!


One lucky winner will get a Color Twinery Sampler Pack!!

I used the Sketch from Card Positiong Systems.


Here is my project:

Celebrate

Directions:
  • Make card from Innocent Pink Cardstock. Size: 4.5" x 5.5"
  • Print image onto White Cardstock. Color it with Copic Markers. 
  • Create scene sponging clouds and Grass. Stamp sentiment in Red Ink.
  • Mat this piece with a slightly bigger piece of Kraft Cardstock. Add stitches.
  • Stamp banner on White Cardstock in Worn Lipstick Distress Ink. Cut out and glue them to front card. Add silver brads and twine.
  • Die-cut a circle using the smallest circle from Circle Nestabilities. Adhere it to card and add Baker's twine. Make a bow using Lemondrop Twine and adhere it to card.
  • Add image to card with foam tape.
  • Add Star Stickles to heart and clip on the girl's dress and hair and to all the banner's borders.
Card Recipe:
  • Cardtsock: Innocent Pink, White, Kraft (Gina K. Designs)
  • Paper: StampTv Kit (Gina K. Designs)
  • Digi Image: Pure Innocence by Heather Ellis.
  • Stamps: Perfect Pennant (Gina K . Designs)
  • Ink: Worn Lipstick (Ranger), Bashful Blue, Certainly Celery, Real Red (SU), Copic Markers.
  • Embellishments: Lemondrop Baker's Twine, Pink Sorber Baker's Twine (The Twinery), Silver Brads (JoAnn's)
  • Accessories: Circle Nestabilities (Spellbinders), Scor-tape, Foam tape, Sewing machine.
The deadline for this challenge is 11.59pm PST on Friday, April 15, 2011. For more details, some fabulous design team inspiration and to link up your projects, click here

Hope you like my card.
Have a great day!!

Friday, April 8

CSS Alumni Blog Hop: Cookie Inspiration

Hello my friends! Welcome to another CSS Alumni Blog Hop. This time it is an Inspiration Hop and the yummy inspiration comes from Better Bit of Butter and these yummy collection of cookies :)
Now, if you are coming from Deb's blog you are in the right place, if not you should start from StampTV so you don't miss a thing.

I got inspired by Premier Wedding Cookie #4 and this is my card.


Directions:
  • Make card from White cardstock. 5" square.
  • Cut a piece of Kraft cardstock (4.5" square). Stamp the Damask image from the new StampTV Kit in Tea Dye Distress Ink. Ink and distress all edges. Add stitches and tie ribbon around. Adhere to card.
  • Die-cut a piece of Ocean Mist Cardstock with Eyelet Circle Nestabilities.
  • Print yellow Grunge Damask Digital Paper, die-cut, emboss and stencil a circle using Circle Nestabilities.
  • Die-cut, emboss and stencil a White piece of cardtsock using Circle Nestabilities. Stamp sentimet on it in Faded Jeans Distress Ink. Adhere it to Yellow Circle. Stamp butterfly on it in Tea Dye Distress Ink. Adhere it to card with Foam tape.
  • Stamp image from Bring the Bling around sentiment and add Liquid Pearls.
  • Stamp butterfly from StampTV set on Yellow Digital paper in Tea Dye Distress Ink, cut it out and adhere it to card. Add a small Gold Nailhead to butterfly.

Card Recipe:
Make sure to leave a comment as you hop along because on Tuesday morning (April 12th), we will randomly choose one of the comments from all the blogs who will get a stamp set of their choice valued up to $24.95!

Now, it is time to hop over to Joy's blog and enjoy her beautiful creation.

Hope you like my card.
Have fun hopping.

Wednesday, April 6

Heartfelt Creations cards.

Hello my friends! Hope you all are having a great day!

Today we are wishing a fond farewell to 9 of the current design team members:  Clare Curcio, Debbie Seyer, Peggy Cain, Selma Stevenson, Gini Cagle, Linda Payne, Dee Jackson, Rosemary Dennis, and Anita Hovey We wish you a double blessing on all of your future creative endeavors. Visit their blogs and please thank each one of them for all the creative projects they have shared featuring Heartfelt Creations projects.

Ten of the current Heartfelt Creations design team members will continue for another 6 month term:  Lisa Gregory, Angelica Turner, Kristina King, Olga Jewell, Lisa Somerville, Cheryl Walker, Giovana Smith, Loretta Lock, Olena Levchenko, and Kerry Urbatch. We are excited for another creative term with these ladies.

We would also like to extend a warm welcome to 10 new design team finalists that will be joining the Heartfelt Creations design team for the next 6 months:Glenda Brooks, Therese Broman, Carla Suto, Lori Leng, Jan Hennings, Heidi Erickson, Lisa Lynne Wright, Marsha Sanderlin, Sue Walsh, and Joelle Hancox.  Congrats Ladies! We look forward to working with you and taking the paper-crafting industry to new heights of inspiration.

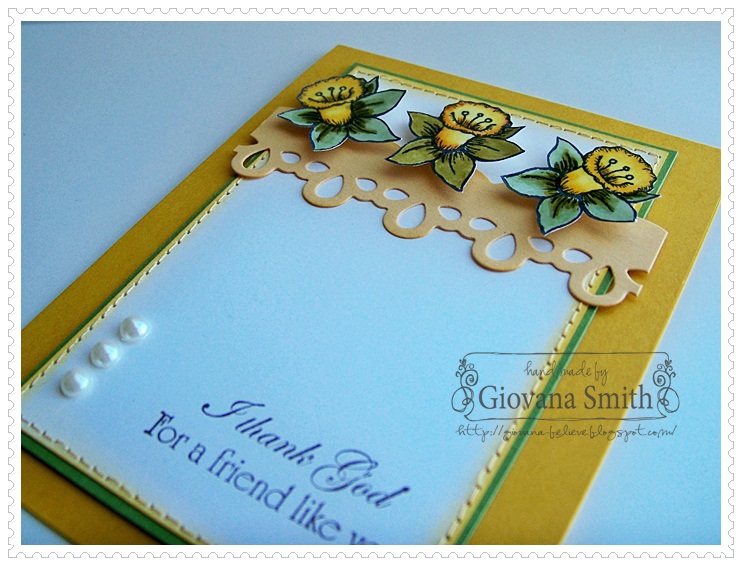
I Thank God

Products used:
  • HCPC 3359 Daffy Daffodil Pre-Cut Set
  • HCD 709 Springtime Medley Die
  • HCPC 3363 Inspire Me Sentiments Pre-Cut Set
  • HCD 702 Decorative Butterfly-Border Die-cut
  • Directions:
  1. Make card from Crushed Curry Cardstock. A2 size.
  2. Cut a piece of White Cardstock (3.25" x 4.75"), ink all edges and mat it with a slightly bigger piece of Green Cardstock. Add stitches.
  3. Stamp sentiment from HCPC 3363 Inspire Me Sentiments Pre-Cut Set in Walnut Stain Distress Ink. Adhere to card.
  4. Die cut border in Yellow Corn Carsdtock using HCD 702 Decorative Butterfly-Border Die-cut. Adhere to card.
  5. Stamp daffodil images from  HCPC 3359 Daffy Daffodil Pre-Cut Set on White Cardstock in Memento Tuxedo Black. Color them with Copic Markers : YG63, YG95, Y13, Y15, Y17. Die-cut images with HCD 709 Springtime Medley Die.
  6. Adhere images to card with foam tape. Add Crystal Lacquer and set to dry.
  7. Add Pearls on left bottom. 

Happy Easter

Products used:
  • HCPC 3368 Egg-Citing Day PreCut Set
  • HCPC 3366 Wrought Iron Cross PreCut Set
  • Circle Nestabilities.
  • Grand Calibur
  • Directions:
  1. Fold piece of Cardstock and die-cut card shape using  Eyelet Circles Dies.
  2. Stamp image from HCPC 3368 Egg-Citing Day PreCut Set on White cardstock in Memento Tuxedo Black. Color image with Copic Markers: Yg63, YG95Y13, Y17, B23, E31, E33, E35, YR14, BG15.
  3. Die-cut and emboss image using Circle Nestabilities.
  4. Adhere die-cut image to card. Add Star Dust Stickles to flowers and eggs.
  5. Stamp image from HCPC 3366 Wrought Iron Cross PreCut Set on White cardstock in Walnut Stain Distress Ink. Die-cut, emboss and stencil it with Circle Nestabilities. Adhere to inisde card.
  6. Tie ribbon.
Hope you like my projects. All Heartfelt Creations products can be found HERE