Thanks!!
Hello my friends!! I have a cute Pink-y card for you today! I really love this Fairy Image from Baby Bud Designs. I colored it with Copic Markers and Prismacolor Pencils and added it lots of glitter :)
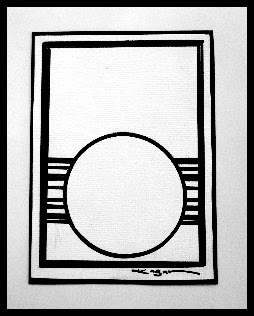
I used the sketch from 2S4U, one of my favorite sketch blogs :)
Directions:
- Make card from cardstock.
- Mat together light pink cardstock and patterned paper. Ink all edges in PP.
- Add stitches.
- Add ruffle ribbon. Add rhinestones.
- Print image twice, color them. Cut out body and wings from second image. Add glue or any other adhesive and add fine glitter. Set to dry.
- Die-cut main image using Circle Nestabilities, Sponge edges.
- Add adhesive to glittery second image (only body part) and adhere to main image. Create 3D effect with wings
Card recipe:
- Cardstock: Bubblegum Pink (GKD), Blush Blossom (SU. White GP).
- Paper: PTI.
- Image: Fairy Orlagh (Baby Bud Designs)
- Ink: Copic Markers, Prismacolor Pencils.
- Embellishments: Bright Pink Satin Ribbon (Offray), Bright Pink Rhinestones (Kaisercraft), Sugar Cube & Bubblegum Fine Glitter (Martha Stewart)
- Accessories: Sewing machine, thread, Circle Nestabilities (Spellbinders), Adhesive(Love My Tapes), Sponges, Dry Clear Glue.
Have a great day!


oh she is precious! I just love the way you did the beautiful ribbon treatment and her flying wings! so very very pretty, Giovana!
ReplyDeletehave a most glorious weekend! :)
Sooooo pretty!!! Love the ribbon treatment!!
ReplyDeleteGorgeous! x
ReplyDeletetoo cute!
ReplyDeleteSo pretty! I love what you did with her wings! and the ribbon is the perfect sweet trim :)
ReplyDeleteGreat job!
hugs, margie
so darling Ms. Giovana. Always a pleasure to stop by
ReplyDeleteThanks for joining us at 2S4Y this week
:) Kazan
Such a pretty card! I love the added layer and all the fabulous sparkle the glitter adds!
ReplyDeleteI think you have amazing talent and I'm so happy to have the chance to create with you for "Baby Bud Designs"!
Lis