Monday, September 5
Happy Halloween
Hello friends!
Every month the Impression Obsession Design Team is showcasing a theme day,
this month out theme is "Halloween"
I have a fun card using the new Batty Halloween set.
Stamp sentiment in Chocolate Ink.
Stamp the circle ring in Tan Ink.
Stamp bats in white cardstock in Taupe Ink, color them with markers and fussy cut them out.
Cut a 5.5" 4.25" piece of patterned paper from Vintage Halloween Paper Pack.
Add stitches to each side of piece and adhere it to a white card base.
Die-cut Crescent Moon Rossette from patterned paper, fold lines to create a moon fence and adhere it to blended panel. Tie orange twine around.
Adhere blended panel to card with foam adhesive.
Adhere bats with foam adhesive.
Add shimmer to bats.
Products used
Affiliated links used at no extra cost to you.
Check out what the design team has created:
Have a great day!
Friday, September 2
IO September Kit Hop Day 2
Welcome to the September Limited Edition Red Rubber Kit Blog Hop!
September 1st & 2nd the Impression Obsession Team will be sharing new projects with the NEW September Limited Edition Red Rubber Kit You can find a list of participants on the Impression Obsession Blog each day through the event.
I have a couples of cards for you featuring the cute Piglet!
A friend is
Details:
Stamp Piglet on white cardstock in Caramel ink.
Color image with alcohol markers, then fussy cut out.
Die-cut Dainty Heart in pink and red cardstock.
Stamp a background panel using the stitched lines stamp
on white cardstock in Baby Blue Ink.
Then, die-cut panel with Woodgrain Frame, blend Baby Blue and Caramel Ink on frame,
cover frame with Versamark Watermark Ink and add clear embossing powder, heat set.
Die- cut frame again in vellum paper, adhere center piece on stamped panel.
Stamp sentiment on vellum piece.
Adhere panels to a 4.75" 5.5" light blue card base.
Embellish with red sequins and pink rhinestones.
Color image with alcohol markers, then fussy cut out.
Die-cut Dainty Heart in pink and red cardstock.
Stamp a background panel using the stitched lines stamp
on white cardstock in Baby Blue Ink.
Then, die-cut panel with Woodgrain Frame, blend Baby Blue and Caramel Ink on frame,
cover frame with Versamark Watermark Ink and add clear embossing powder, heat set.
Die- cut frame again in vellum paper, adhere center piece on stamped panel.
Stamp sentiment on vellum piece.
Adhere panels to a 4.75" 5.5" light blue card base.
Embellish with red sequins and pink rhinestones.
For my friend
Stamp Piglet on white cardstock, color image with alcohol markers, the die-cut piece with Wacky Stitched Circles die.
Die-cut Grass Border and adhere it to circle piece.
Stamp sentiment on white cardstock in Chocolate Ink, die-cut it using Rounded Corner Sentiments 2.
Cut card base to 5: x 4.25", tie white ribbon around.
Adhere a 0.75" pink cardstock to the side.
Add panels to card base.
Embellish card with pink rhinestones.
Products used
Affiliated links used at no extra cost to you.
We will be giving away TWO Impression Obsession $25 gift certificates for the event so the more you comment through our September Kit Hop the more chances to win!
All comments for each of the event days will be open until Tuesday September 6th at 8pm CT
All winners will be announced on Wednesday September 7th on the Impression Obsession Blog.
Have fun hopping!
Thursday, September 1
IO September Kit Hop Day 1
Welcome to the September Limited Edition Red Rubber Kit Blog Hop!
September 1st & 2nd the Impression Obsession Team will be sharing new projects with the NEW September Limited Edition Red Rubber Kit You can find a list of participants on the Impression Obsession Blog each day through the event.
The kit is full of fun images and sentiments,
who doesn't love Winnie the Pooh and friends? I think we all do!
I used this adorable image; my card is pretty simple; the great image is the star :)
Details:
Stamp image on white cardstock in Chocolate Ink.
Color image with markers, here I used Copics and Spectrum Noir)
Mask image and stamp stitch lines in Baby Blue Ink.
Trim image with largest die from Stitched Slimline Layers 2.
Die-cut a small piece using smallest die from Stitched Slimline Layers 2 and
Classic Pooh Paper Pack.
Cut a card base and stamp sentiment in Chocolate Ink.
Adhere pieces to card.
Stamp image on white cardstock in Chocolate Ink.
Color image with markers, here I used Copics and Spectrum Noir)
Mask image and stamp stitch lines in Baby Blue Ink.
Trim image with largest die from Stitched Slimline Layers 2.
Die-cut a small piece using smallest die from Stitched Slimline Layers 2 and
Classic Pooh Paper Pack.
Cut a card base and stamp sentiment in Chocolate Ink.
Adhere pieces to card.
Products used
Affiliated links used at no extra cost to you.
Check out what the design team has created:
We will be giving away TWO Impression Obsession $25 gift certificates for the event so the more you comment through our September Kit Hop the more chances to win!
All comments for each of the event days will be open until Tuesday September 6th at 8pm CT
All winners will be announced on Wednesday September 7th on the Impression Obsession Blog.
Have fun hopping!
Monday, August 29
Impression Obsession Die-cut Days
Hello friends!
The Impression Obsession Design Team have set aside a couple days a month to share some fabulous new Impression Obsession die projects! Have fun checking out what our Designers have made today.
I have a fun project for you!
Thanksgiving will be here before you know it and I made a card for this special occasion.
Details:
Die-cut Decorative Mini Slimline frame in Fall Floral paper and white cardstock(3x),
glue all pieces together.
On white cardstock stamp Sketchy Leaves in Versamark Watemark Ink, add white embossing powder and heat set.
Blend Caramel Ink on all edges. Glue frame on panel.
Die-cut Happy 3X from Happy Anniversary set in brown cardstock, glue pieces together.
Die-cut tag from Decorative Mini Slimline in white cardstock, stamp Thanksgiving from All Year Sayings in Cocoa ink.
Die-cut leaves from Autumn Leaves set.
Adhere pieces to card.
Embellish card with pearls, add a little bow.
Products used
Affiliated links used at no extra cost to you.
Check out what the design team has created for you
Hope you like it!
Have a wonderful day!
Monday, August 22
Impression Obsession Theme Day "Holidays"
Hello friends!
Every month the Impression Obsession Design Team is showcasing a theme day,
this month out theme is "Holidays"
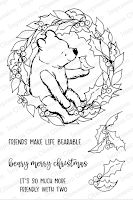
Our new release has this super cute stamp set called "Pooh Wreath"
If you are a Pooh lover, this set is a must have!
Details:
Stamp Pooh wreath on white cardstock in Chocolate Ink.
Color image with markers.
Trim piece with Crazy Stitched die.
Adhere panel to a bigger piece of green paper.
Cut glittery cardstock and adhere it to a front card base.
Adhere panel with foam adhesive.
Stamp sentiment on white cardstock in Cherry ink.
Die-cut sentiment with Rounded Corner Sentiment 1, adhere it to a
Rounded Corner Sentiment 2 piece.
Embellish card with pink and red sequins.
Products used
Affiliated links used at no extra cost to you.
Subscribe to:
Posts (Atom)