Sunday, April 1

Technique Junkies Stamps April Release


Hello friends and Happy Easter and Welcome April!!
Today is the beginning of a new month, that means a new release from Technique Junkies Stamps!!
The selection for this month is amazing, love that Technique Junkies has a little something for every style!
If you arrived here from the Technique Junkies Blog, then you are in the right place, if not go back to check it out!
Ok, let me show you the cards I made for you today

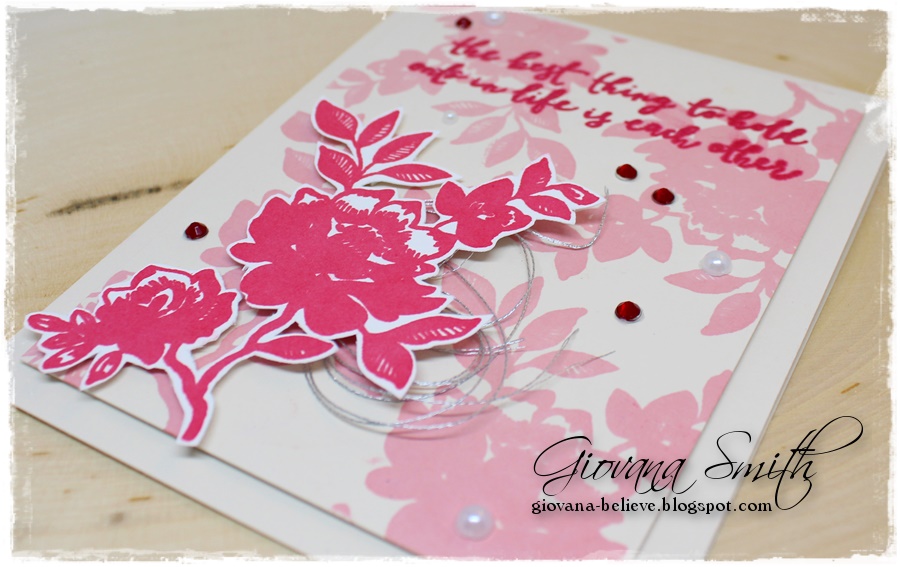
Love this couple! Aren't they adorable?! 
This card is very simple, "All Shapes" image was on a piece of white cardstock in Memento Tuxedo Black, then added a bit of color with markers. Then, die-cut it with scalloped stitched dies, I die-cut a piece of patterned paper as well. Panels were added to card base with foam tape. I found a sheet of scrapbook stickers and added a couple that fit the best {wink, wink}


++++++++++++++++++++++++++

Since I got the "All the Moms" stamp, I had the idea to create a window card, I mean with a real window, hehehe. So, I cut my stamps, yep, I used scissors and cut the sentiment and the floral part. I stamped the sentiment on a piece of black cardstock in Versamark Watermark Ink and added blue embossing powder and heat set, then die-cut the piece.
With the help of my MISTI I positioned the floral part on a corner in Blue Ink, kept the stamp in the same spot on my misti and stamped the opposite corner.
Die-cut a frame and added to the window, then stamped the sentiment on a piece of vellum and added it under the frame.
Finally, added blue rhinestones and the sentiment inside the card .

Inside of card.
 +++++++++++++++++++

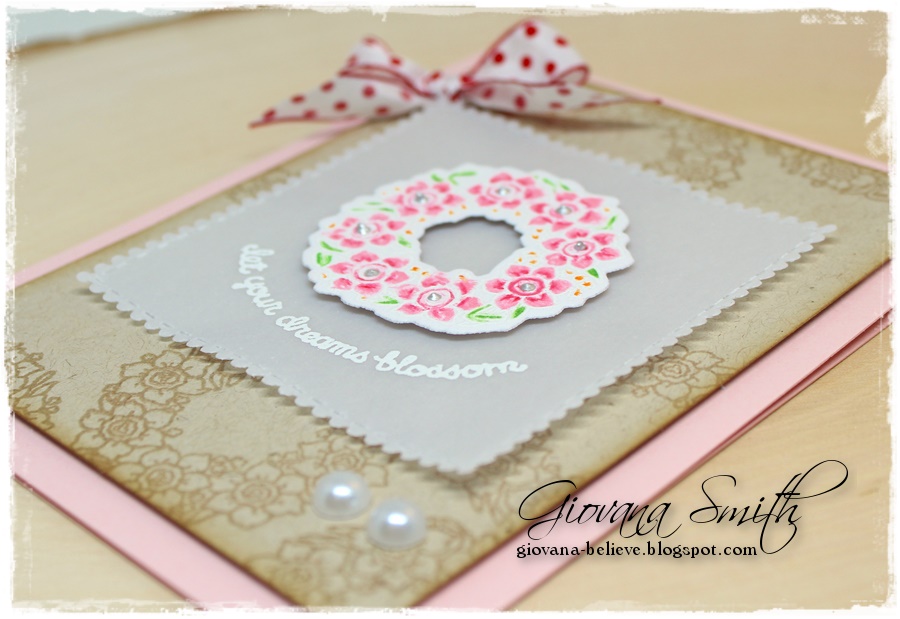
This image is very pretty! I stamped the "Poppy Bouquet" image on a piece of watercolor paper in Antique Linen Distress Ink, then colored the images with ColourTint Pencils by Spectrum Noir, the colors are very soft and I love how it turned out! Stamped the sentiment from "All the Moms" set on a piece of vellum, then die-cut the pieces. Added sequins and pearls and Brown Gala Glitz in the center of the poppy.
Added panel to card with foam tape.
++++++++++++++++++

Super easy card!!! I stamped the "Fairy Tale Flowers" on a piece of Gold Vellum in Versamark Watermark Ink and Gold Embossing powder, then heat set. Die-cut the background, then cut a diagonal piece of the panel and adhered the piece to a Kraft card base. Stamped the sentiment from "All The Moms" set on a piece of white cardstock and added it to card front, then added pearls and a little banner.


Now, I invite you to visit Ceal's blog!
Don't forget the new release has an instant 15% off until April 8th!! (no coupon needed) 

Hope you enjoy the new release.
Have a wonderful day!

Friday, March 30

Impression Obsession Spring Hop Day 2!!!


Hello friends!! 
Welcome to Day 2 of Impression Obsession Spring Die Release!!
We have some beautiful new dies on the Impression Obsession Store! Have you see them yet? You should run right now and check them out, hehehe. 
And What is a blog hop without prizes?!  Yes! We are giving away not, 1, not 2 BUT 3 $25 Gift Certificates!!
Be sure you visit and comment on the participating blogs, the more you comment, more chances for you to win! One comment per blog please.
You have until April 1st (9pm CST) to leave a comment, winner will be announced on April 2nd on the Impression Obsession Blog.

Let me show you the cards I have for you today, plus a super cute bonus (x2) project!

Hello Spring
For this project I used the brand new "Spring Branches Die Set" and "Hello Spring Stamp".
I die-cut the branches using White cardstock, then colored them with Spectrum Noir Markers.
For the background panel I used the outer die from "Bunny Frame Die", die-cut it using watercolor paper, then applied Color Burst: Lemon Yellow and Alizarin Crimson.
After the panel got completely dried, I stamped the "Hello Spring" sentiment in Jet Black Stazon Ink.
Then added all the branches to the panel.
Embellished it with pearls.


Happy Easter

For this project I used a background I created with leftover paint the little ones had after painting their picture frames. I thought it would be fun to use it in an Easter project, and loved how this card turned out.
I again used the outer die from "Bunny Frame Die", I die-cut the "Happy Easter" in Gold cardstock, then the "Bunny Border" in pink Cardstock. Added the border with foam tape and glue the sentiment on panel.
Finally I added it to a A2 Card Base. 


And these are the projects the girls made!! They love the bunnies and get excited every time I get new craft stuff!!  

List of participants:

Thanks so much for stopping by
Have a fantastic day!
Enjoy the hop


Thursday, March 29

Impression Obsession Spring Die Hop!!


Hello my friends! Welcome to the Impression Obsession 2018 Spring Release Die Hop!
We have some beautiful new dies on the Impression Obsession Store! Have you see them yet? You should run right now and check them out, hehehe. 
And What is a blog hop without prizes?Yes! We are giving away not, 1, not 2 BUT 3 $25 Gift Certificates!!
Be sure you visit and comment on the participating blogs, the more you comment, more chances for you to win! One comment per blog please.
You have until April 1st (9pm CST) to leave a comment, winner will be announced on April 2nd on the Impression Obsession Blog.

Now, let me show you my projects! I used a couple of new sets with coordinated DIES! They are beautiful!
Let your dreams blossom.
For this project I used Bloom Baby Bloom Set and Bloom Baby Bloom Die Set.
I stamped the wreath on a piece of Watercolor Paper in Versamark Watermark and added White Embossing Power and colored it with Chameleon Pencils. Then die-cut the wreath with a coordinated die . Stamped the sentiment on a piece of die-cut vellum.
For the background I stamped the same colored image on a piece of Kraft Cardstock in Versamark Ink on the opposite corners, then inked the edges with Vintage Photo Distress Ink.
Add panels to a pink card base, add pearls and ribbon.


Spread your wings and fly
Butterflies were stamped on watercolor paper in versamark Watermark Ink, then added white embossing powder and heat set. I colored the images with Chameleon pencils, then die-cut them with coordinated dies.
For the background I stamped the Watercolor Dots in Peacock Feathers Distress ink, then I used a dot stencil and applied a very thin layer of white embossing paste, set aside to dry. After that, I distressed all the edges with Vintage Photo Distress Ink, added ribbon blue twine and circle die-cut pieces, then added the butterflies, sentiment as well.
Finally, added blue rhinestones.


Here is the list of participants:
Description:
Thanks so much for stopping by
Have a fantastic day!
Enjoy the hop

Friday, March 23

My Sweet Petunia and Pink & Main Blog Hop!


Hello everyone!! We have another fun collaboration blog hop between My Sweet Petunia and Pink & Main! Amazing projects will be shared from both Design Teams and chances to win too! 
I just discovered Pink & Main and the products they offer are adorable! Super cute images, but not only that, papers, dies, ink and more!!
Two lucky commenters from the hop to win one of two prizes:
$50 shopping spree at My Sweet Petunia and a 
$50 shopping spree at Pink & Main

All you need to do is leave a comment on the participating blogs no later than April 1st at 11:59 pm (Central time), the winner will be announced  on Tuesday April 3rd on the My Sweet Petunia and Pink & Main Blogs

So, let me show you the projects I created for you today!

Find Beauty
For this card I used "Doodle Flowers" set. First, I stamped the images on  a piece of copy paper, then cut them out (used for masking). I started stamping the bigger flowers on a piece of watercolor paper in Stazon Jet Black ink, then masked them and stamped the little flower and leaves. Since this is a thicker paper, the MISTI is super handy to stamp the image more than once to get the perfect impression.
After that I colored the image and background with Spectrum Noir Aqua. After the panel was dried, stamped the sentiment in Pink & Main Fire Engine color. (Love this color, plus the ink is super duper amazing quality) After that, I added a lined border,  added a red panel behind and mounted on a white card base. I used foam tape for every layer. Embellished it with pearls and Clear Shimmer Marker (hard to show on the picture)


Have a dreamy day
I colored the images with Copic Markers, then die-cut them and set aside. 
Die-cut the background panel, then used Wilted Violet Distress Oxide Ink all around the panel, after that I misted it with Frost Sheer Shimmer Spritz and set aside to dry. After the panel was dried, I stamped the sentiment in Stazon Jet Black Ink and the stars in the same Distress Oxide color.
Then, I added all the pieces to the panel with foam tape and embellished it with sequins.


Thanks a Million
This card was super easy and fast to make.
First, I stamped the Thanks from Thanks to you set on a piece of white cardstock in Pink & Main Fire Engine Ink, then I used the background Thanks Die, I die-cut 4 pieces and glued them together.
I created a background using Worn Lipstick Distress Oxide, then added the little hearts from "Magical Unicorns Set" in Fire Engine ink.
Stamped the "A million" on a piece of vellum in Stazon Jet Black Ink. 
Added all the pieces to a white card base and sequins to embellish the card.


Here is the list of the participating blogs.

Giovana Smith --> ME


Have fun hopping!
Don't forget to leave a comment for your chance to win.

Have an amazing day!

Tuesday, March 20

My Sweet Petunia and Reverse Confetti Collaboration Hop!!


Hello everyone!! Welcome to a fabulous collaboration hop between My Sweet Petunia and Reverse Confetti. Both Design Teams have prepared amazing projects for you, plus what is a hop without prices! YAY!! 
Yes, we have 2 amazing prices:
$60 shopping spree at My Sweet Petunia and
$60 shopping spree at Reverse Confetti.

The only thing you have to do is enjoy the hop and leave your comments on the participating blog (we all love them). 
Leave your comment no later than March 25th at 11:59 pm (Central Time) and winners will be announced on Tuesday March 27th, on the Reverse Confetti and My Sweet Petunia blogs.

Now, let me show you the projects I have for you today! Of course for all my projects I used Reverse Confetti and my MISTI, so let's get started.

Wishing you Well
I started stamping a background using Cubes Color Combo #4 Inks and one of the stamps from So Stripey set. Then I added a frame created with dies and vellum paper. After that I stamped the sentiment on the vellum piece in Jet Black Stazon Ink, sentiment from Petals' n Posies.
For the top image, I stamped the big floral image from Something Wonderful set on a piece of white cardstock in Salsa Ink, then cut it out. Added leaves from Petals 'n Posies set, stamped in Pistachio ink. Added them to card front with foam adhesive. Embellished with silver thread and pearls.

 The best thing...
This card was super easy and fast to make.
Started with a piece of light pink cardstock and stamped  the floral image from Something Wonderful in Piggy Bank Ink, then stamped the sentiment in Salsa Ink. The top floral was stamped in Salsa ink as well, cut out and added to front panel with foam adhesive. Embellished the card with silver thread, pearls and red rhinestones.

 Thanks so very much
This was the first card I made and love it very much!! 
Started with the background, used a stencil and white embossing paste, then set it aside to dry. 
Stamped the floral images from Garden Bunch Set in Rose, Wisteria and Black. Then die-cut the flowers using coordinated dies
Added flowers and leaves from Petals' n Posies using foam adhesive.
Stamped the sentiment from Lots' to Say on a piece of vellum in St. Valentine Stazon Ink.
Embellished the card with pearls.

Blog hop list!
Get ready to get inspired!

Giovana Smith ---> Me
 Lydia Fiedler


Hope you enjoy this hop! 
Don't forget to leave a comment for your chance to win!
Have fun!