Welcome to the
Sweet 'n Sassy Stamps August Release Celebration! All of the Design Divas are excited to kick things off today with a fun blog hop full of inspiration using the sets that will be available for
purchase in the store right now!!!! Yes! you read that right, the new stamps are available in the store right now, you don't have to wait until later for that!
Also, this month we have a New Release Celebration Format, lots of challenges and more chances to win free stamps.
Here are the projects I have for you today:
Back to School Rhubarb: This set has a couple of beautiful Rhubarb images and fantastic sayings!
Directions:
- Make card base from White Cardstock. 5" square card.
- Mat a piece of Red Cardstock and Patterned Paper. Add stitches.
- Stamp Rhubarb image on White Cardstock in Memento Tuxedo Black. Color it with Copic Markers. Die-cut image with Decorative Plaque Die.
- Stamp saying on Green Cardstock in Barn Door Distress Ink. Die-cut it with Banner Die.
- Die-cut a Mini Scallop Border and adhere it to card panel. Tie on ribbon, and create a triple bow with bow-easy. Adhere it to card.
- Add die-cut image and sentiment to card with Pop dots.
- Add Crystal Lacquer to backpack, apple and heart nose.
Card recipe:
- Cardstock: White, red and Innocent Pink (GKD)
- Patterned Paper: Hometown Summer (Pink Paislee)
- Stamp: Back to School Rhubarb (Sweet 'n Sassy Stamps)
- Ink: Memento Tuxedo Black (Tsukineko), Barn Door Distress (Ranger)
- Embellishments: White Seam Binding Ribbon
- Accessories: Banner Dies, Scallop Border Die, Decorative Plaque Die (Sweet 'n Sassy Stamps), Sewing machine, Bow-easy, Pop dots.
-----------------------------------------------
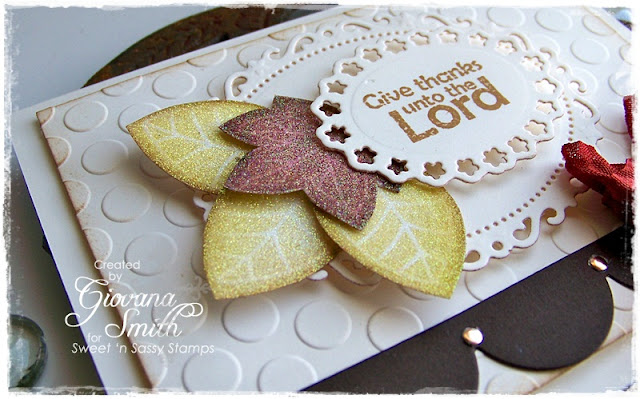
Leaf Silhouettes: I love this set!! Fall is my favorite season and this set is going to make my Thanksgiving projects a lot easier :) I created this "Glittery leaves", they are super easy. I am planning on making a Tutorial to any one who wants to learn how to make this.
Directions:
- Make card base from Ivory Cardstock. A2 size.
- Cut a panel from Ivory Cardstock (5" x 3.75"). Emboss panel with Seeing Dots Embossing folder and ink all edges.
- Die-cut a Big Scallop border in Chocolate cardstock. Adhere it to card panel.
- Stamp sentiment on Ivory Cardstock in Vintage Photo Distress Ink. Die-cut and emboss it with Floral Oval Nestabilities.
- Die-cut and emboss a bigger Floral Oval piece.
- Leaves: Cover a piece of White Cardstock with a piece of Tape Sheet. Apply Shell White Microfine Transparent Glitter. Stamp leaves direct on glitter. Cut them out and ink all edges.
- Adhere big Oval piece to card panel. Add leaves and sentiment.
- Create a triple bow with bow-easy, add a green pearl brad and adhere it to card panel.
- Add panel to card base and tiny gold nail heads to scallop piece.
Card Recipe:
- Cardstock: Ivory, Chocolate (GKD)
- Stamps: Leaf Silhouettes (Sweet 'n Sassy Stamps)
- Ink: Vintage Photo Distress, Walnut Stain Distress, Peeled Paint Distress (Ranger)
- Embellishments: Mini gold headnails, Green Pearl Brad (American Crafts), Seam Binding Ribbon (Etsy)
- Accessories: Large Scallop Border Die (Sweet 'n Sassy Stamps), Floral Oval Nestabilities (Spellbinders), Seeing Spots embossing folder (Provo Craft), Shell White Microfine Transparent Glitter (Art Glitter)
Here is the list of participants:
Hope you like my creations.
Have a fantastic day!!


