Wednesday, August 5

Your smile is the best gift!

Hello friends! August just arrived, I can't believe how fast this year is flying by! Pretty soon we are all  gonna be talking about Christmas, but for now I want to share the new Latina Crafter sketch + twist, although I used only the sketch this time.


Here are the details:
  • Make a card base from White cardstock. A2 size.
  • Cut a panel from Kraft Cardstock 4.75"x 3.5". Add a panel from yellow chevron paper, then cut a small panel from light blue paper, add it to panel and add stitches.
  • Adhere panel to card base.
  • Die-cut a landscape from green shimmering cardstock and add it to panel. Tie yellow twine around.
  • Stamp sweet cute Flogger on watercolor paper in Blazk StazOn ink, color it with markers, here I used Spectrum Aqua. Cut out image and add it to card base with foam adhesive.
  • Stamp sentiment on watercolor paper and black ink. 
  • Add a sun wood veneer and to it add a yellow dewdrop.
  • Add blue dewdrops and card is ready.


Submitting this project to:

Hope you like it!
Have a fantastic day!!

Products used for this project:


Tuesday, August 4

Latina Crafter August Release!


Hello friends! Welcome to Latina Crafter August Release!! This time Latina Crafter has 5 new girls and 6 new coffee stamps! I have three cards for you.
Hola amigas/os! Bienvenidos al nuevo lanzamiento de  agosot de Latina Crafter, esta vez tenemos 5 nuevas chicas de Jennifer y 6 nuevos sellitos de café!! Tengo tres tarjetas ara ustedes con mucho cariño.

I start with this new "Snowcones" set, perfect for Summer, I tried my best to showcase to set in the best way possible ;) I paper pieced the stand, the girl was colored with Spectrum Noir markers.
Empezamos con el nuevo set "Snowcones", este set es perfecto para el verano! Para el kiosko usé la técnica de "paper piecing", the girl was colored with Spectrum Noir Markers.


====================

Next, this new coffee set "One cup at a time", the saying was stamped in Vellum cardstock in Ganache StazOn ink, actually created a shaker with pink, red and white sequins, sadly the vellum is very thick and doesn't show the sequins too well. Finished it with a coffee stain die cut and rhinestones.
Seguimos ahora con el set "One cup at a time", el sentiment lo estampé en vellum, creé un shaker with sequins rojo, rosado y blanco, le agregué un die-cut de splash de café y rhinestones.


=======================

And the last project is using "Coffee and Prayer", again I stamped the saying on a piece on Vellum cardstock, added paper flowers, sequins and pearls, super simple, the uneven panels are the big detail here to give it a different look.
Y mi último proyecto, es con el set "Praying and Coffee", el sentiment fue estampado en Vellum, le puse un pedazo de cartulina rosada detrás para darle mejor vista. Le agregué flores de papel, sequins y perlas. Los paneles están inclinados para darle más vista y detalle. 


This is the line up:
Este es el recorrido:


Now, we invite to visit all the blogs participating in this hop and leave a comment for your chance to win a $20 Gift Card!!
Ahora, te invitamos a saltar en todos los blog, no te olvides de dejar tus mensajitos y así entrarás al sorteo de una Tarjeta de regalo de $20!


Thanks for stopping by!
Have a great day!!

Monday, August 3

"Peace" Sheena A Little Festive Collection sneak peek

Hello friends! I continue showcasing Christmas projects! Lots of inspiration coming to you, and Sheena Douglas has a new A Little Bit Festive Collection coming next week for !!

For my sneak peek today I have this beautiful image and saying from "Peace set". These images are quite large so they are perfect for 6" x 6" cards.

Here are the details:
  • Start with a 6" x 6" Scored White Card base.
  • Color images with Spectrum Noir Markers:
    • Candles: IG2
    • Flames: LY2, GB5
    • Leaves: LG2, LG3, DG2, DG4
    • Flowers: CR3, CR8, DR1
    • Peace sign: CR7, CR8, DR2, DR5, 
    • Leaves and dots: LG3, DG2, GB4, TN3
  • Create a panel with Candy Red Shimmering cardstock and patterned paper. Cut the Peace sign, add a piece of Forest Green Shimmering cardstock, add zig-zag stitches.
  • Die-cut and emboss Candles image with Circle Dies. Add it to card base with foam adhesive.
  • Create a double bow with Ultimate Tool and add it to card.
  • Cover "Peace" with Crystal Lacquer, add Star Dust Stickles to leaves and Gol Stickles to tip of flames.


Submitting this project to:
Hope you like it!
Have a fantastic day!!

Products used for this project:

Sunday, August 2

Skipping Stones Design Blog Hop Day 2

Hello and welcome to day 2 of Skipping Stones Design Grand Reopening Blog Hop! Today I have a couple of card showcasing 2 of the brand new Christmas sets, Christmas Labels and Joy

JOY: This card is super simple and I love how it turned out, funny thing is other members of the DT had created similar cards, I think created minds think alike {wink, wink}
Here are the details:

  • Make card base from Kraft cardstock. A2 size
  • Stamp Joy and the reinder with swirls in Versamark Watermark ink on a piece of White cardstock (3.75" x 5") add gold embossing powder and heat set.
  • Die-cut a border and glue it to white panel.
  • Add white panel to a Candy Red Shimmering cardstock (same size as white) and add to kraft card base.
  • Add red rhinestones and clear sequins to swirl.

MERRY CHRISTMAS: For this card I used one of the labels from Christmas Labels set and the background with the little snowflake from the set.
Here are the details:

  • Create a card base from white cardstock. 5" x 5".
  • Cut a panel from White cardstock 4.25" square and repeat stamp the snowflake in Versamark Watermark, then add White embossing powder and heat set. Then sponged the background first with Tattered Rose Distress Ink, then add Spun Sugar Distress Ink to the edges, clean up top of embossed images. Add panel to a bit bigger piece of Pink rose Shimmering cardstock. Tie on red ribbon and make a bow. Add piece to card base.
  • Stamp label on white cardstock in Forest Moss Distress Ink. Die-cut, emboss and stencil piece with oval dies and Tattered Rose Distress Ink.
  • Add oval piece with foam adhesive.
  • Add a pink snow, add pearls and white liquid pearls to snow background.


We are giving away a $25 Gift Certificate to the store!! To be eligible you must become a follower of the SSD blog and leave a comment at each stop as well as here.  Commenting will be left open until  August 8th and the winner will be announced on Monday August 10th!  So this gives everyone time to hop and leave comments at each of the different stops.

And to celebrate even BIGGER, Heather is offering FREE SHIPPING today!! Just enter freeship at checkout!!
Now everyone let's start hopping and we hope you enjoy all the creations along the way and should you get lost below is the complete lineup:
Have fun hopping!!

Saturday, August 1

Skipping Stones Designs Blog Hop Day 1

Hello everyone!  Welcome to the Skipping Stones Design Grand Reopening/New Release Blog Hop.  Skipping Stones has been around since 2005 but unofficially closed down for a few years while the owner Heather Timmins took some time off to graduate from school and she finally did!  Congrats Heather so now she back with a new design team, stamps and more... yes, I am very excited to announce that I am part of the new Design Team!! Woo-hoo!!

So today and tomorrow we are having blog hops showcasing new and not too new sets! The project I have for you today is using the set "Funny Coffee vol #1".

Here are the details:

  • Make card base from Kraft cardstock.
  • Stamp coffee cups on a piece of watercolor paper in Black StazOn ink.
  • Color images with watercolor markers, here I used Spectrum Aqua Markers.
  • Cut a panel from vellum cardstock, stamp sentiment and coffee rings, add it to watercolor image, then add stitches.
  • Add stitched panel to card base.
Super easy and simple card, and flat!! Easy to mail, perfect to include gift card or coffee money {wink, wink}

So, I hope you like my project! I invite to hop along and enjoy the DT projects! Don't forget to leave a comment for your chance to win a $25 Gift Certificate to the SSD store!!


Rules: To be eligible you must become a follower of the SSD blog and leave a comment at each stop as well as here.  Commenting will be left open until  August 8th and the winner will be announced on Monday August 10th!  So this gives everyone time to hop and leave comments at each of the different stops.
Now everyone let's start hopping and we hope you enjoy all the creations along the way and should you get lost below is the complete lineup:
Have fun hopping!!

Friday, July 31

Nordic Christmas "Joy"


Hello friends!! How are you today?! Are you glad is Friday? I am!! because Saturday and Sunday are coming, I have plans to do yard/garden work very early in the morning, also I can rest and sleep at any time, LOL although my daughter wants to do school shopping, I am not sure about that yet, the temperatures are going to be high, 106 degrees is not fun! Also, I can craft and catch up with DT projects.

Anyway, I have a sneak peek for you today. The new Nordic Christmas for Crafter's Companion is coming to town next week and the images are adorable!! Also, a CD will be available with super fun papers and more!

Here are the details of this project:

  • Make a card base from Ultra White Premium Cardstock.
  • Print snow blue patterned paper and adhere it to a piece of red cardstock, adhere it to card base.
  • Die-cut Scenic Pines from White cardstock, stencil the pine trees with Peeled Paint Distress Ink and adhere it to card, cover the lower part with Star Dust Stickles, set aside to dry.
  • Stamp image and color it with Spectrum Noir Markers:
    • Santa's Sleigh: CR9, TN5, TN7, TN8, GB11
    • Reindeer: TN2, TN4, TN5, TN7, GB11, LG2, DG2
    • Santa's outfit: DR1, IG6
    • Sac: GB11
  • Fussy cut image and add it to card base with foam adhesive.
  • Stamp sentiment, die-cut and emboss it with circle dies, add it to a scallop circle piece from red cardstock.


Submitting this project to:

Hope you like it!
Have a great day!!

Thursday, July 30

Christmas in July!!

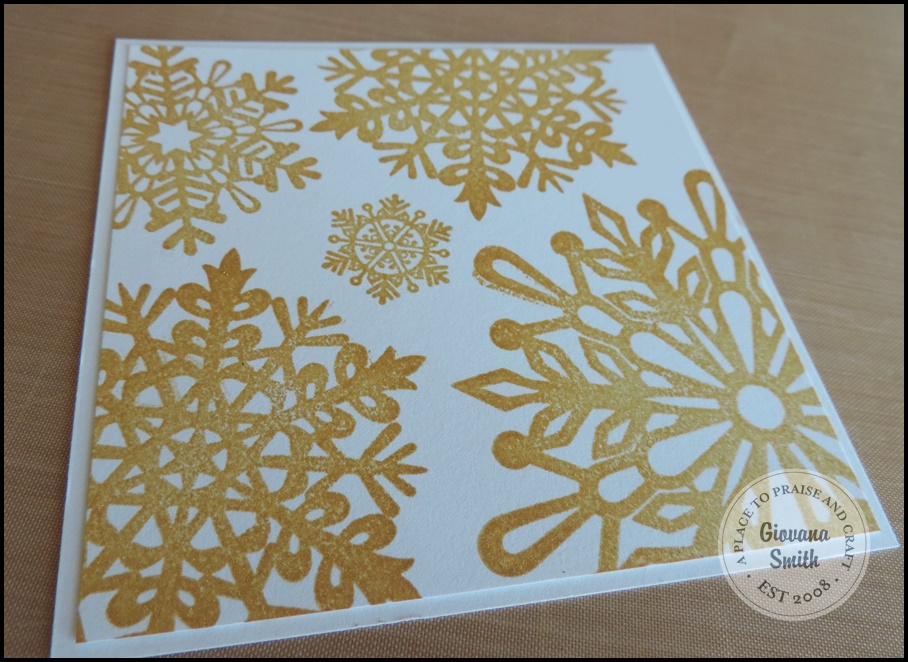
Hello friends!! Today I want to bring you a little bit of winter in this very hot season!! I honestly don't like extreme weather, but I will prefer some cold than the extreme hot temperatures we are having now. Anyways, I think we can start celebrating Christmas in July! So, I have a monochromatic gold card for you, here are the steps:

Step 1: Gather all your materials needed, in this case I used Stardream Metallic Fine Gold and Savoy Bright White Card stockWhite Organza Ribbon, Golden Glitz Delicata ink and stamps.


Step 2: Cut a piece of Savoy Bright White cardstock, 4.25" square and stamps snowflakes in Golden Glitz Delicata ink. Mount piece on a 4.5" square piece of same color card stock.

Step 3: Die-cut snowflakes from Stardream Metallic Fine Gold Card stock.

Step 4: Die-cut a couple of same snowflakes from Bright White Card stock and adhere them behind gold one.

Step 5: Tie White organza ribbon on stamped panel, then adhere it to a 5" square Stardream Metallic Fine Gold card base.

Step 6: Add snowflakes with foam adhesive, stamp sentiment and add it to card with foam adhesive as well.

Stamps and dies are from Sweet 'n Sassy Stamps, sadly, they are retired.

Submitting this project to:

Hope you like it and give it a try!
Have a fantastic day!


Products used for this project: