Pages

Thursday, August 29

Thinking of you

Hello friends!! Hope you are having a great Thursday! My daughter started school last Monday, my husband is back at work after being sick and I stay at home, listening my music or sometimes just my heart ;)

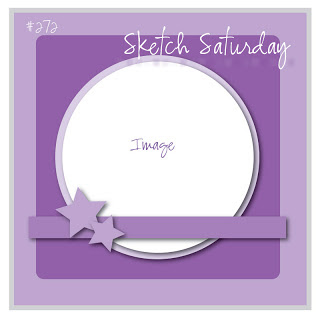
I made this card yesterday using the Sketch from Splitcoaststampers, new stamps just released from Latina Crafter, this set is "Sólo porque" (Just because). This new set has pretty bold flowers and nice sentiments in Spanish.
For this card I used my new Memento Luxe inks {love them}, the banners were created with few scraps pieces I had on my desk.


Submitting this card to:

Hope you like it!!
Have a fantastic day!

Tuesday, August 27

More Christmas in August ;)

Hello friends!! I am still working on more Christmas projects!! Hope you like it! The Christmas Card Paper Collection is great if you don't have time to stamp or color, just cut out the pieces and put them together ;) Simple and easy.

Instructions:
  • Make card base from Burgundy Cardstock. 6" square
  • Mat a piece of Pink Textured Cardstock and Christmas Card paper Collection, add stitches.
  • Die-cut  Decorative Stem 4 times from Pink cardstock, add it to card front., add White lace tape around panel.
  • Cut  Nativity image from Christmas card paper collection and mat it with a piece of Burgundy cardstock, add stitches and add it to card panel.
  • Stamp sentiment on White Cardstock in Jet Black Archival Ink, die-cut and emboss and add it to card.
  • Add pearls to left corner of image.


Heartfelt Creations and store products used:
  • HCPC 3556 Christmas Song PreCut Set
  • HCDP1 236 Christmas Card paper Collection.
  • HCD 738 Ornamental Add On
  • Grand Calibur
  • Oval Nestabilities

Other Products:
  • Cardstock: Burgundy and Pink Textured (Bazzill), White (GKD)
  • Ink: Jet Black Archival (Ranger)
  • Accessories: Pearls, Dimensionals (SU), White Lace Tape (Love My Tapes), Sewing machine
 
All the products in blue can be found at the Heartfelt Creations Store
 
Hope you like it!
Have a fantastic day!

Monday, August 26

You're one in a Million

Hello friends!! Today I have a very pink-y card for you. For my card I used "One in a Million" sentiment and Large Stitched Flower image from Great Impressions Stamps.
Instructions:
  • Make a card base from White cardstock. A2 size.
  • Stamp flower on a scrap piece to use as a masking piece.
  • Cut a piece of White cardstock, stamp flower, covered it and stamp the other 3, always masking.
  • Color flowers with Markers (I used Spectrum Noir Markers), then mat this piece with a slightly bigger piece of Pink cardstock, add stitches.
  • Tie on twine and make a bow.
  • Stamp sentiment on white cardstock in Memento Luxe Love Letter Ink, add clear embossing powder and heat set.
  • Add piece to card with dimensionals and add 2 little pearls.
  • Add Clear Lacquer to 1 flower and sprinkle glitter. Set aside and let air dry for at least 1 hour.


Hope you like it!
Have a great day!

Thursday, August 22

Blessings to Ewe

Hello my friends! Happy Thursday to all of you. I created a very cute card for you today using the brand new set "Prim Blessings" by Sweet 'n Sassy Stamps.

I used a variety of dies to create this cute scene, the patterned papers are old ones from Pink Paislee. The sheep was stamped x3 on watercolor paper in Jet Black Archival Ink and colored with Inktense Pencils. The clouds were stamped in Memento Summer Sky Ink. I added stitches and twine.


Here are the Sweet 'n Sassy Products used:

Hope you like it!
Have a fantastic day!

Tuesday, August 20

Merry Christmas

Hello friends!! I have a pretty card using my new stamps (just released) from Heartfelt Creations!

Instructions:
  • Make card base from Ivory Cardstock. 5.5" square.
  • Cut a panel from Burgundy Cardstock (5" square) and mat it with a piece of Christmas Card Paper Collection, Cut a strip from the paper collection with Merry Christmas, mat it with a piece of Pink cardstock and add straight stitches. Add panel to card base.
  • Stamp image onto watercolor paper in Coffee Archival Ink, color image with Inktense Pencils. Die-cut, emboss and stencil piece with Circle Nestabilities.
  • Stamp the small leaves on White cardstock in Memento Tuxedo Black ink, color them with Distress Inks (sponging) and die-cut them with coordinated dies.
  • Add Image to card, add leaves. Add little dots of Ruby  Liquid Pearls.
  • Create a bow and add to card.


Heartfelt Creations and Store Products Used:
  • HCPC 3551 Holly Berry PreCut Set
  • HCPC 3556 Christmas Song PreCut Set.
  • HCDP1 236 Christmas Card Paper Collection
  • HCD 738 Ornamental Add On Die
  • Circle Nestabilities
  • Grand Calibur

Other Products:
  • Cardstock: Ivory, White (GKD), Pink Textured, Burgundy (Bazzill), Watercolor Paper (Strathmore)
  • Ink: Coffee Archival, Peeled Paint Distress, Forest Moss Distress (Ranger), Memento Tuxedo Black (Tsukineko)
  • Accessories: Burgundy Ribbon (May Arts), Ruby Liquid Pearls (Ranger), Sewing machine, DImensionals, Inktense Pencils (Derwent)


All the products in blue can be found at the Heartfelt Creations Store

Hope you like it!
Have a fantastic day!

Monday, August 19

Happy Moments

Hello friends!! Today I have a very sweet card for you today. I used this cute "Giraffes" image from Great Impressions. I think this card can be used for Mother's Day, Baby Announcements, I love you, etc.

Instructions:
  • Create a card base from White Cardstock. 5" square.
  • Mat a piece of Brown Cardstock and Patterned Paper (Wanted from Cosmo Cricket), add stitches and adhere it to card front.
  • Stamp giraffe image on White Cardstock in memento Rich Cocoa, color image with markers (Copics). Die-cut, emboss and stencil image with Circle Nestabilities.
  • Mat image with a scallop circle in Brown color.
  • Die-cut banner, stamp sentiment from Sweet Happy Moments, add banner to card with dimensionals.
  • Add a couple of buttons.


I am submitting this card to:
  1. Simon Says Stamp Challenge: Monochromatic
  2. Sketch Saturday
Hope you like it!
Have a fantastic day!

Friday, August 16

She is Unique "Mix Media Canvas"

Hello friends!! Hope you are having a great day!! I feel like I haven't blogged in long time, I love to pre-scheduled my posts, especially during release time, sometimes I do the last minute work, but most of the time I have projects done in advance. Anyway, last week my daughter got the stomach flu, I thought she got food poisoning, few days later I got sick, oh boy! Thanks goodness, my husband didn't get sick.

Ok, enough of this. I want to share with you a mix media canvas I made for the "Dare to get Dirty" challenge. I am getting in love with mix media now, it is so much fun, I just follow my heart and create. Don't be afraid to try it.

This is a 6"x8" canvas. The image is Angie Girl by Unity Stamps. I stamped the image on Watercolor paper and colored it with Inktense Pencils, then cut them out. After that I cut out the sun, house and grass from scraps! (save your scraps, they came handy here!!) The sentiment was stamped on Patterned Paper and cut in almost single words.
The background: I started applying gesso to my canvas, then added pieces of PP and Mod Podge, added acrylic paint (blue and green), then I sprayed Taxi Mister Huey's. I added some stamped dots using Grunge Borders from Sweet 'n Sassy Stamps in Sepia Archival Ink. Then added the images and cut out pieces and added lines with a black marker.


Hope you like it!!
Have a great day!

Wednesday, August 14

SNSS August Blog Hop Day 5‏: His Peace & Calms His Child

Welcome to day 5 of our August feature Blog Hops!  Today we're featuring two great sets in a new series of large inspirational sentiments.


Augusthispeace
AugustSNS-13-041HisPeace
 
  • Stamp set includes 1 sentiment
  • Set measures approximately 3" x 4"
  • Stamp measures approximately 2 1/2" x 3 3/8"
  • Designed by Korin Sutherland
  • Priced at $9

This card is pretty CAS, I really wanted to make a green and pink card for some reason, LOL. The saying was stamped in  Memento Luxe Love Letter, added clear embossing powder and heat set. Die-cut, embossed and stenciled the saying with wonky rectangle dies, I added the piece to a stitched panel, added the little bow and clear rhinestones.

 
================================================
Augustcalmshischild
 
 
AugustSNS-13-039CalmsHisChild
 
  • Stamp set includes 1 sentiment
  • Set measures approximately 3" x 4"
  • Stamp measures approximately 2 1/2" x 3 3/8"
  • Designed by Korin Sutherland
  • Priced at $9
Another CAS card, For this I stamped the saying in Jet Black Archival Ink, the BG silhouette is from God Is set, stamped in Tea Dye Distress Ink, added two different ribbons and a teal button


Check out some of the fabulous samples made by our talented DT in the thumbnails below.

Be sure to leave a comment of each of the blogs along your journey because
we're giving both of these sets away to one lucky winner!  

The deadline to comment for a chance to win is midnight EST Friday, August 16th.  The list of winners will be announced on our website homepage by Monday, August 19th.

Thanks so much for joining us!  Enjoy the hop!

Tuesday, August 13

Heartfelt Creations August Release "Christmas Card Collection"

We are pleased to present the Christmas Card Collection. The Christmas Card paper pad has 76 card fronts that will enable you to create quick and easy Christmas cards that are embellished or simple- you pick! This paper pack is a fantastic solution for getting the most beautiful cards for the least amount of time. If you don’t need one side, flip it over and use the other side! The coloring is done for you. There are many panels for utmost variety and the best  selection. The stamps and dies released with this collection are absolutely festive and ornamental. The gorgeous type and frames will help you create the most beautiful Christmas project your friends have ever seen!


This is the project I created with this collection, a "Gif Bag"

Directions:
  • Cut a panel from Christmas Card paper Collection to cover front of paper bag.
  • Stamp berries on White Cardstock in Green Ink, die-cut with coordinated dies. Ink all edges with Moss Green Metallic Paint.
  • Stamp circle border on Cranberry Tart Cardstock in Versamark ink, add gold embossing powder and heat set. Die-cut piece to create a circle frame.
  • Stamp saying on Ivory Cardstock in Versamark Ink, add gold embossing powder and heat set, die-cut piece with larder circle nestabilities to match frame.
  • Cut a banner from velvet ribbon and patterned paper, adhere it to bag. Die-cut ornament in gold cardstock and adhere it to bag. Add circle frame, buttons, holly berries and dew drops.
  • Create a ribbon with twine and add it to frame.


Heartfelt Creations Products:
  • HCDP1 236 Christmas Card Paper Collection
  • HCD 738 Ornamental Add On Die
  • HCPC 3551 Holly Berry PreCut Set
  • HCPC 3554 Love at Christmas PreCut Set
  • Circle Nestabilities
  • Grand Calibur
  • Poinsettia Dewdrops
  • Moss Green Metallic 3D Paint

Other Products:
  • Cardstock: Ivory, White, Cranberry Tart, Good as Gold (GKD)
  • Accessories: White Paper Bag (Michaels), Gold embossing powder, Embossing heat tool, Jute twine, Velvet Ribbon, Dimensionals, Red buttons

Leave a comment on the Heartfelt Creations blog by August 20th to be eligible to win the entire collection.


All the products in blue can be found at the Heartfelt Creations Store
Hope you like it!
Have a great day!

SNSS August Blog Hop Day 4‏: His Child

Welcome to day 4 of our August feature Blog Hops!  Today we're featuring Dina's wonderful companion set to His Child called God Is.

Augustgodis
 
AugustSNS-13-050GodIs
 
  • Stamp set includes 3 images and 5 sentiments
  • Set measures approximately 4" x 6"
  • The drummer boy image measures approximately 1 1/2" x 2 1/2"
  • Designed by Dina Kowal
  • Priced at $15
These are the projects I created with this new set.
For this card I stamped the image in the new Memento Luxe Teal Zeal, added clear embossing powder and heat set. The sentiment was stamped in Memento Bahama Blue. Then I die-cut, embossed and stenciled the image with Label 8 Nestabilities. Added a couple of Silver dots to the image.
The Kraft BG was stamped using Grunge Borders, the dots were stamped in Vintage Photo Distress and the chevron ones in Tea Dye Distress. I die-cut ric rac in 3 colors and added them to card.


For this card I stamped the image in Memento Luxe Tuxedo Black, added clear embossing powder and heat set. The sentiment was stamped in Olive Archival Ink, then I die-cut, embossed and stencil the image. I die-cut a couple of grass pieces, added black/white twine and a blue button. Very simple ;)

Check out some of the fabulous samples made by our talented DT in the thumbnails below.

Be sure to leave a comment of each of the blogs along your journey because
we're giving this set away to one lucky winner!  

The deadline to comment for a chance to win is midnight EST Friday, August 16th.  The list of winners will be announced on our website homepage by Monday, August 19th.

Thanks so much for joining us!  Enjoy the hop!

Monday, August 12

Harvest Wagon

Hello friends! After all the Christmas in July, I think now it would be fun to show some Fall cards and projects, Thanksgiving is going to be here in no time, so I closed my eyes and thought about the beautiful month of November (my birthday too, LOL).

I think this "Harvest Wagon" image is very pretty!! It can be used in lots of different ways :) My card is very simple. I stamped the image on White cardstock in Memento Tuxedo  black and colored it with Markers (Copics and Spectrum Noir)/ Then I die-cut, emboss and stencil it with Label 8 Nestabilities, sponged around with Distress inks. I created my card base with 2 pieces of Orange Cardstock die-cut and emboss with Decorative Labels 8 Nestabilities. Finally I added a piece of ribbon and a button.


Hope you like it!!
Have a fantastic day!!

SNSS August Blog Hop Day 3: ‏Decorative Frames

Welcome to day 3 of our August feature Blog Hops!  Today we're featuring a wonderful new set, Decorative Frames, that coordinates with one of our existing die sets, Decorative Plaques....a perfect match!


Augustdecorativeframes
 
AugustSNS-13-048DecorativeFrames

  • Stamp set includes 8 images and 12 sentiments
  • Set measures approximately 6" x 8"
  • The top left image measures approximately 2 3/8" x 2 5/8"
  • Designed by Korin Sutherland
  • Priced at $26
  • Coordinates with Decorative Plaque Dies
AugustSNSD-14DecorativePlaques
 
This is the project I created: For my card I die-cut a frame in Black Cardstock, stamped the frame and sentiment in memento Luxe Wedding Dress. Added few leaves left from another project and inked all the edges with the same ink, as well as the roses. I added scored lines to the right and bottom, I added few scraps as banners to give it more color :) 


Check out some of the fabulous samples made by our talented DT in the thumbnails below.

Be sure to leave a comment of each of the blogs along your journey because
we're giving this stamp set away to one lucky winner!  

The deadline to comment for a chance to win is midnight EST Friday, August 16th.  The list of winners will be announced on our website homepage by Monday, August 19th.

Thanks so much for joining us!  Enjoy the hop!

Sunday, August 11

SNSS August Blog Hop Day 2‏: Prim Blessings

Welcome to day 2 of our August feature Blog Hops!  Today we're featuring Diane's precious new set, Prim Blessings.

Augustprimblessings
 
AugustSNS-13-049PrimBlessings

  • Stamp set includes 7 images and 5 sentiments
  • Set measures approximately 4" x 6"
  • The large sunflower image measures approximately 2 1/4"
  • Designed by Diane Zechman
  • Priced at $15

  • These are the projects I created:

    I think these birds are adorable!! I stamped the image on Watercolor Paper in Jet Black Archival, color them with Inktense Pencils. The sentiment was stamped in Golden Glitz (Tsukineko), then I used the oval die from the Decorative Plaques Collection and paper pierced. Then, I stamped the hearts on a piece of White Cardstock in Memento Luxe Tuxedo Black, added clear embossing powder and heat set, colored with Red Copics, added Crystal Lacquer and glitter. Die-cut a border lace and added to panel after adding stitches.
    I die-cut a medium heart, covered it with Crystal Lacquer and added glitter and a paper flower.


    For this card I used the Deconstructed Sketch. the sunflowers were stamped on Watercolor Paper in Jet Black Archival, colored them with Inktense Pencils. I used a piece of 1/2" scor-tape to add the criss cross lines, a lot easier than using glue.


    Check out some of the fabulous samples made by our talented DT in the thumbnails below.

    Be sure to leave a comment of each of the blogs along your journey because
    we're giving this set away to one lucky winner!  

    The deadline to comment for a chance to win is midnight EST Friday, August 16th.  The list of winners will be announced on our website homepage by Monday, August 19th.

    Thanks so much for joining us!  Enjoy the hop!


    Saturday, August 10

    SNSS August Blog Hop Day 1‏: Bookmark Bit & Pieces + Bookmarks & More Dies

    Welcome to day 1 of our August feature Blog Hops!  Today we're featuring a fun new set with matching dies...

    Augustbookmarkbitsandpieces
     

    AugustSNS-13-046BookmarkBits&Pieces2

    • Stamp set includes 11 images and 5 sentiments
    • Set measures approximately 8" x 6"
    • The owl image measures approximately 1 3/4" x 1 5/8"
    • Designed by Korin Sutherland
    • Priced at $26
      AugustBookmarksandmore
    • Set of 7 dies
    • Bookmarks measure approximately 2" x 6"
    • Designed by Korin Sutherland
    • Priced at $32.75
    • You can get the bundle for only $53.00

    These are the bookmarks I created :) I have more. but I thought 3 for now would be good!! The left one is super easy!! Just stamped the saying onto an ivory bookmark, added few flowers in pink and ink all edges.
    The center one is more masculine, just added StarDust Stickles to the map and orange and yellow twine.
    The last one is my favorite. I stamped the mushroom on a piece of paper, cut it out and used it to mask, colored them with markers (Copics and Sprectrum Noir) I created a BG with the smallest die cloud and then stamped the saying.

    gioss309
    Check out some of the fabulous samples made by our talented DT in the thumbnails below.

    Be sure to leave a comment of each of the blogs along your journey because
    we're giving this fabulous bundle away to one lucky winner!  

    The deadline to comment for a chance to win is midnight EST Friday, August 16th.  The list of winners will be announced on our website homepage by Monday, August 19th.

    Thanks so much for joining us!  Enjoy the hop!


    Hope you like them!!

    Tuesday, August 6

    So grateful for you!!

    Hello friends!! I am here with a very Clean and Simple card for you! Believe it or not, this kind are the hardest for me to do, so I wanted a OLC "One Layer Card" with this beautiful image, so this is what I created.

    So grateful for you

    Instructions:
    • Make card base from White Cardstock. A2 size
    • Stamp Dahlia in Love Letter Ink, add clear embossing powder and heat set.
    • Stamp sentiment in Jet Black Ink.
    • Tie on ribbon, add button and hemp


    Heartfelt Creations Products & Products Carried by HC:
    • HCPC 3549 - Blooming Dahlia PreCut Set
    • HCPC 3520 - Botanical Oval PreCut  Set

    Other products:
    • Cardstock: White (GKD)
    • Ink: Memento Luxe Love Letter (Tsukineko), Jet Black Archival (Ranger)
    • Accessories: Green Ribbon (May Arts), Red Button, Hemp twine (Darice), Clear embossing powder, Embossing heat tool.

    All the products in blue can be found at the Heartfelt Creations Store
     
    Hope you like it!
    Have a great day!

    Monday, August 5

    Princess Castle

    Hello friends!! Today I have a very cute and girl-y card. My daughter is 9 years old and for as long as I remember the only color she "loved" was PINK!! Recently, she has changed it for "turquoise" because is a "cool color" LOL.
    Anyway, when we moved into our new house, she was only 3 and wanted her bedroom "PINK", we got the paint and goodness, the pink was so bright, it could bright the entire hall with no light on! She was in her own "Princess Castle" as she used to call it.

    When I saw this image and sentiment I knew I had to get it, she loves it (still likes pink I think) and even made a couple of cards for her friends :) She is a real cardmaker too.
    Anyway, I used Princess Castle and Princess Sentiment for my card.

    Instructions:
    • Make card base from Pink Cardstock.
    • Stamp image and sentiment in Versamark Ink, add gold embossing powder and heat set. Mat image with a pink CS panel and Patterned Paper, add stitches and adhere it to card front.
    • Stamp Castle image on White Cardstock (x3), color it with markers and cut out little pieces to create the 3D effect.
    • Add pieces to main image.
    • Add a small bow.
    • Add little pearls to corner.


    Submitting this card to:


    Hope you like it!!
    Have a fantastic day!!

    Sunday, August 4

    Great Impressions August Challenge!!

    Hello friends!! It's time to announce the theme for Great Impressions August Challenge! This month is a very easy one "Square Cards"

    This is what I created using Baby Boy Sneakers Stamps, I did a 3D image again! This images are so cute and great for 3D {wink, wink}
    The image was colored with Copic markers, then cut out pieces from extra colored images. Die-cut, emboss and stencil main image with Square Nestabilities, then added the extra pieces to create the 3D effect.
    The papers used are from Graphic 45, I love this paper so much I use it only in special occasions, LOL. Added few tiny buttons, ribbon and stitches.


    Hope you like it and can play along too!!
    Have a great Sunday!

    Thursday, August 1

    Oh la la!!

    Hello friends!! Hope your day is going well, I have a friend coming over for coffee this morning, we had a good chat while our girls played together.

    Anyway, today we are starting a new month, I can't believe it is August already! Pretty soon, we are going to be talking about Thanksgiving and Christmas (my favorite holidays!!)
    Today I have a very chic card with a little bit of French style!!  using Latina Crafter Stamps, this set is called "Oh la la" and comes with beautiful sentiments. I also used the sketch for this month.


    Directions:
    • Make card base from Ivory Cardstock. A2 size.
    • Cut  a piece of Patterned Paper, ink all edges and adhere to card front. Add a strip of coordinated Patterned Paper and a border lace.
    • Die-cut a piece of Watercolor Paper, mist it with yellow and red spray mist, set to dry, then Stamp image in Coffee Archival Ink.
    • Add image to card with Dimensionals.
    • Stamp sentiment on Watercolor Paper in Jet Black Archival. Add faux stitches with marker. Adhere it under main image.
    • Add die cut leaf and flower ribbon.

    Submitting this card to:
    Hope you like it!
    Have a great day!